In my house I have a pair of doors that I would like to leave open for good airflow, however I own a cat. Both rooms have things I don’t want the cat messing with. This started a very simple project that served as a lesson in iterations.
I had a simple idea “just need something to hold the door a couple inches open” So in stead of really planning it out, i rushed off took measurements of the door, and the door frame and figured I’ll just wing it, and so armed with these measurements I fired up Fusion 360 and tossed together the first version of this device, and sent it to the 3D printer.
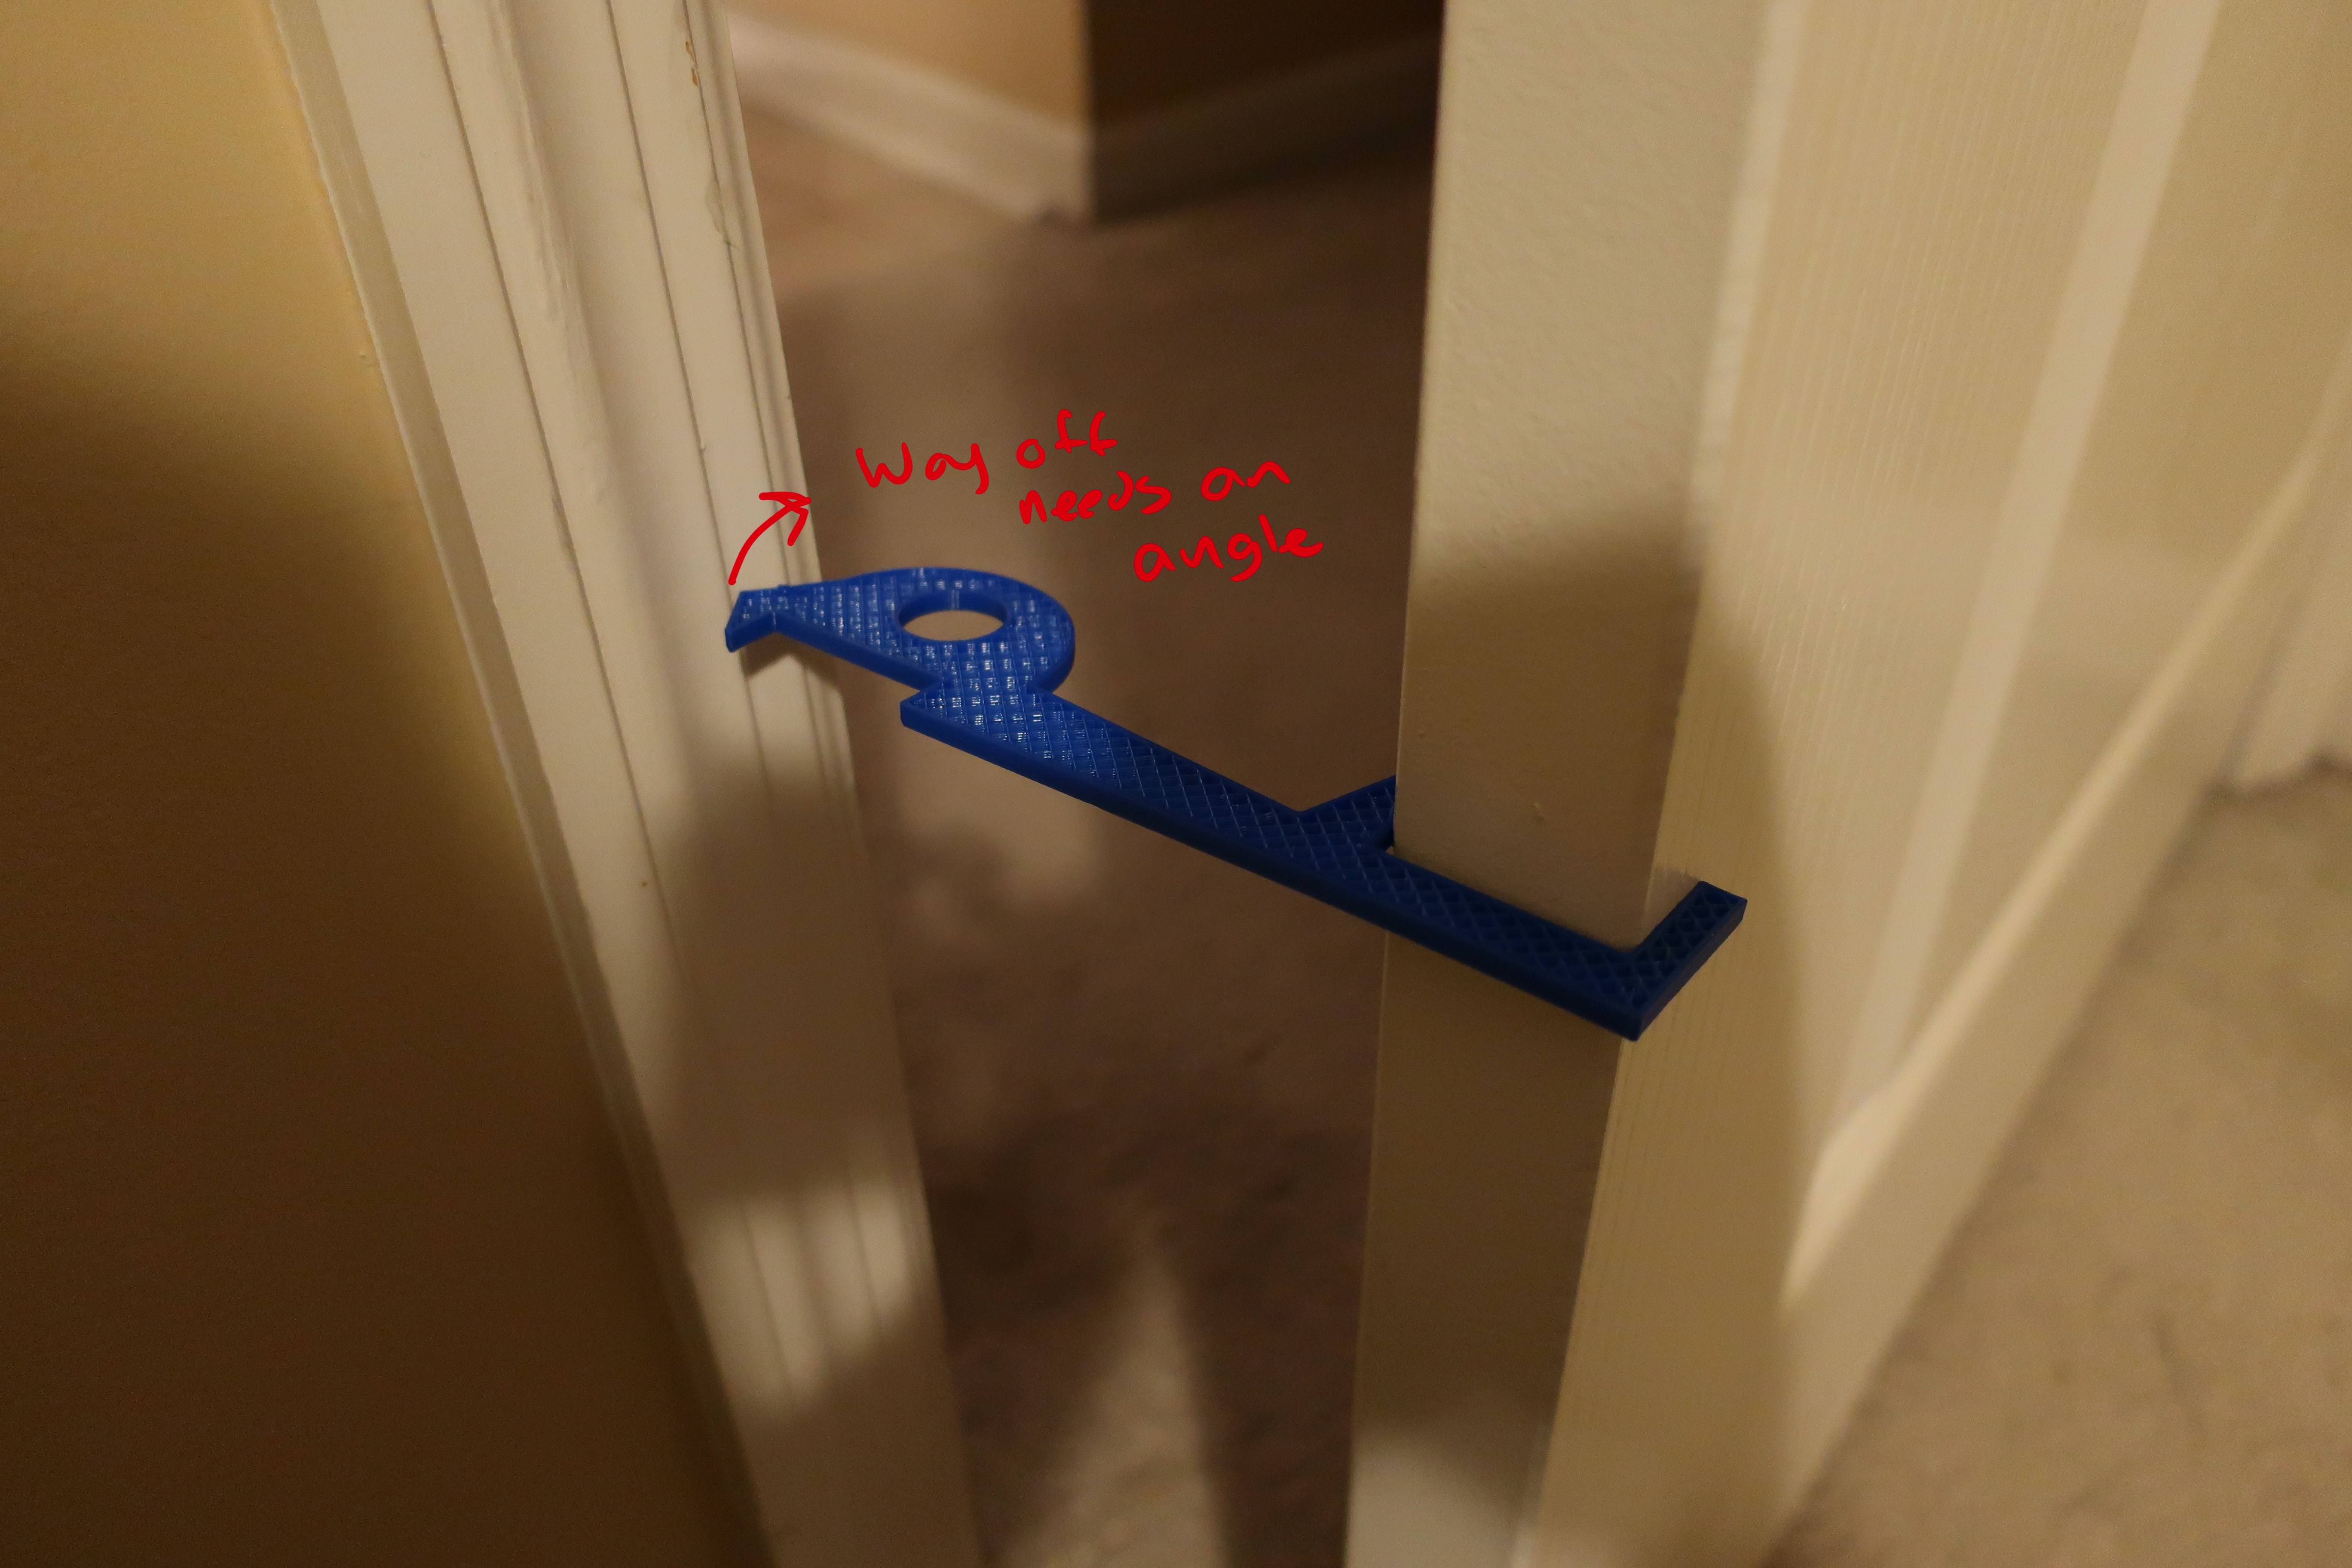
Rather sure that i wasn’t going to nail this first time out I stopped the print about a quarter of the way though no reason to use filament for a rough draft. The first one I had the measurements right but it didn’t take into regard the fact that once you open the door those two faces(door and door frame) are no longer parallel so it actually didn’t even come close to working. It hit squarely on the outside of the door frame.
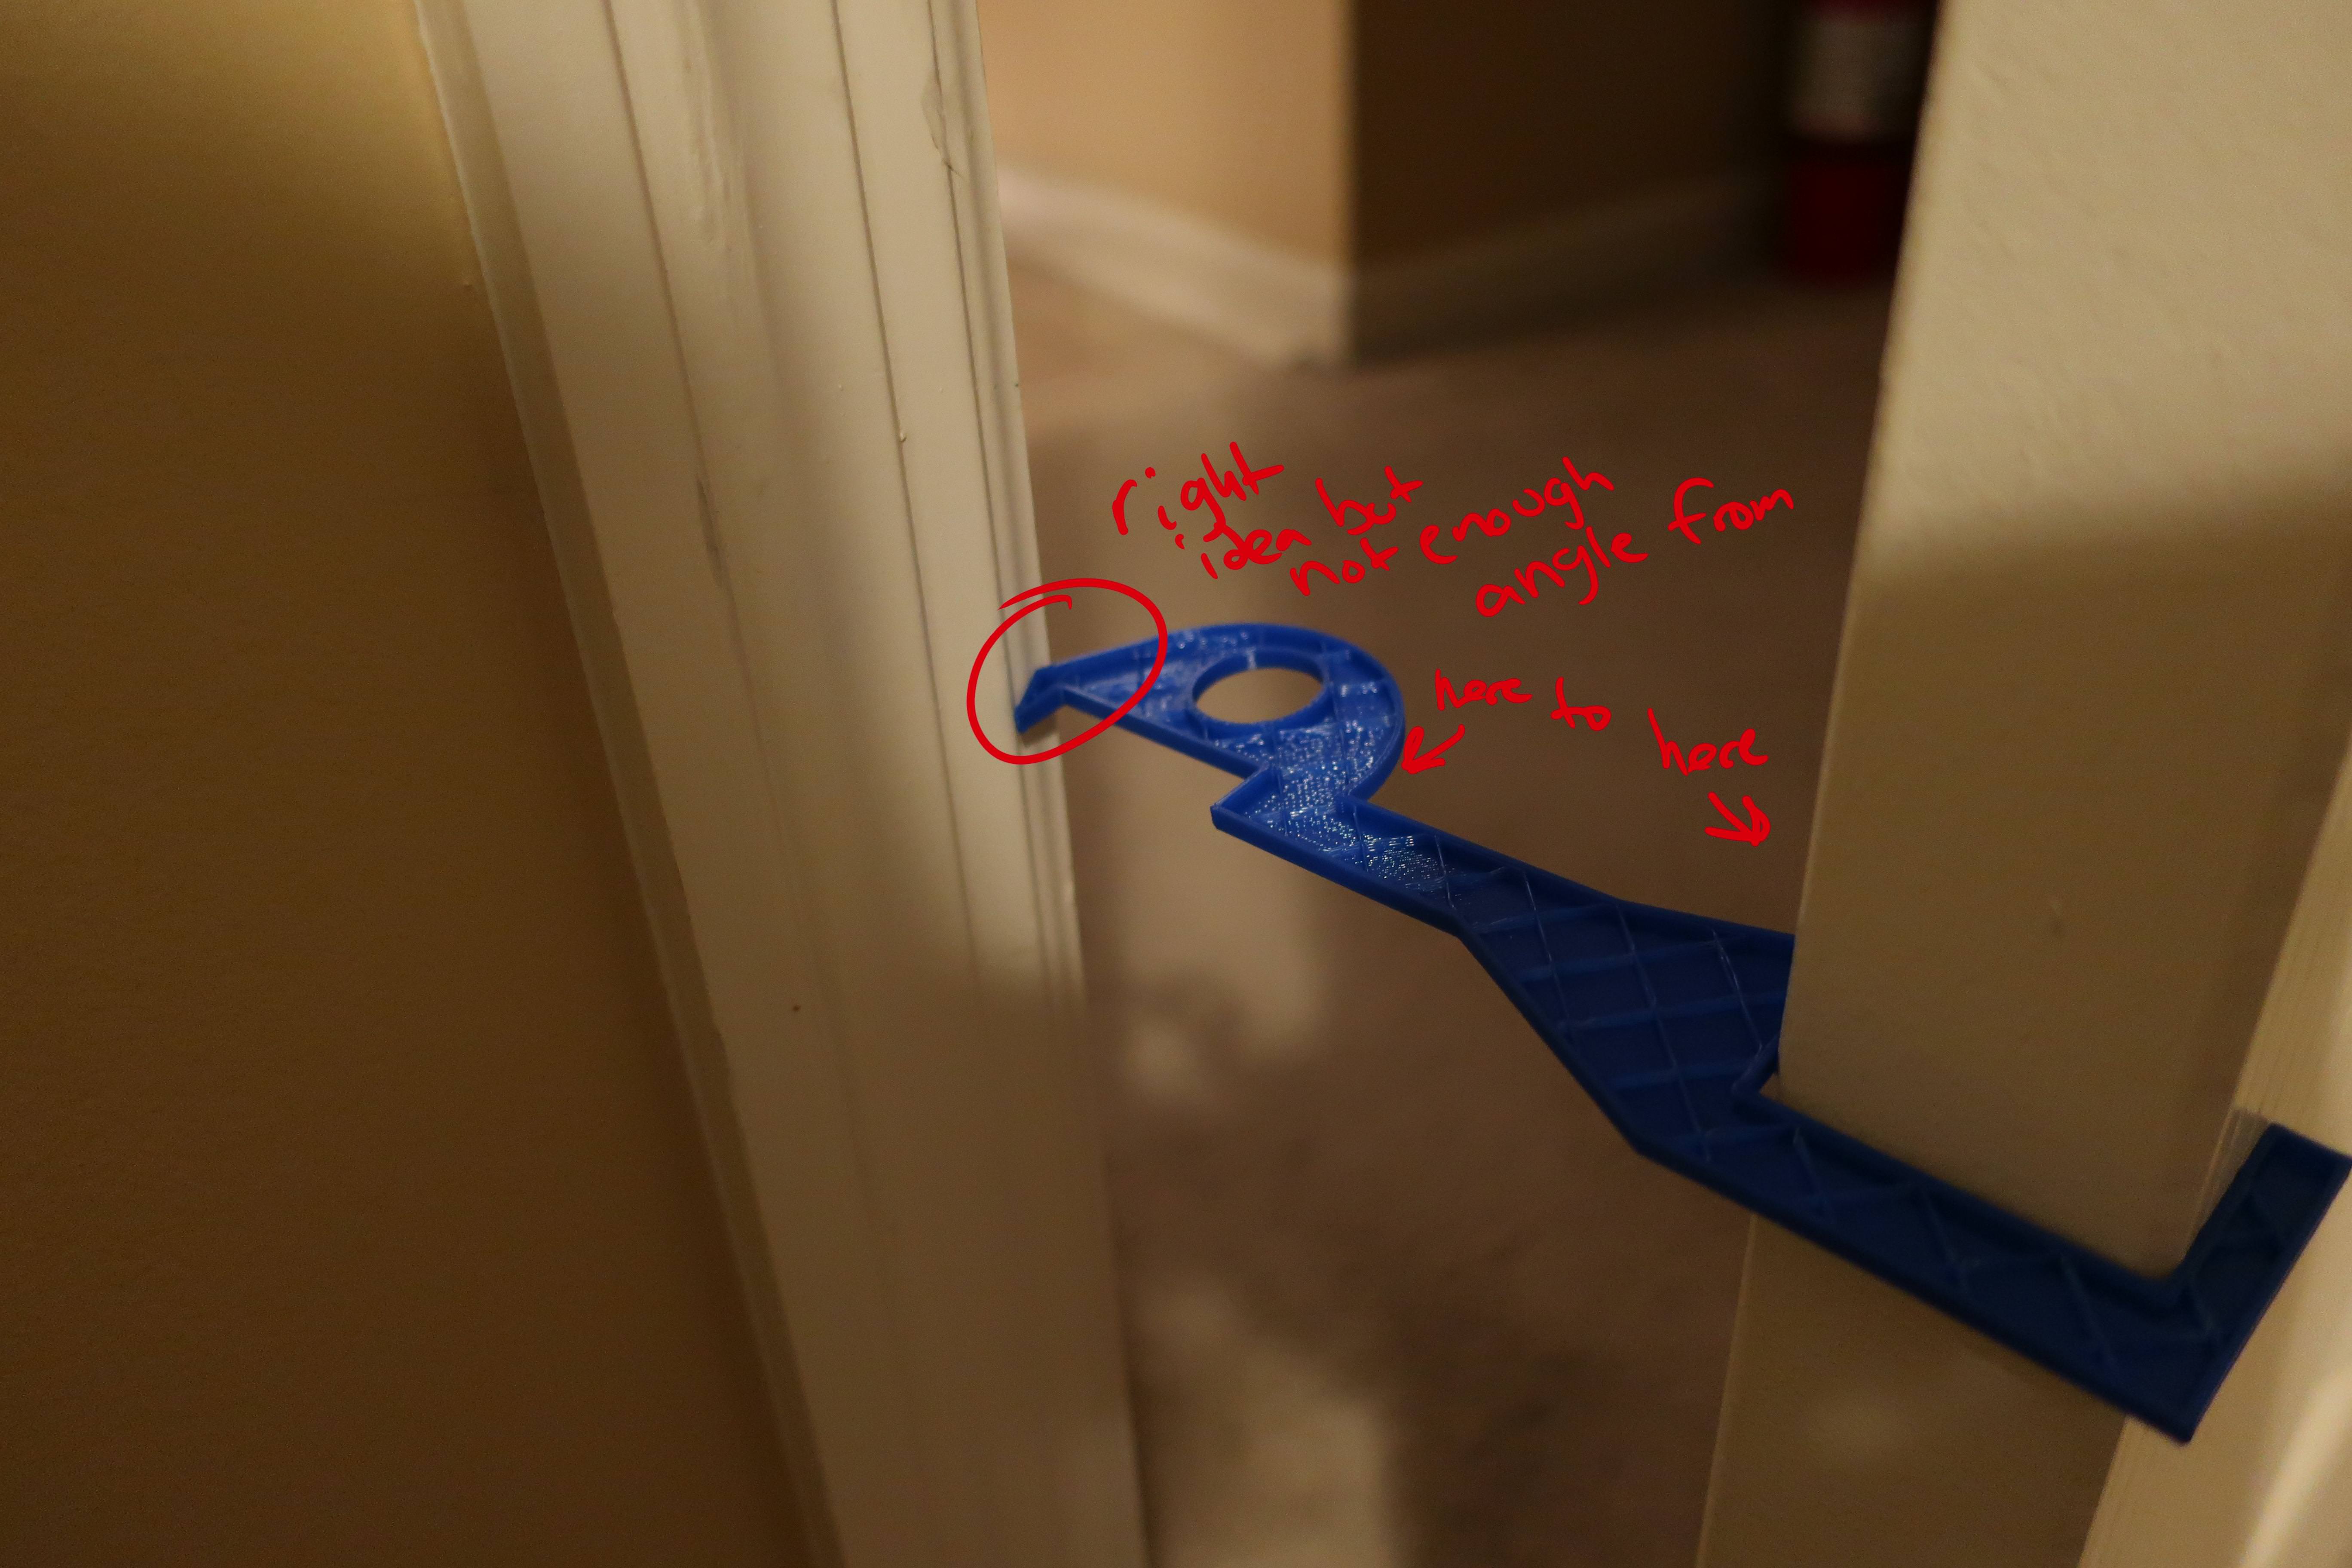
On to number two, I eye balled it still very sure this was going to be a quick fix and I didn’t need to waste time planning this out it’s a glorified doorstop nothing complicated what else could I possibly be overlooking? So I tossed a good bit of offset in there again just winged a guess. Still not enough offset.
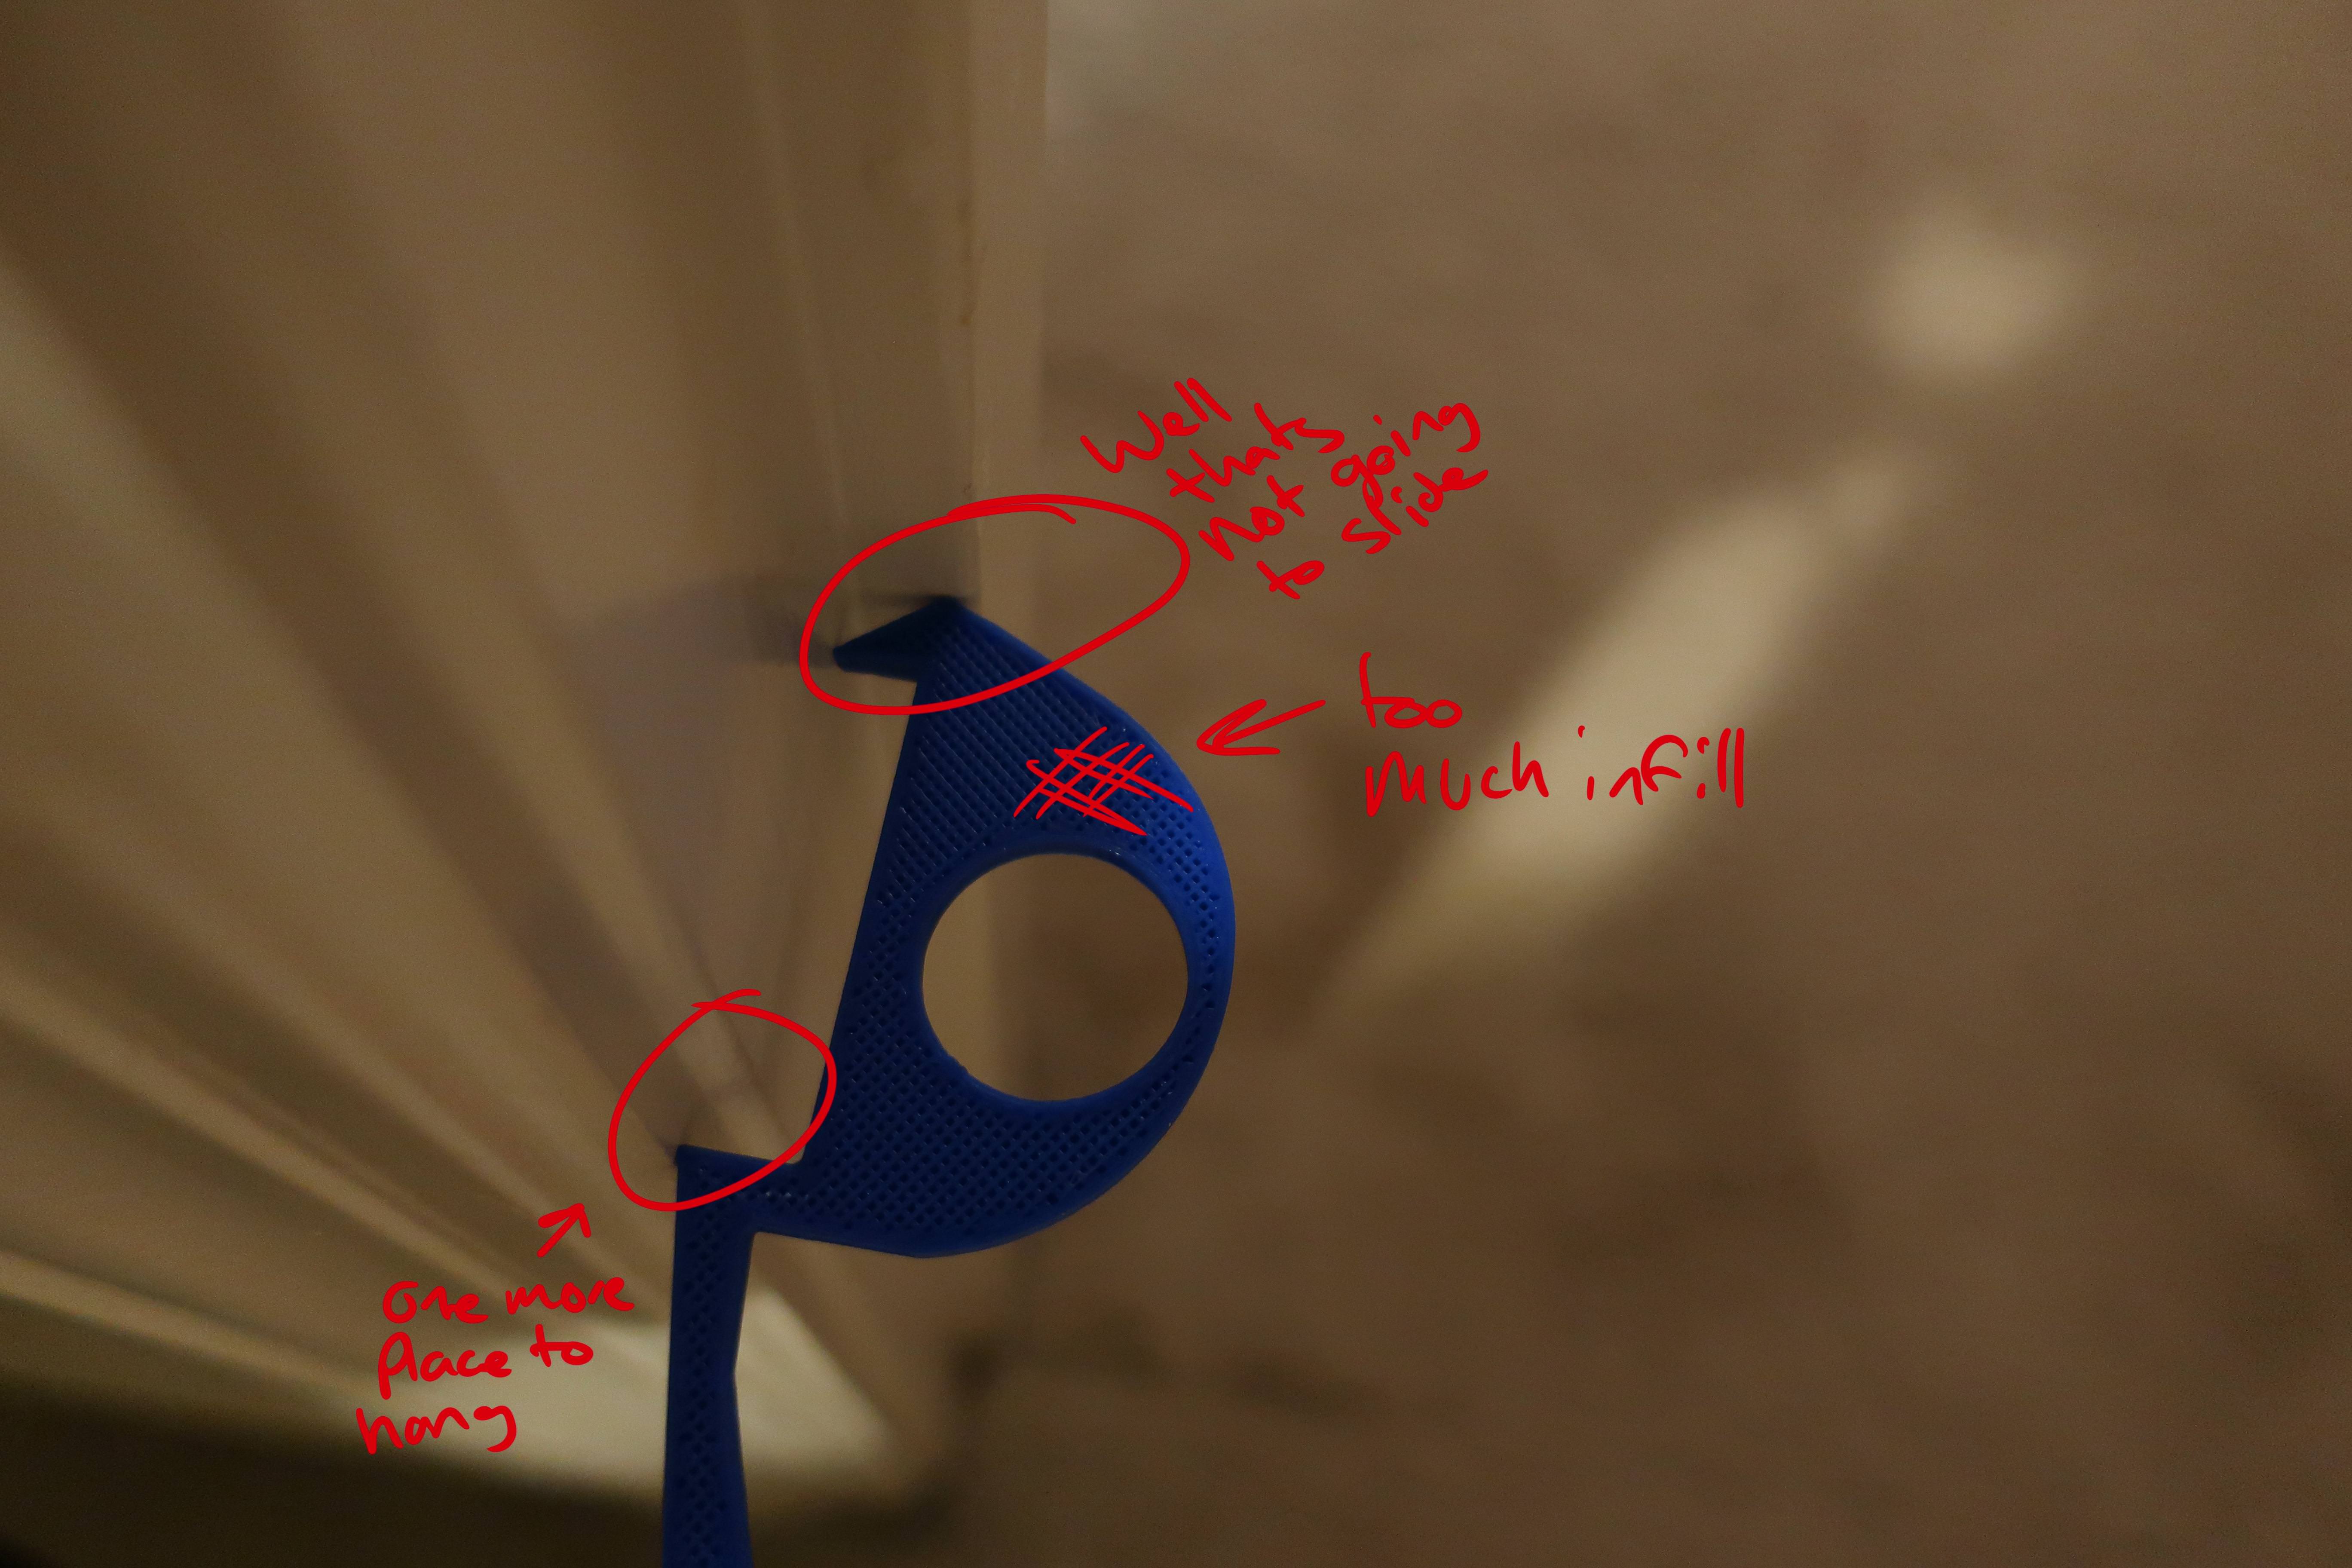
Not to be beat by a door I went back and modified it yet again, try three. This was closer to what I was looking for, but I mistakenly had it’s 3d print infill too high so it took a good deal longer to get far enough though to stop and test. Still not fitting great but getting there, the front angled face that engages with the door frame is not right, and the eyelet to open it is too small.
Try four, getting there the angle between the door and door frame is still not right but we’re certainly well on our way.
Fifth try, starting to wonder if the airflow and or cat is worth this kind of time and effort. It prints and give it a shot, well the angle still isn’t right so I tweak the angle a bit more.
Decide this is close enough to print a full one. So try six and sure this has to be it, so I print the full thing.
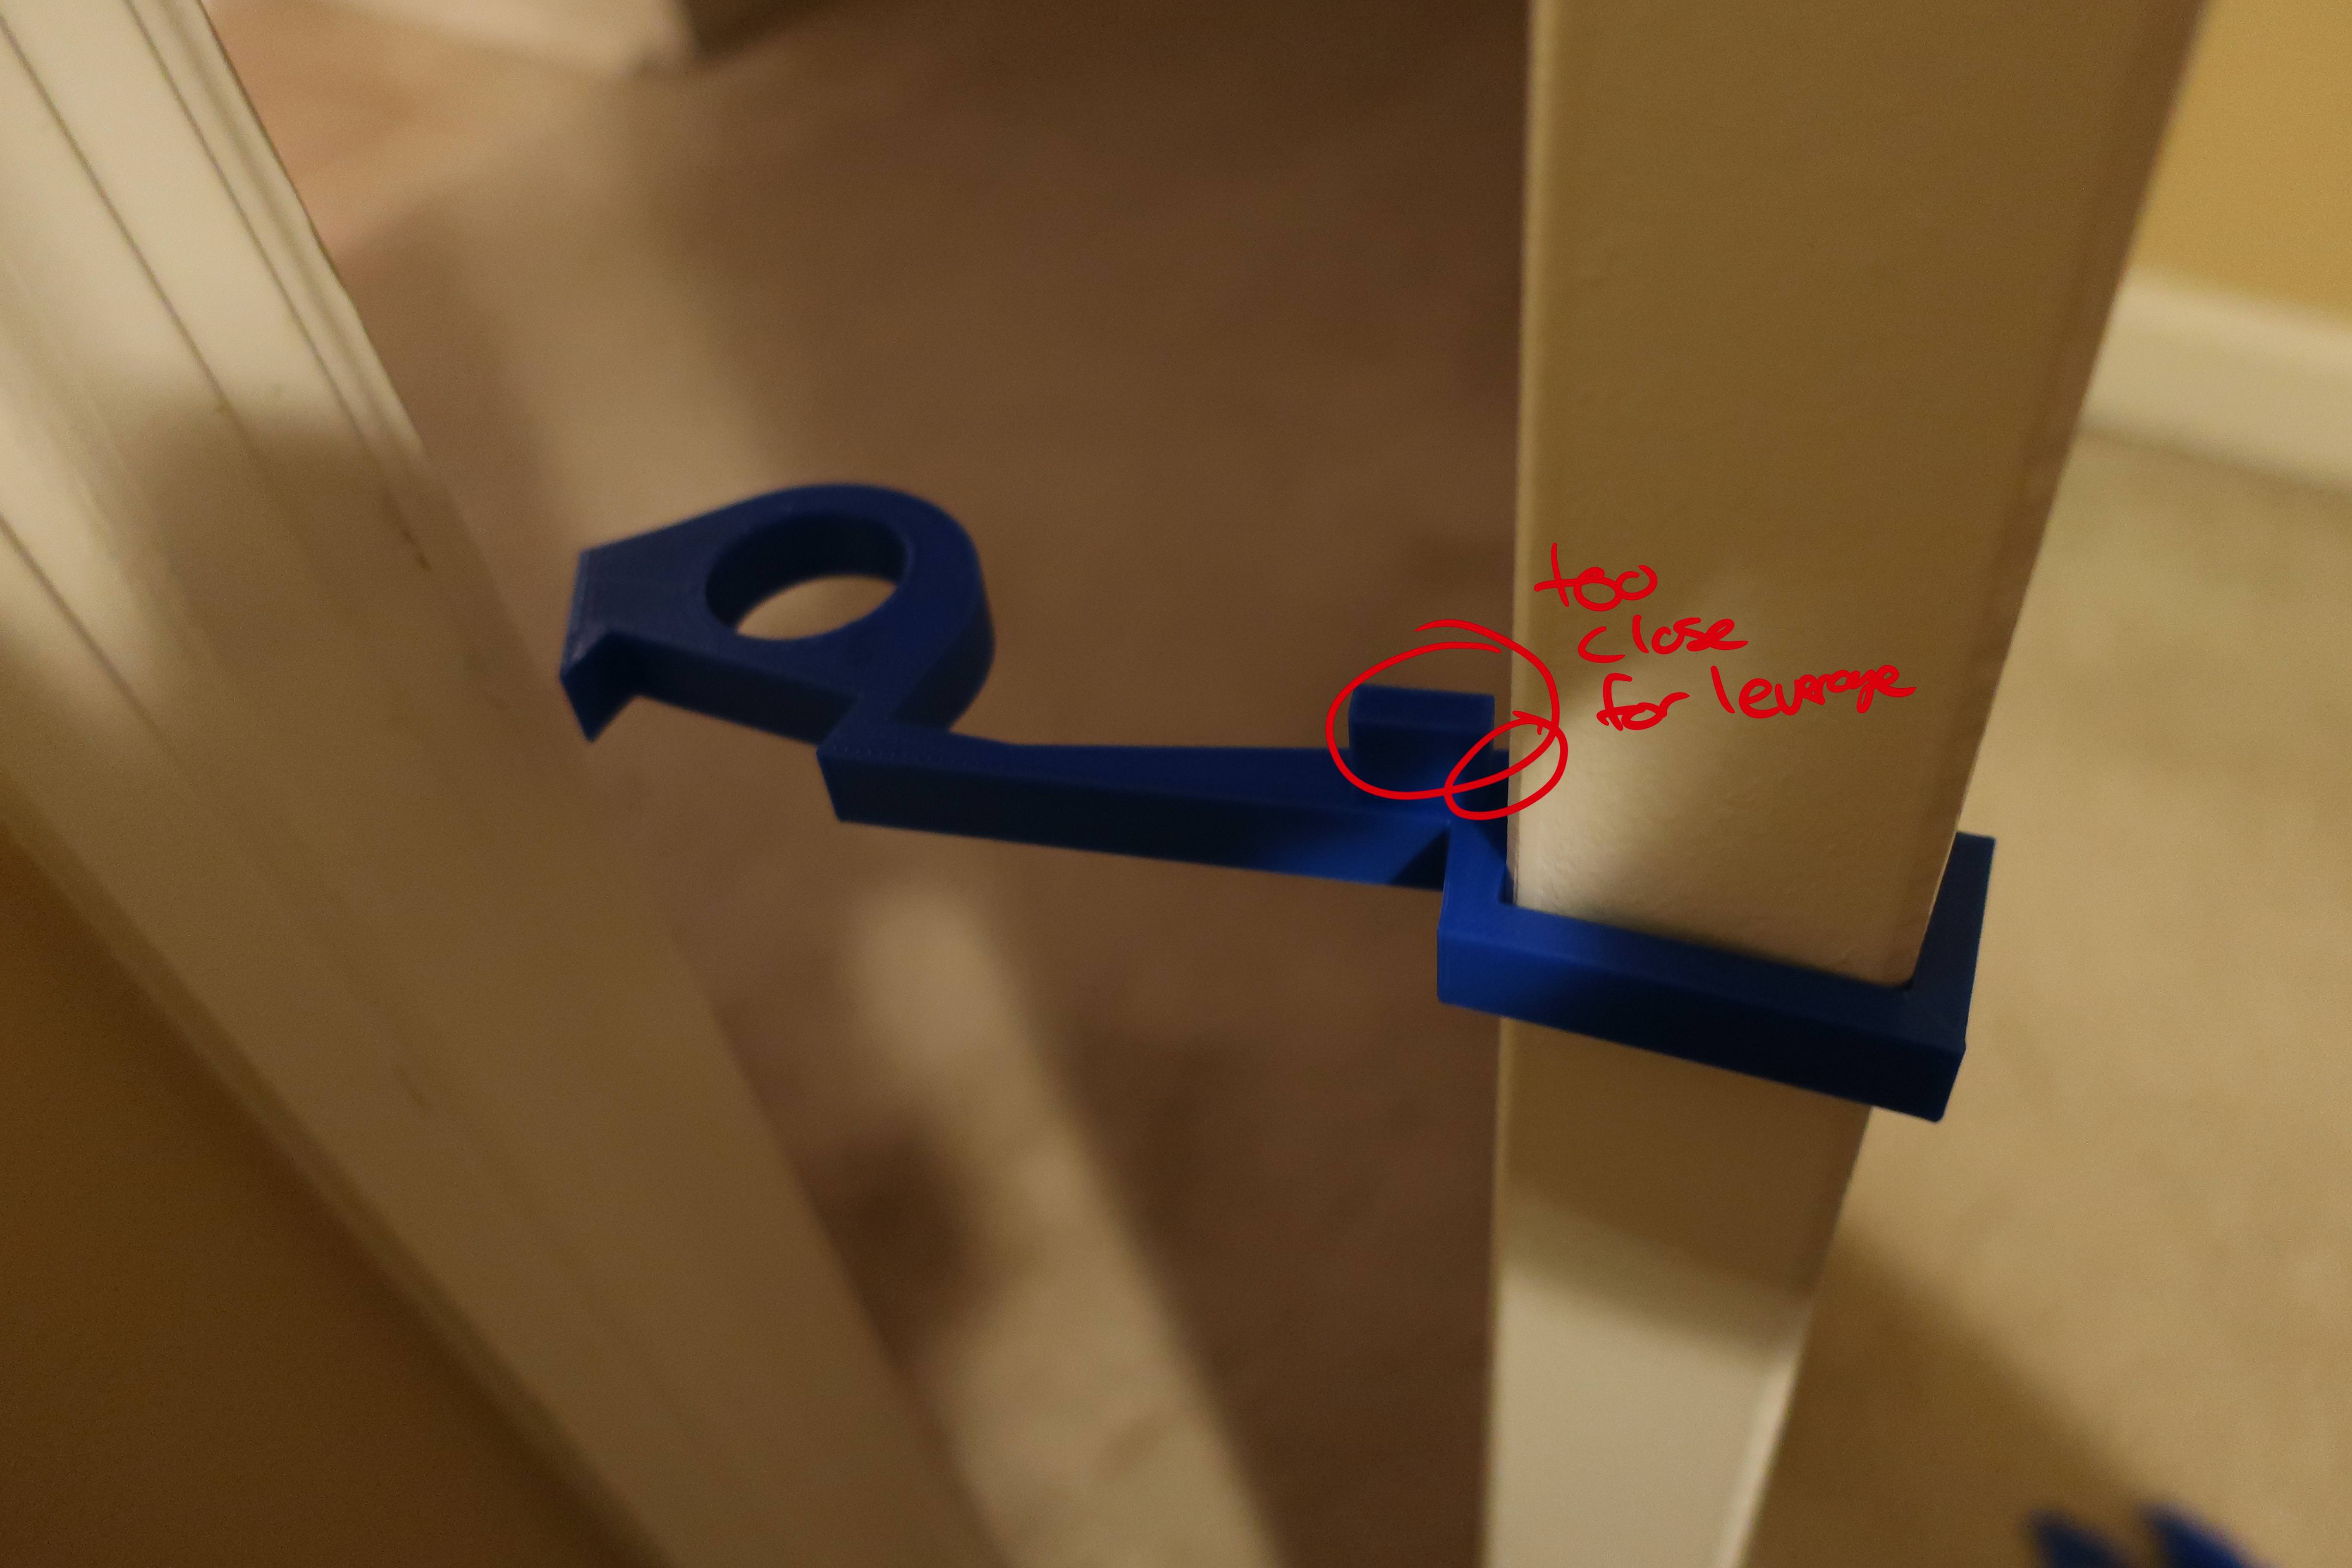
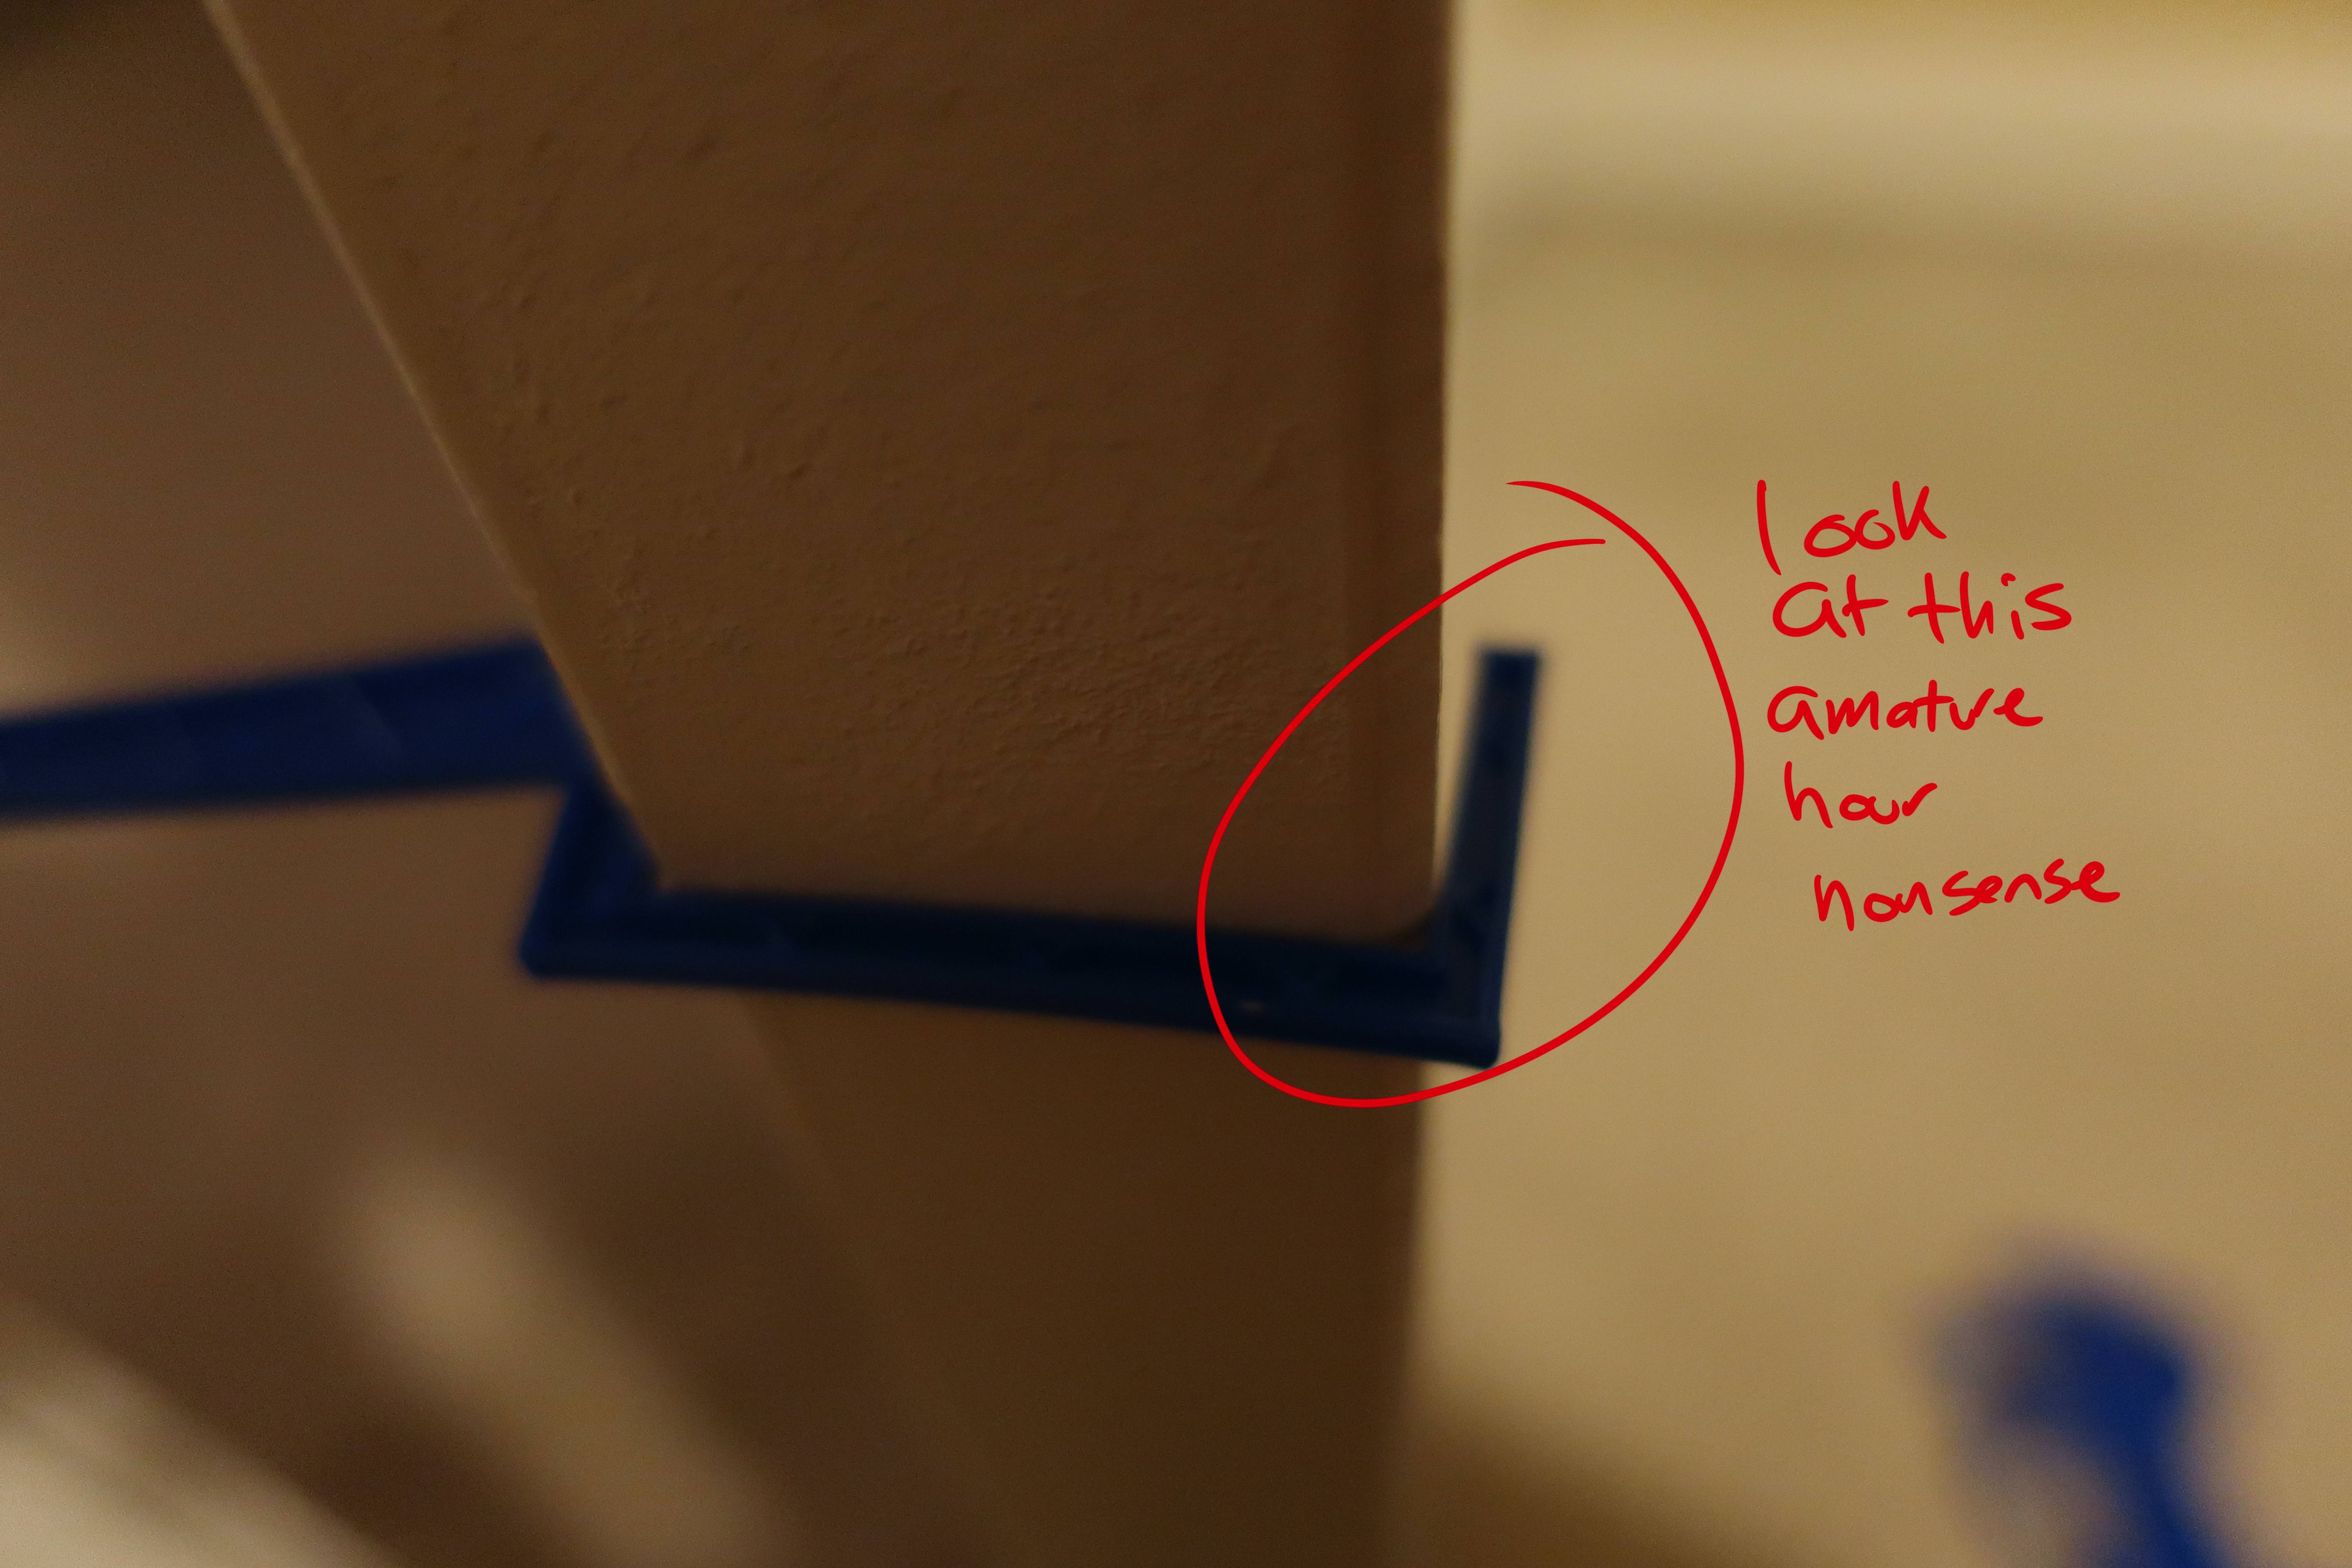
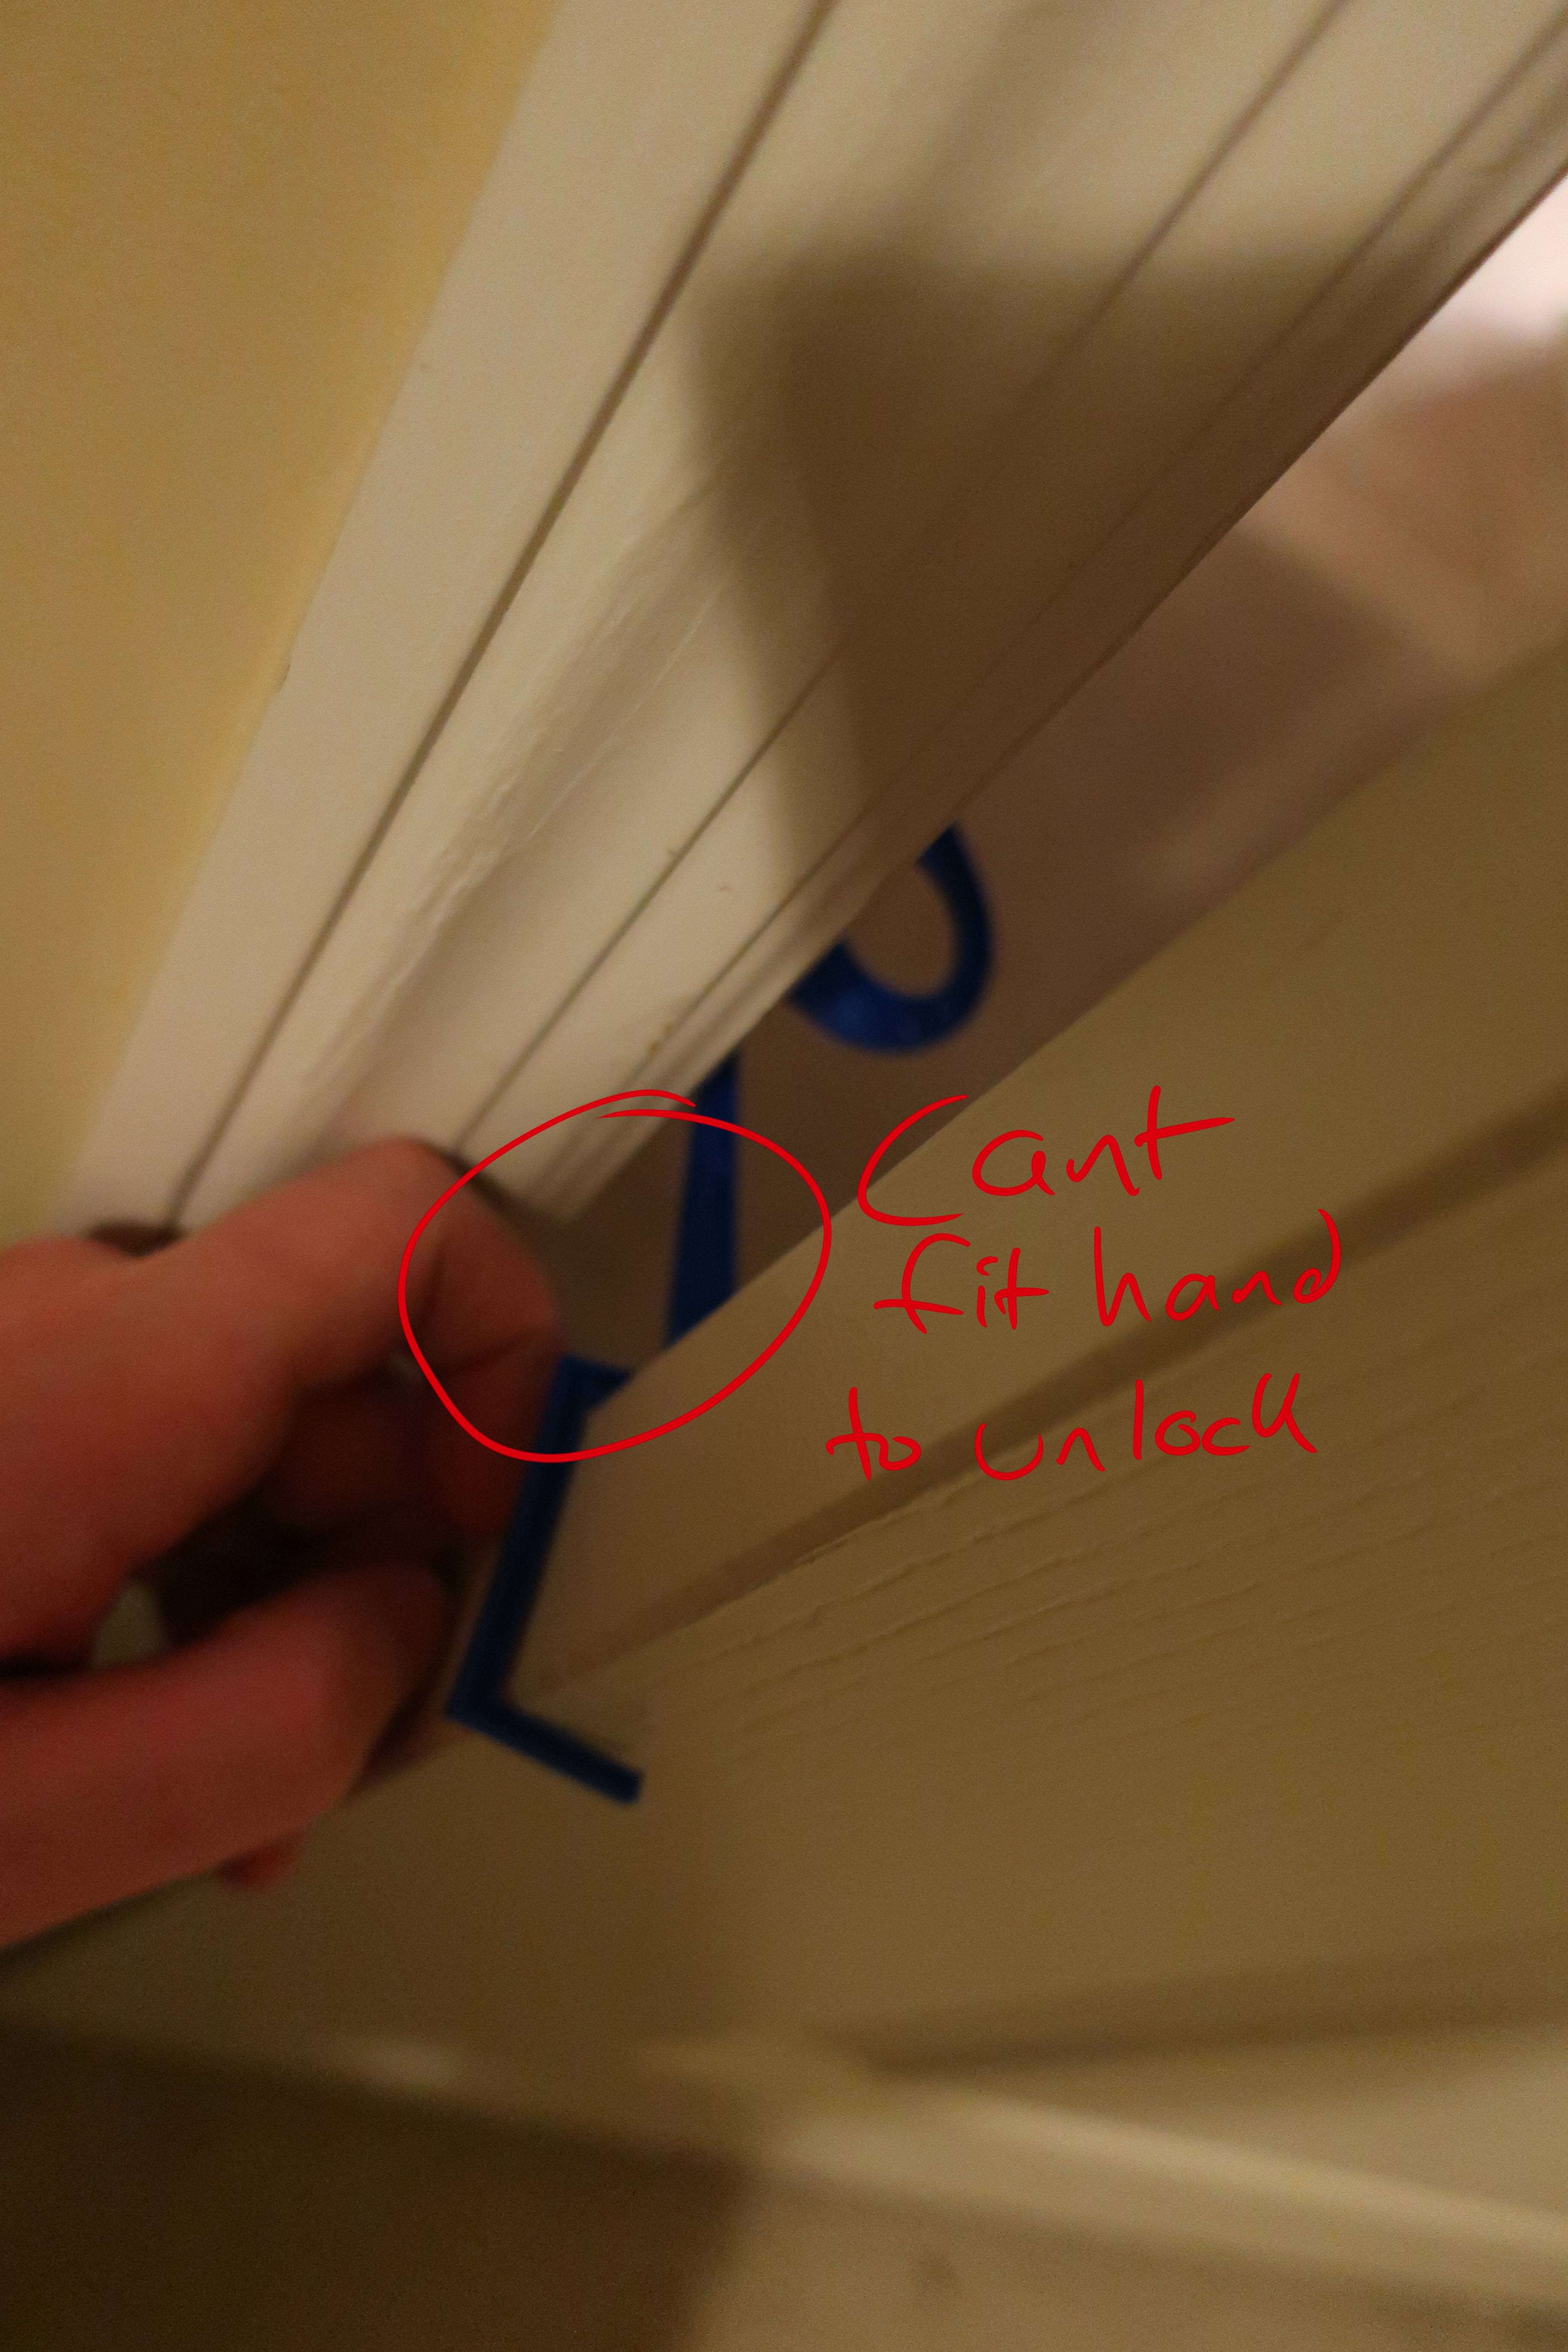
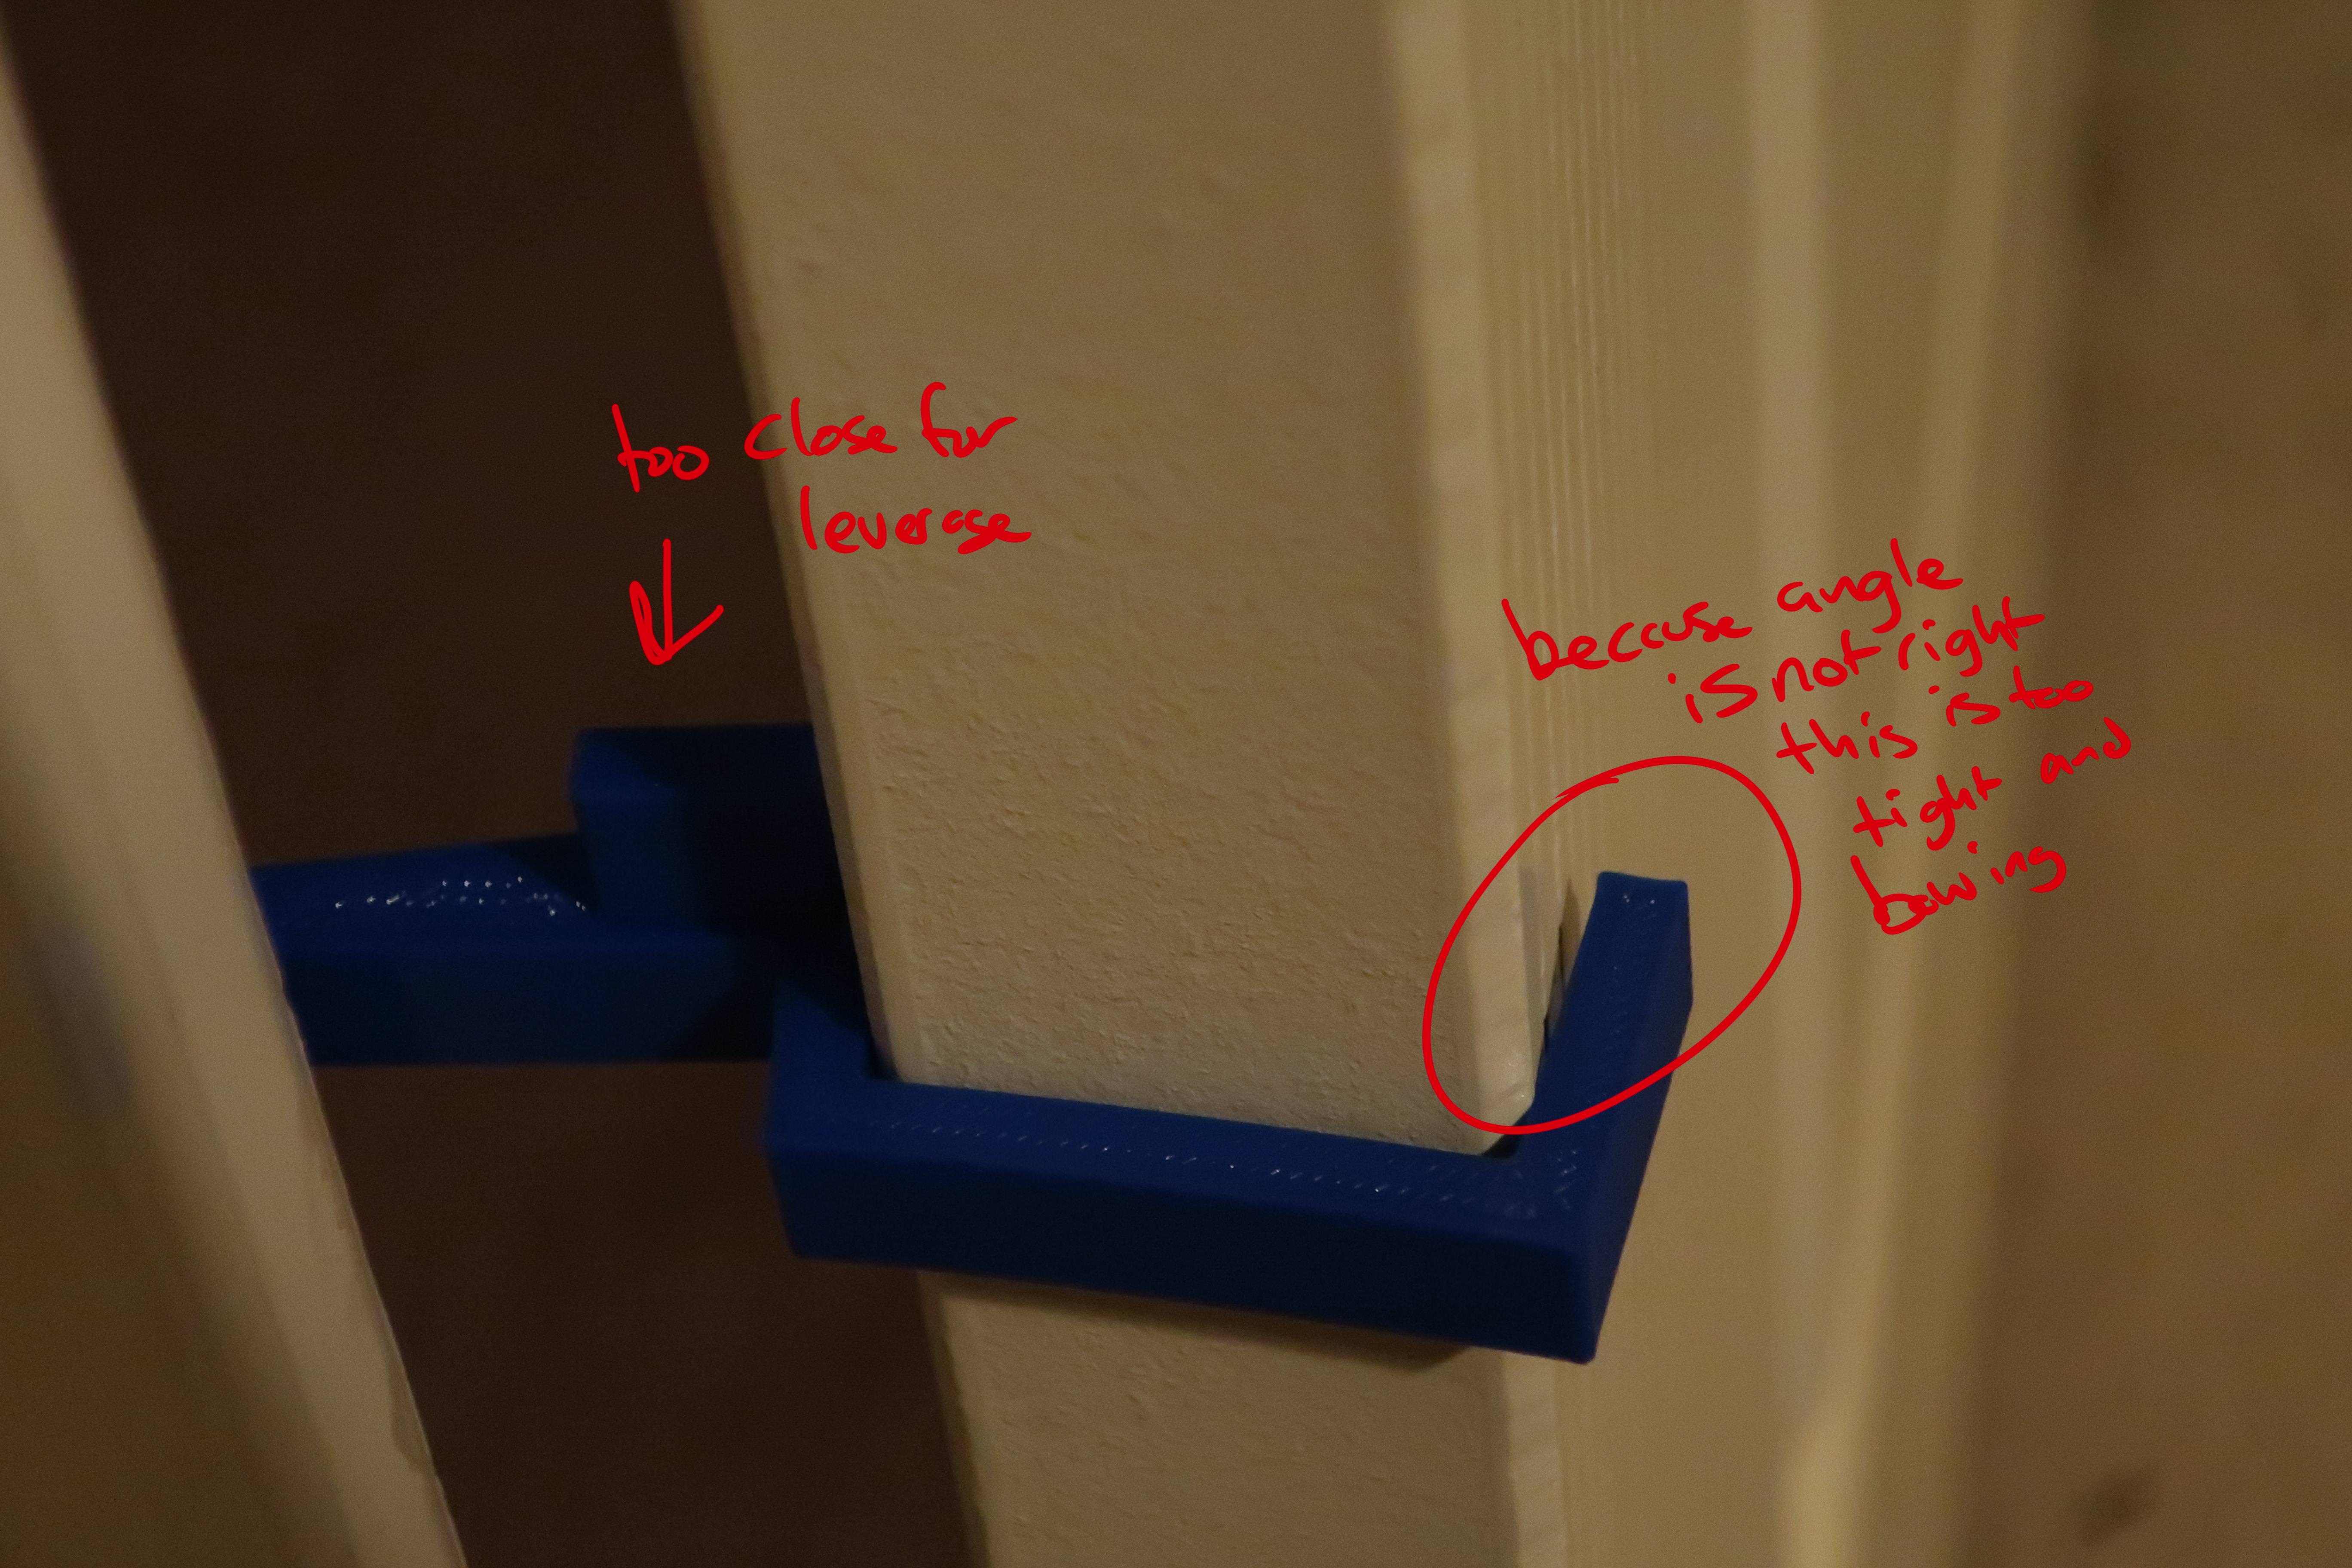
Try seven, change the eyelet to be teardrop shaped to accurately reflect the feeling of being out smarted by a door. But I’m confident I have the angle dialed in after a half dozen previous attempts to print this one in full. And it’s good… but not great. The little raised bit i added on the inside of the door doesn’t have the leverage needed to unlock it so having to slide hand though the door.
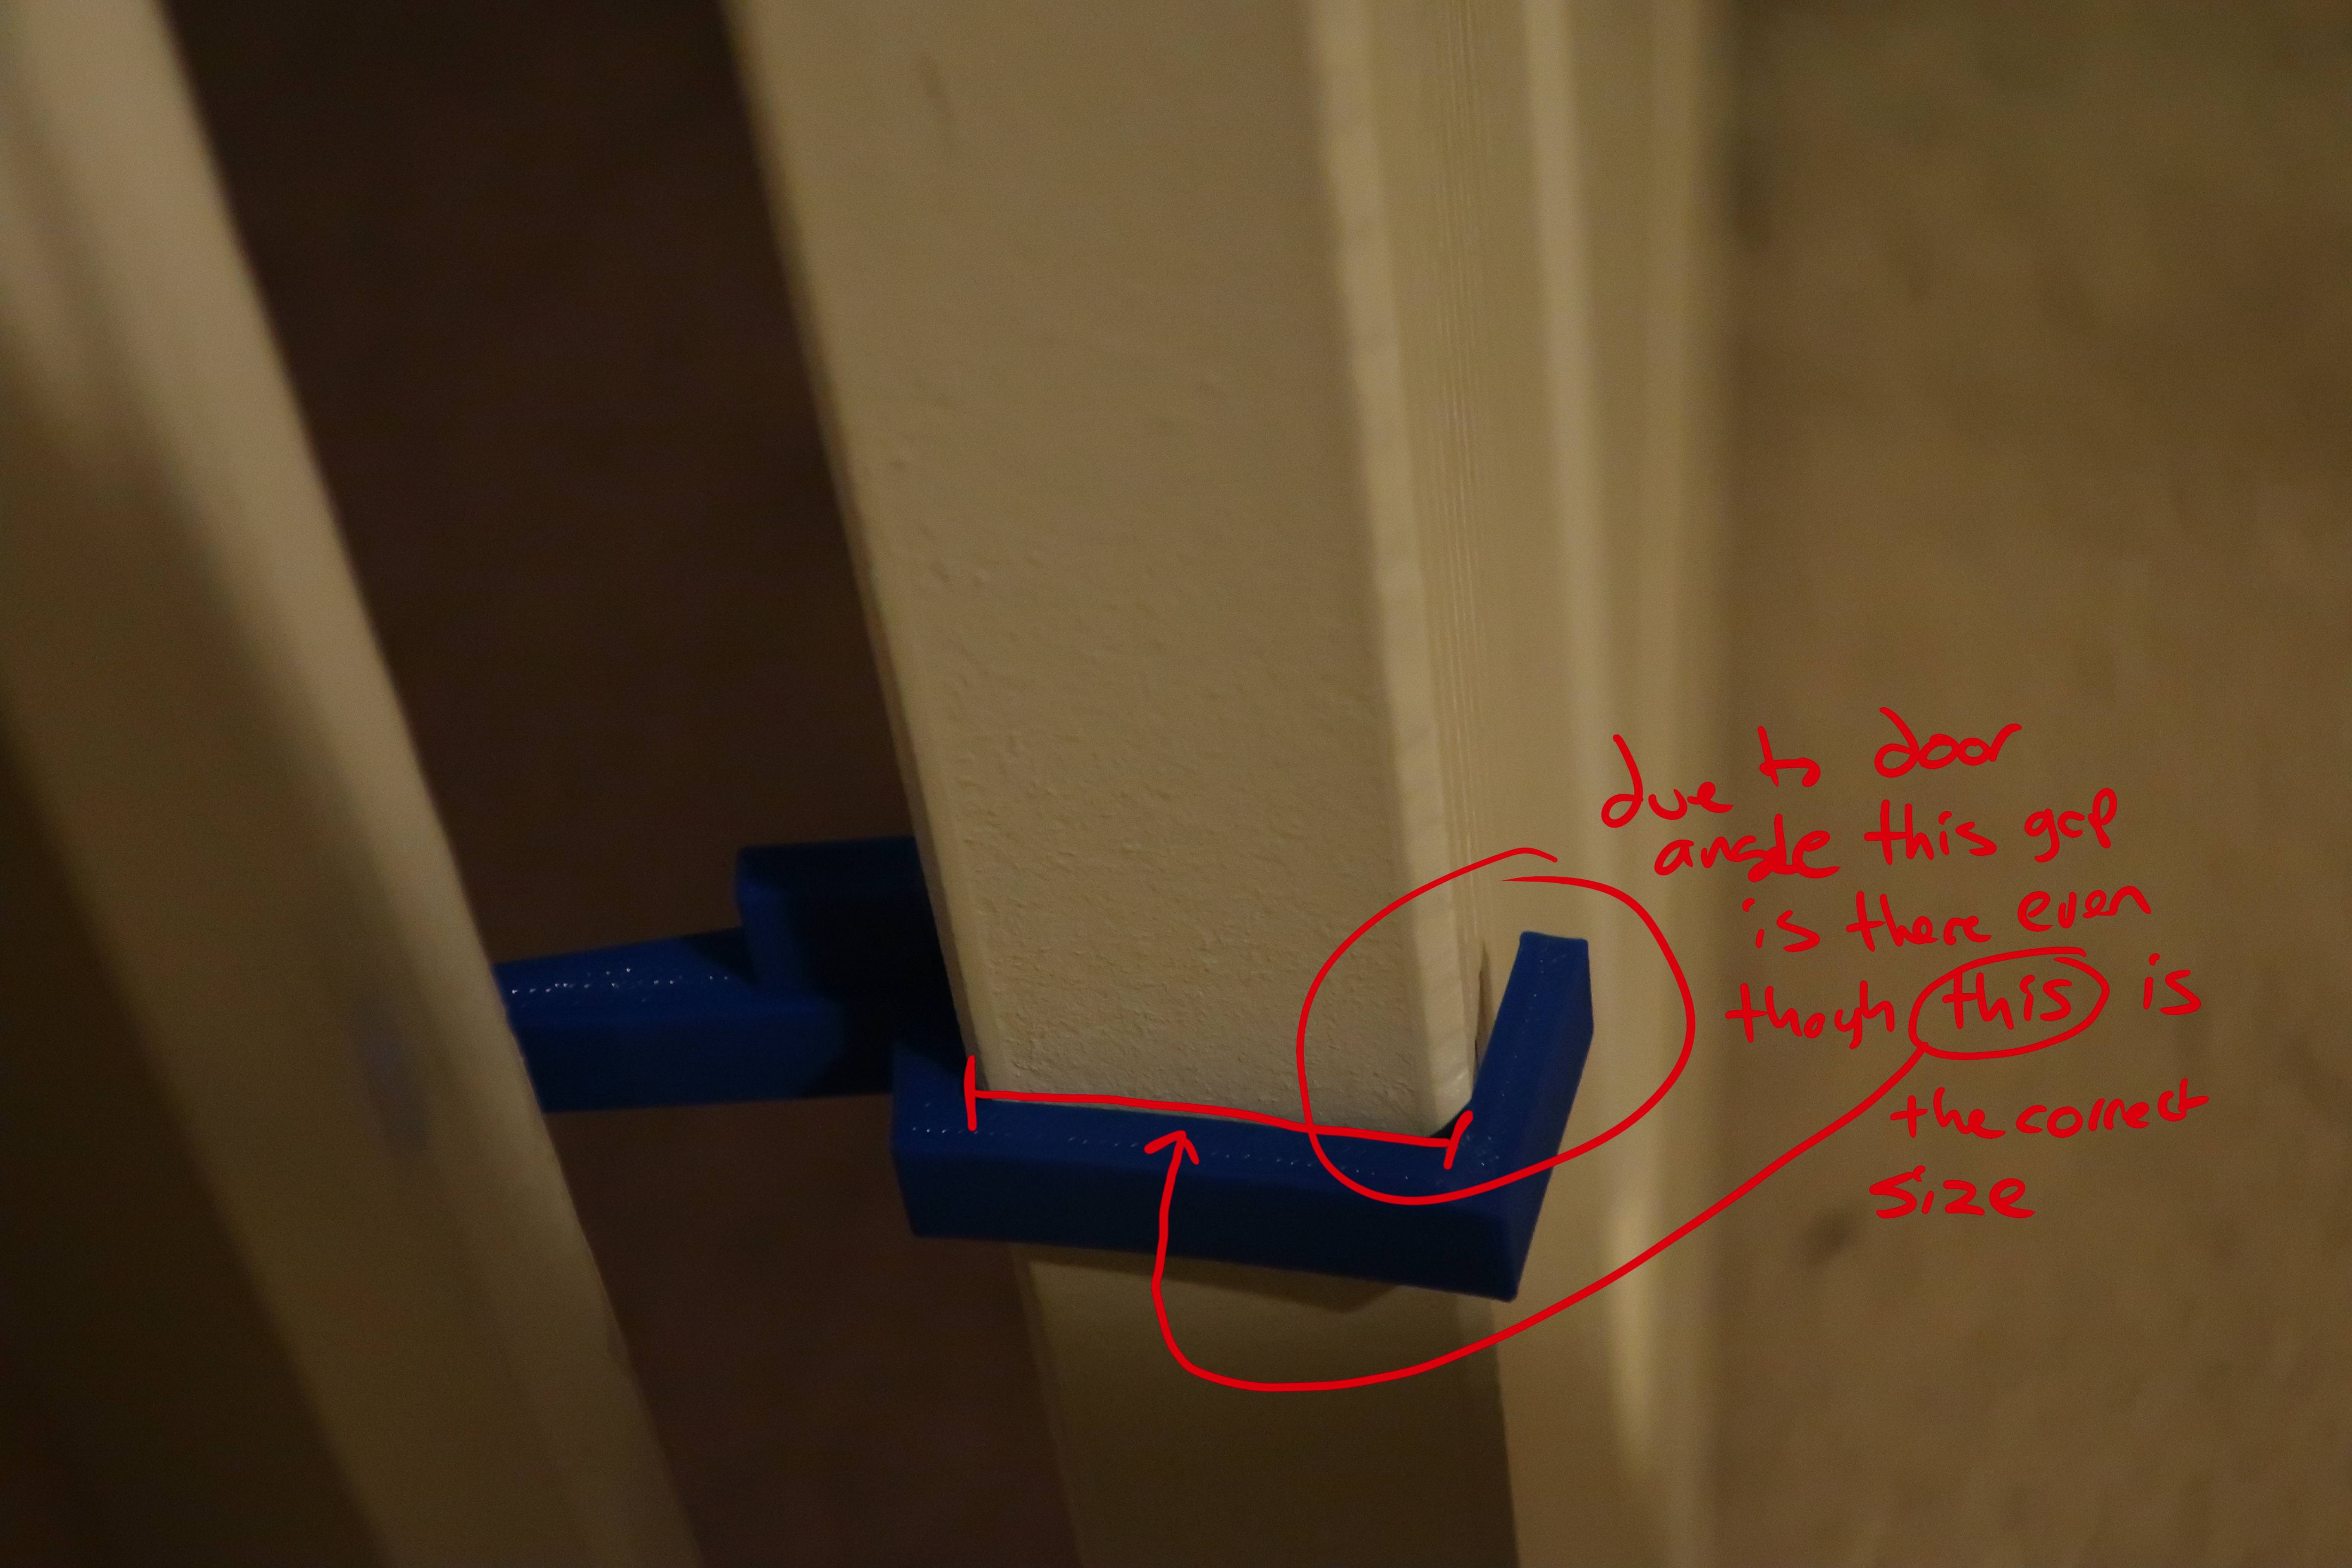
The big kicker happened at this point, i still didn’t have that angle down between the door/door frame. At this point I had three choices.
1) I could leave it and spend a life scraping up my hand getting though the door.
2) I could break out a geometry book, compass, paper, rulers, dice, lucky rabbits foot and figure out for sure what that angle is.
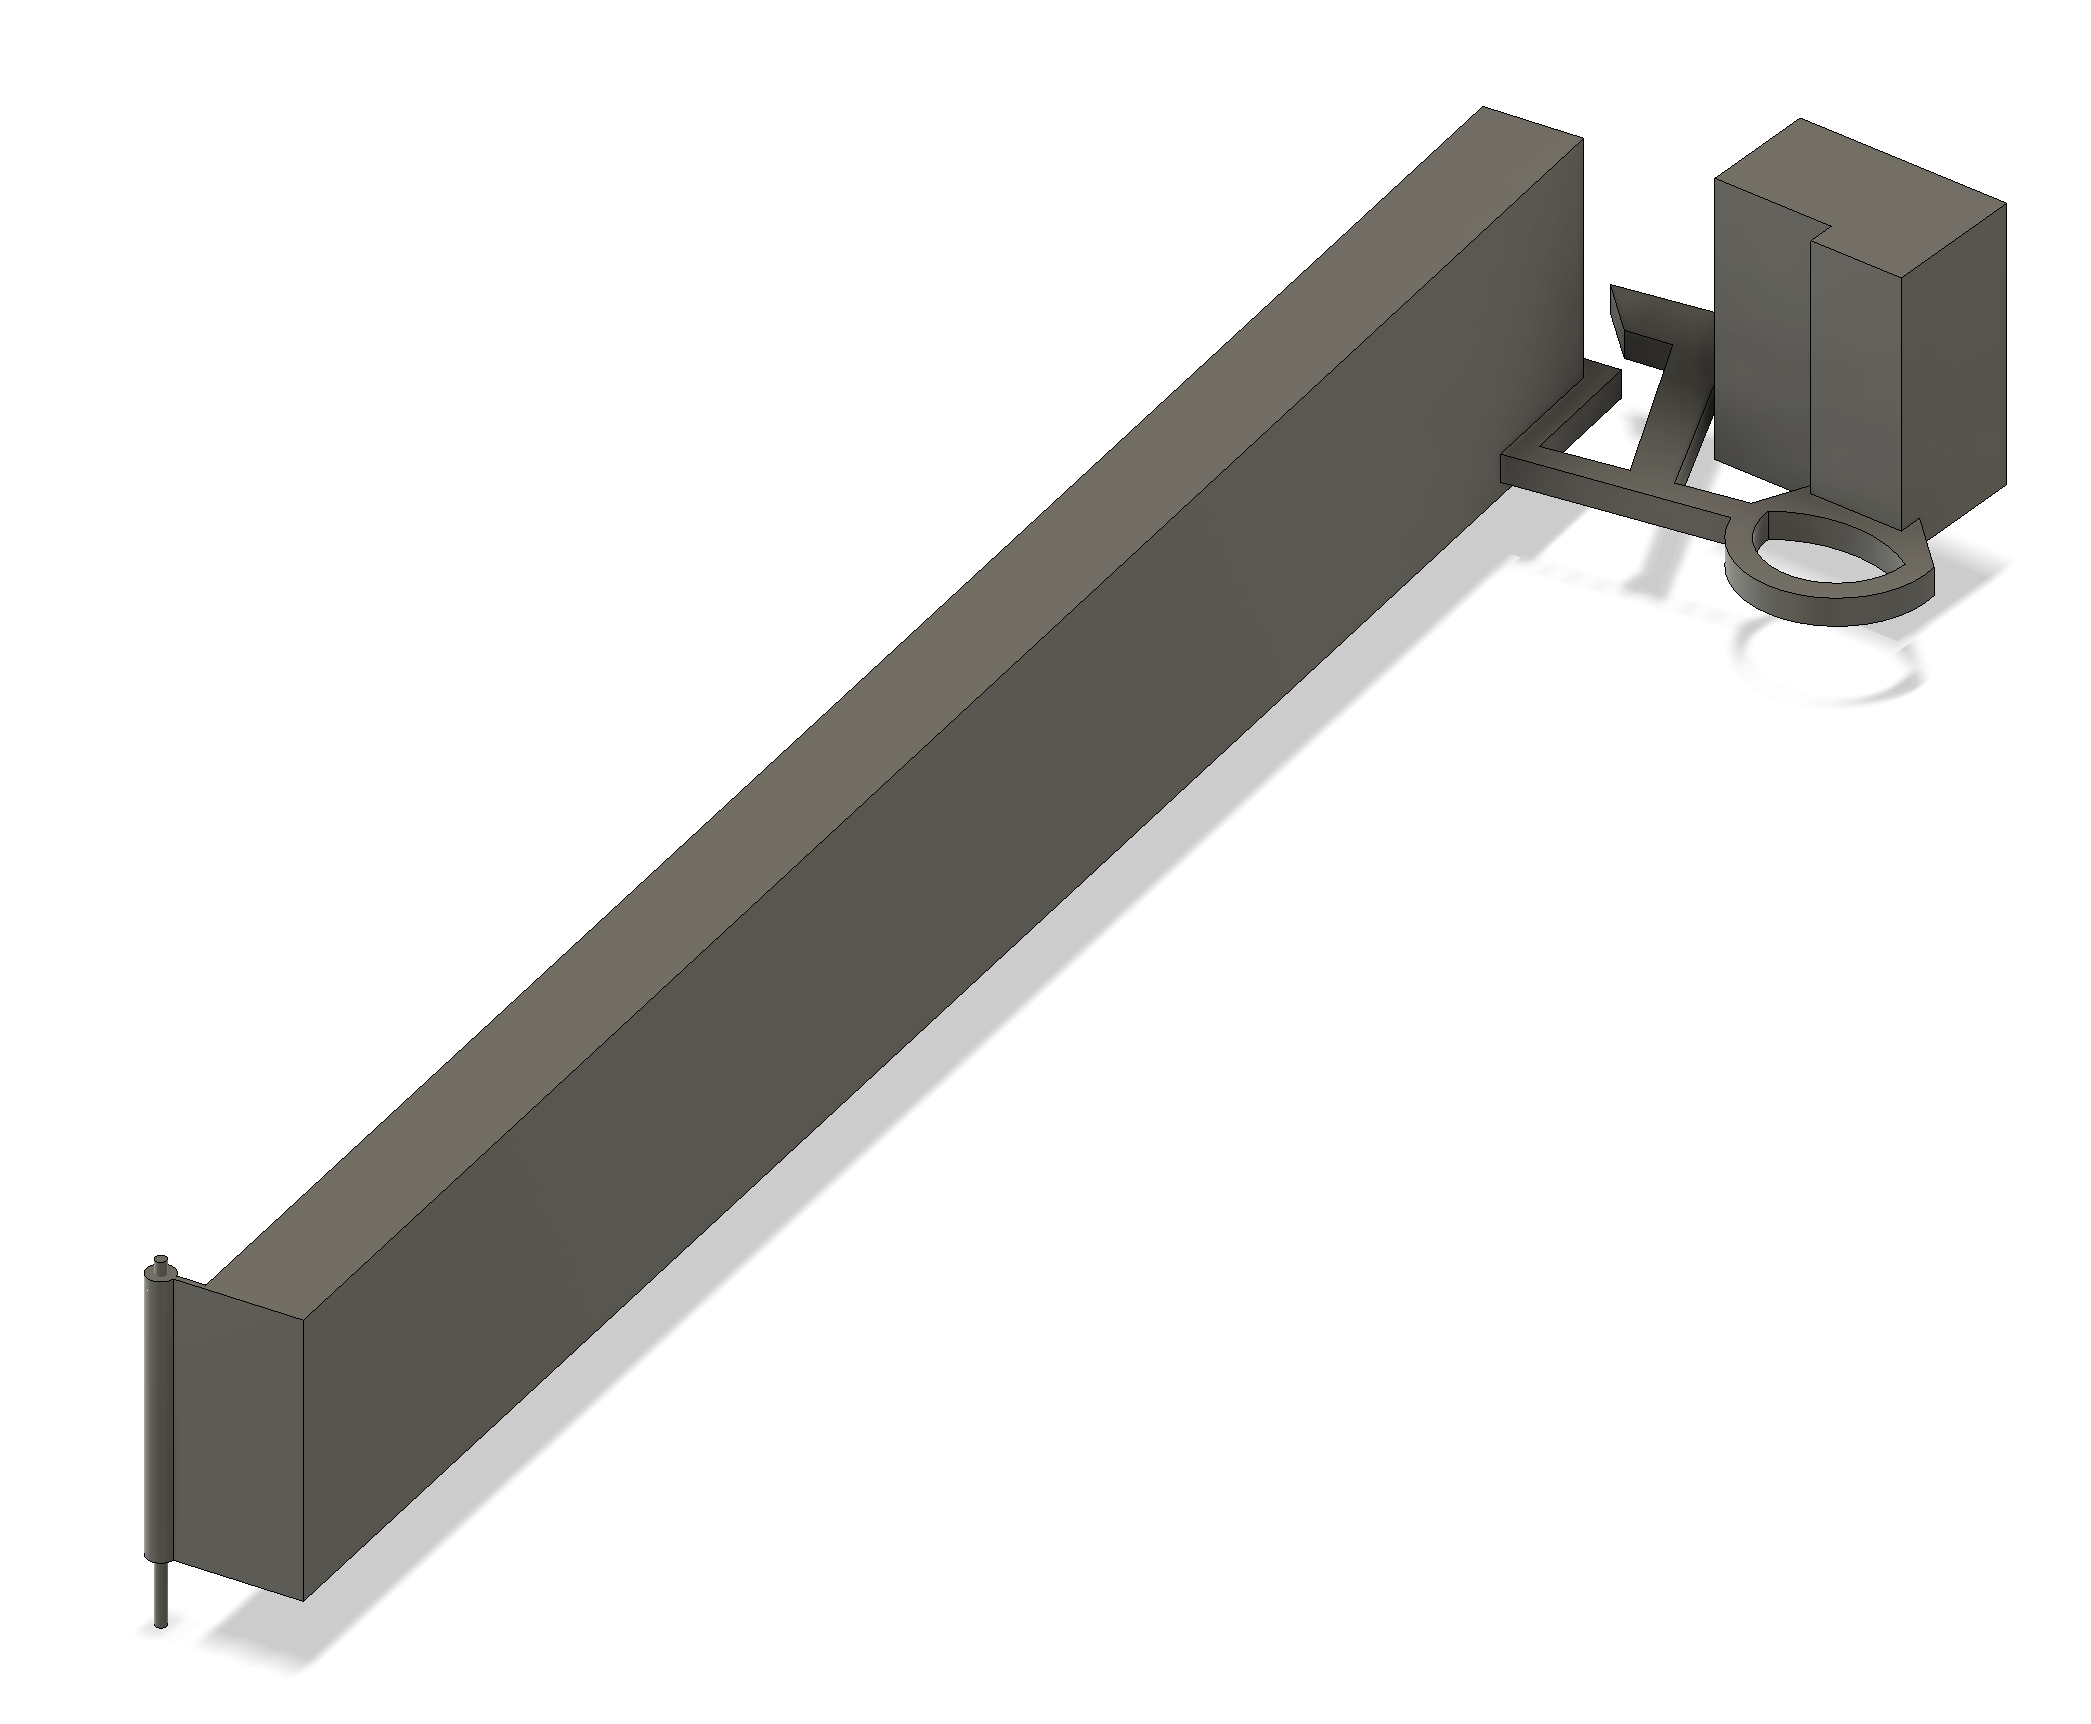
3) Do what I though about doing before step one which I didn’t do because “it won’t be worth the trouble”, model the entire door/door frame/hinge in fusion360 and let that do the math for me.
So I did just that, I only needed to take two more measurements then i started with, the length of the door and the width of the door frame. I then created a joint at the hinge and just like that the door was swinging. I then pretty much started with a blank canvas. I modeled up the new design and printed it, and first try it worked just like I hopped. All the angles are right, it doesn’t bind up anywhere closing it’s perfect, I’ve gone ahead and rented my tux for the 2018 noble prize which due to this thing I’m a shoe in.
But wait… there’s more.
Reading this overly verbose recount of a door stop it’s super easy to jump to a tl;dr and make an assumption:
“You should have just modeled the whole door it in fusion 360 and you wouldn’t have had to make so many”
I myself thought that when I finished this at first. But nothing could be farther from the truth.
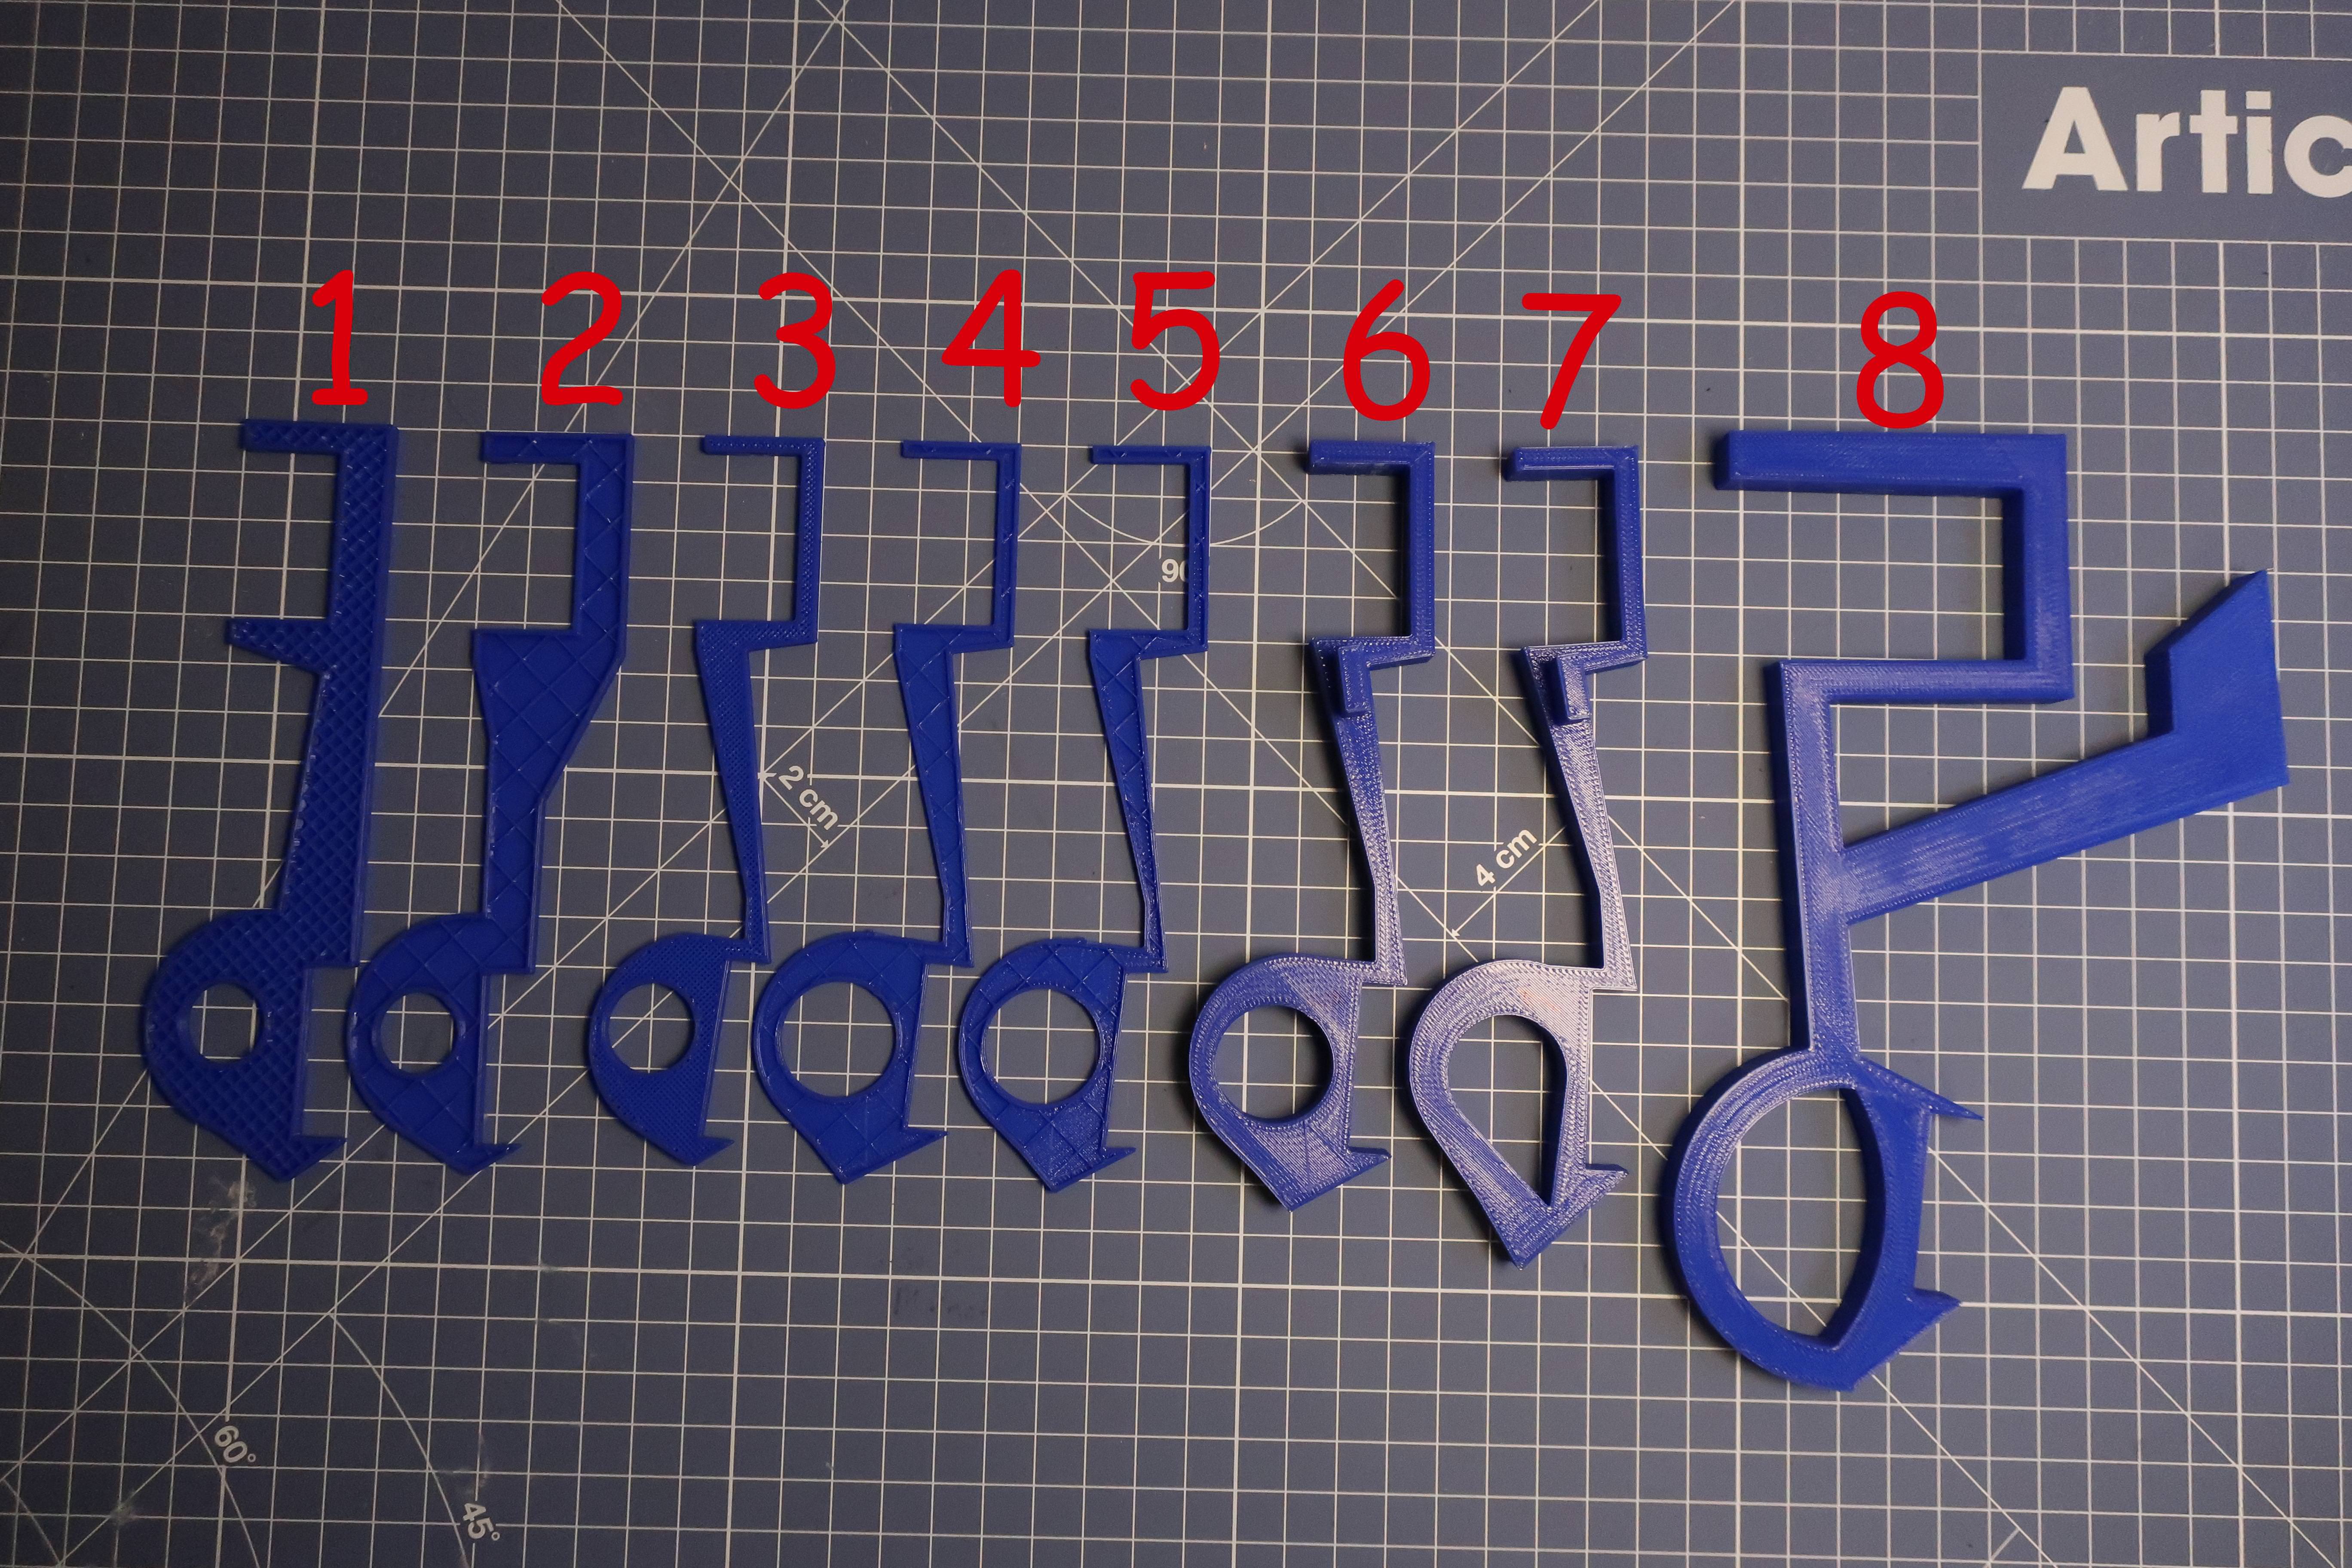
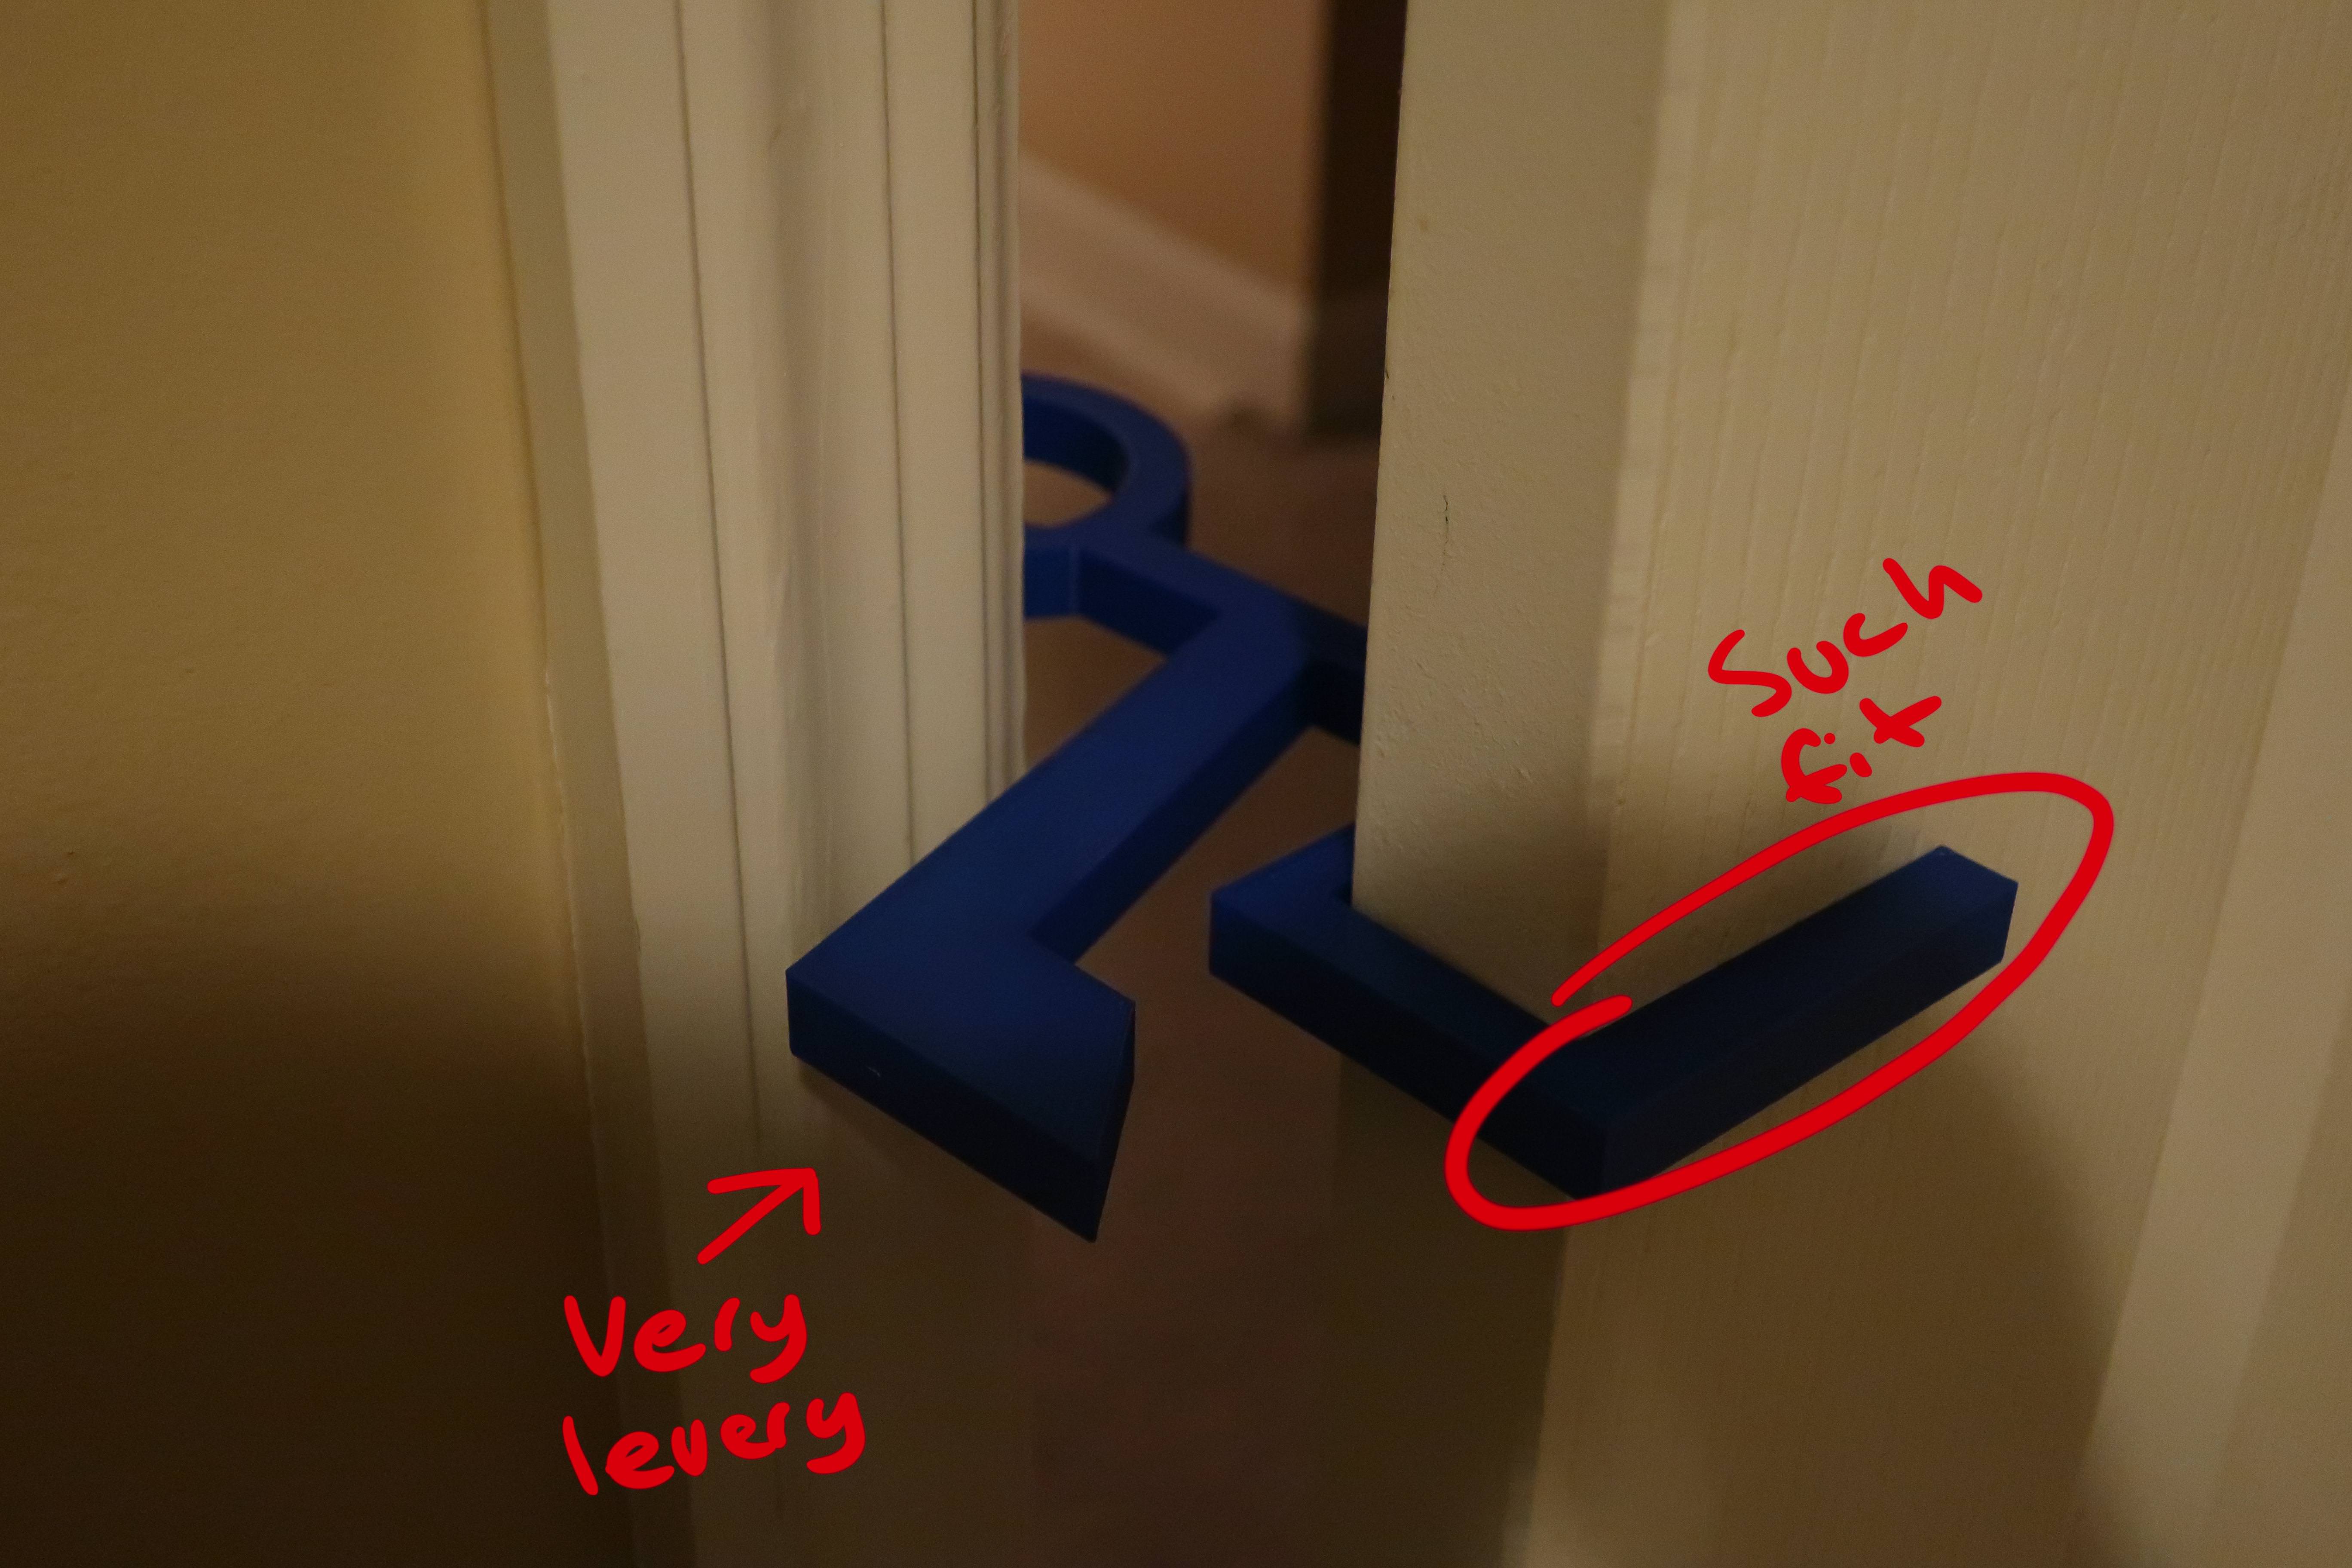
If you look at the final product you see it incorporates tons of lessons learned form the previous failures, It has a larger hole which it took my 3 failures to realize was an issue. It has a arm sticking out that enables it to be activated from inside the room, this took an entire night and 7 versions to realize “sticking a hand though a nearly closed door sucks”. It has a a long angle on the front engagement face to ensure it slides onto the door frame smoothly.
No doubt starting with a better model of the door would have fixed some problems, but there are always going to be issues you don’t think about until you run into, you don’t know what you don’t know. So this two way door stop has served as a good reminder that not only is it important to take time and effort to plan out things and not to assume they are as simple as they appear on face value. It also is a good reminder that you don’t make perfection first run though, having drafts, mock ups and failures and the determination to try try again is vital for creating.