Interested in game development? Makers Local 256 is organizing a real-world gathering and team for participating in this weekend’s Ludum Dare competition! If you’re not a programmer or game designer, don’t worry; teams need artists, musicians, writers, testers, bloggers, social media, fresh ideas, gamer know-how, and probably other things, too! The 72-hour team competition runs from 8pm CST Friday, April 25th, until 8pm CST Monday, April 28th. The 48-hour solo competition runs from 8pm CST Friday, April 25th, until 8pm CST Sunday, April 27th.

Visit the website to find out more about Ludum Dare and to vote for the theme, which will be announced at the opening of the competition tonight!

http://www.ludumdare.com/compo/

We suggest being at the shop at 7pm if possible to begin organization and prepare before then. We’ll be live-blogging the event on the Ludum Dare 29 wiki page. We’ll have a webcam up for streaming on Charlaxy’s Twitch stream, in addition to the shop cameras.

Hope to see you there with your game-making faces on.

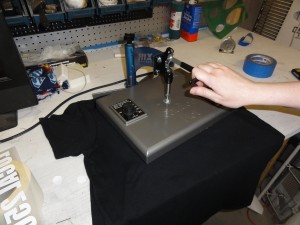
Last week, we got a new heat press set up in the crafting area of the shop.  It’s a Hix Hobby Lite 9″ x 12″. Wolfenhex and I decided to inaugurate it by making a Makers Local 256 shirt.

The shirt we selected was a Gildan 100% cotton, and we used Thermoflex Plus white t-shirt vinyl. The design was cut from a vector graphic using the shops vinyl cutter.

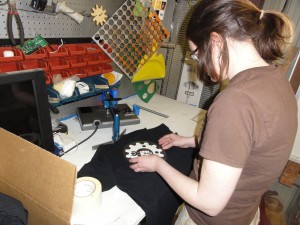
Applying vinyl to t-shirt

After the vinyl cutter did it’s thing, we weeded the design with the help of some sharp tweezers, and then positioned it on the shirt.  The vinyl’s backing is sticky and will help hold it in place.  It’s a good idea to press the shirt with the hot press for about four seconds prior to placing the vinyl, to flatten out the surface and remove moisture.

Using heatpress on t-shirt

Once the vinyl is correctly positioned (we put it below the shirt’s neckline to avoid any wrinkles from that), set a timer and lock the press down.  Temperature, pressure, and duration will vary by vinyl type, so look up the manufacturer’s recommendation.  This vinyl said to press it at medium pressure (there’s a valve for adjusting this on the heat press) and 330F for 17-20 seconds.  We found that it did better at 20 seconds.

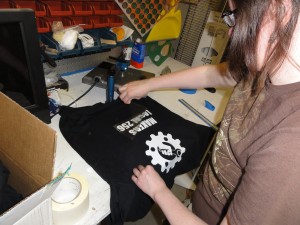
Peeling backing off vinyl

Once it’s finished, peel off the backing while holding the shirt flat (if you can — this is the hardest part because of how hot the shirt and press will be).  Whether you peel it off hot or cold will vary by vinyl type, and peeling off at the wrong time could result in wrinkled vinyl or it not sticking.

This hot-peel vinyl did a fantastic job of bonding to the fabric almost seamlessly.

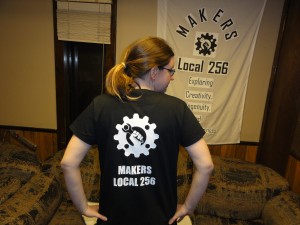
Finished ML256 t-shirt

Here’s the finished product!  We only did one side this time.  If you want to add vinyl to both sides of the shirt, it’s a good idea to put down some parchment paper on the press so that the existing vinyl doesn’t try to stick to it.

Feel free to make your own shirts like this with the vinyl cutter and heat press.  The shop may also have other uses for it, such as working on PCBs.

There’s also a wiki page for the heat press.

Who wants some shop-made shirts like this at the next event?  We can make it happen now!