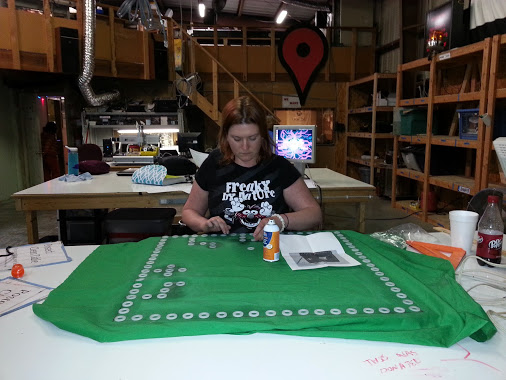
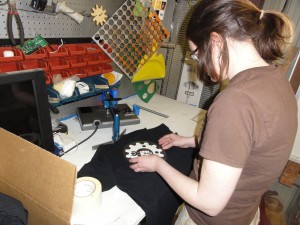
Last week, we got a new heat press set up in the crafting area of the shop.  It’s a Hix Hobby Lite 9″ x 12″. Wolfenhex and I decided to inaugurate it by making a Makers Local 256 shirt.

The shirt we selected was a Gildan 100% cotton, and we used Thermoflex Plus white t-shirt vinyl. The design was cut from a vector graphic using the shops vinyl cutter.

Applying vinyl to t-shirt

After the vinyl cutter did it’s thing, we weeded the design with the help of some sharp tweezers, and then positioned it on the shirt.  The vinyl’s backing is sticky and will help hold it in place.  It’s a good idea to press the shirt with the hot press for about four seconds prior to placing the vinyl, to flatten out the surface and remove moisture.

Using heatpress on t-shirt

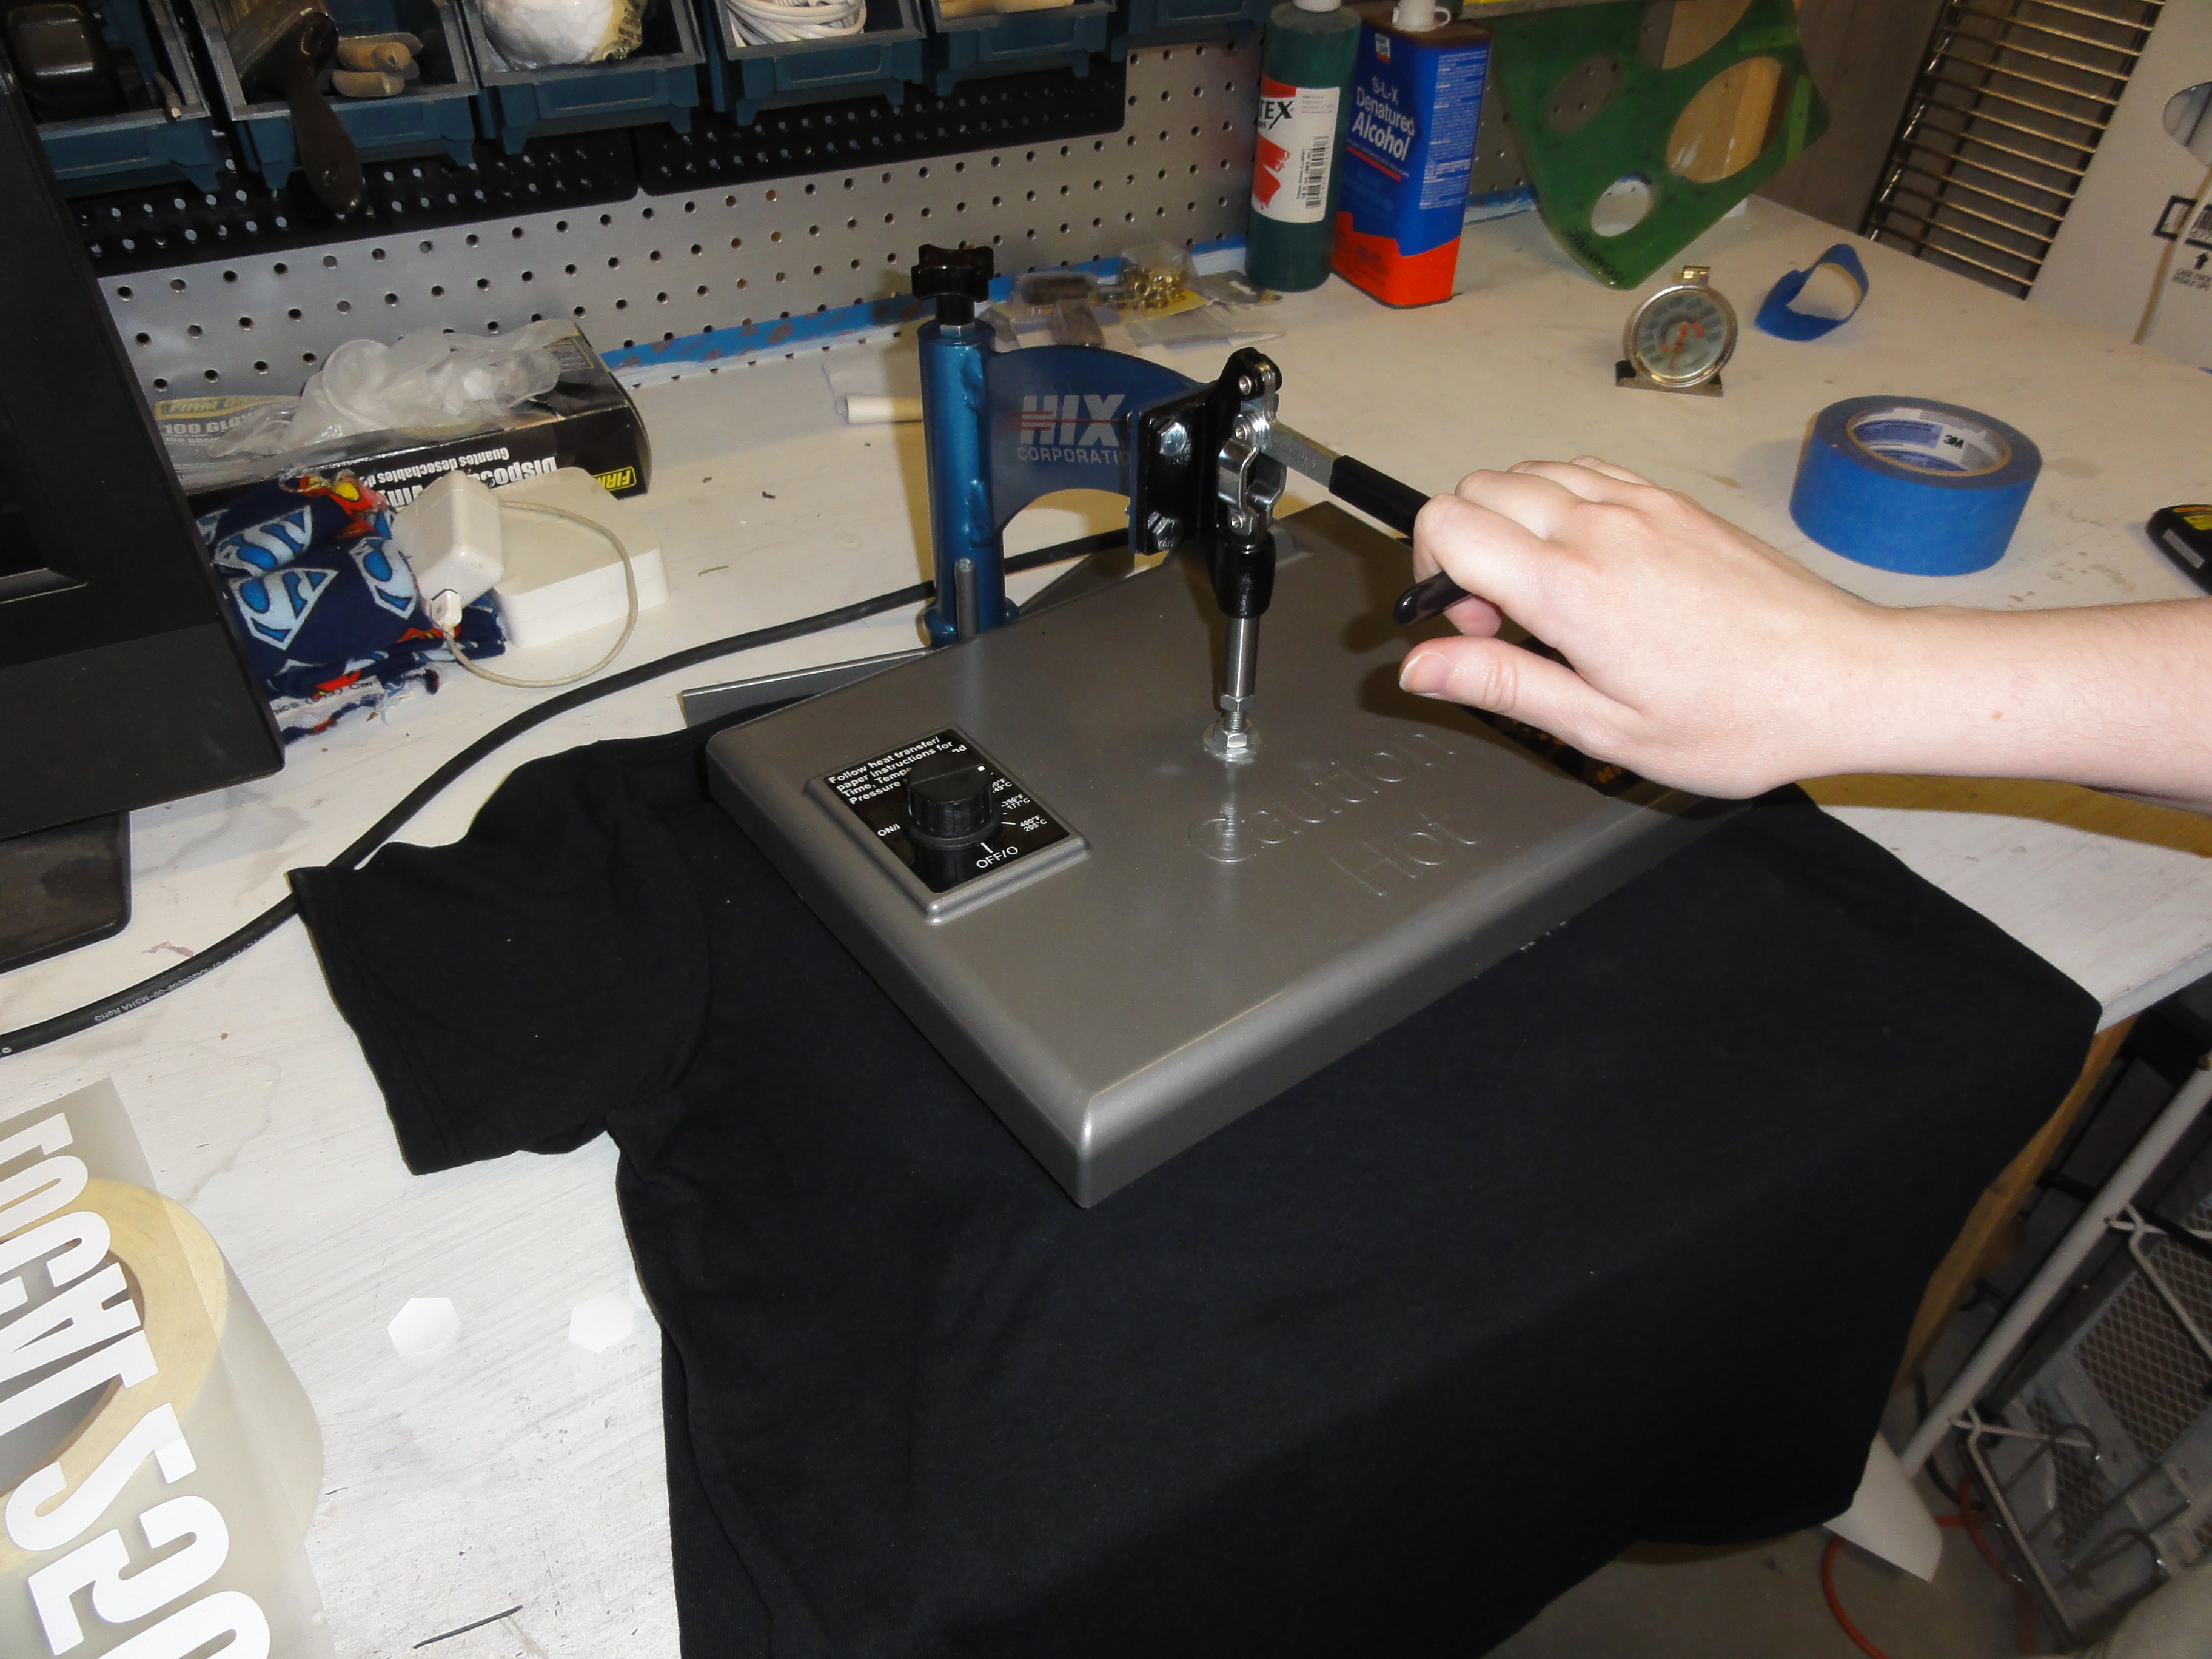
Once the vinyl is correctly positioned (we put it below the shirt’s neckline to avoid any wrinkles from that), set a timer and lock the press down.  Temperature, pressure, and duration will vary by vinyl type, so look up the manufacturer’s recommendation.  This vinyl said to press it at medium pressure (there’s a valve for adjusting this on the heat press) and 330F for 17-20 seconds.  We found that it did better at 20 seconds.

Peeling backing off vinyl

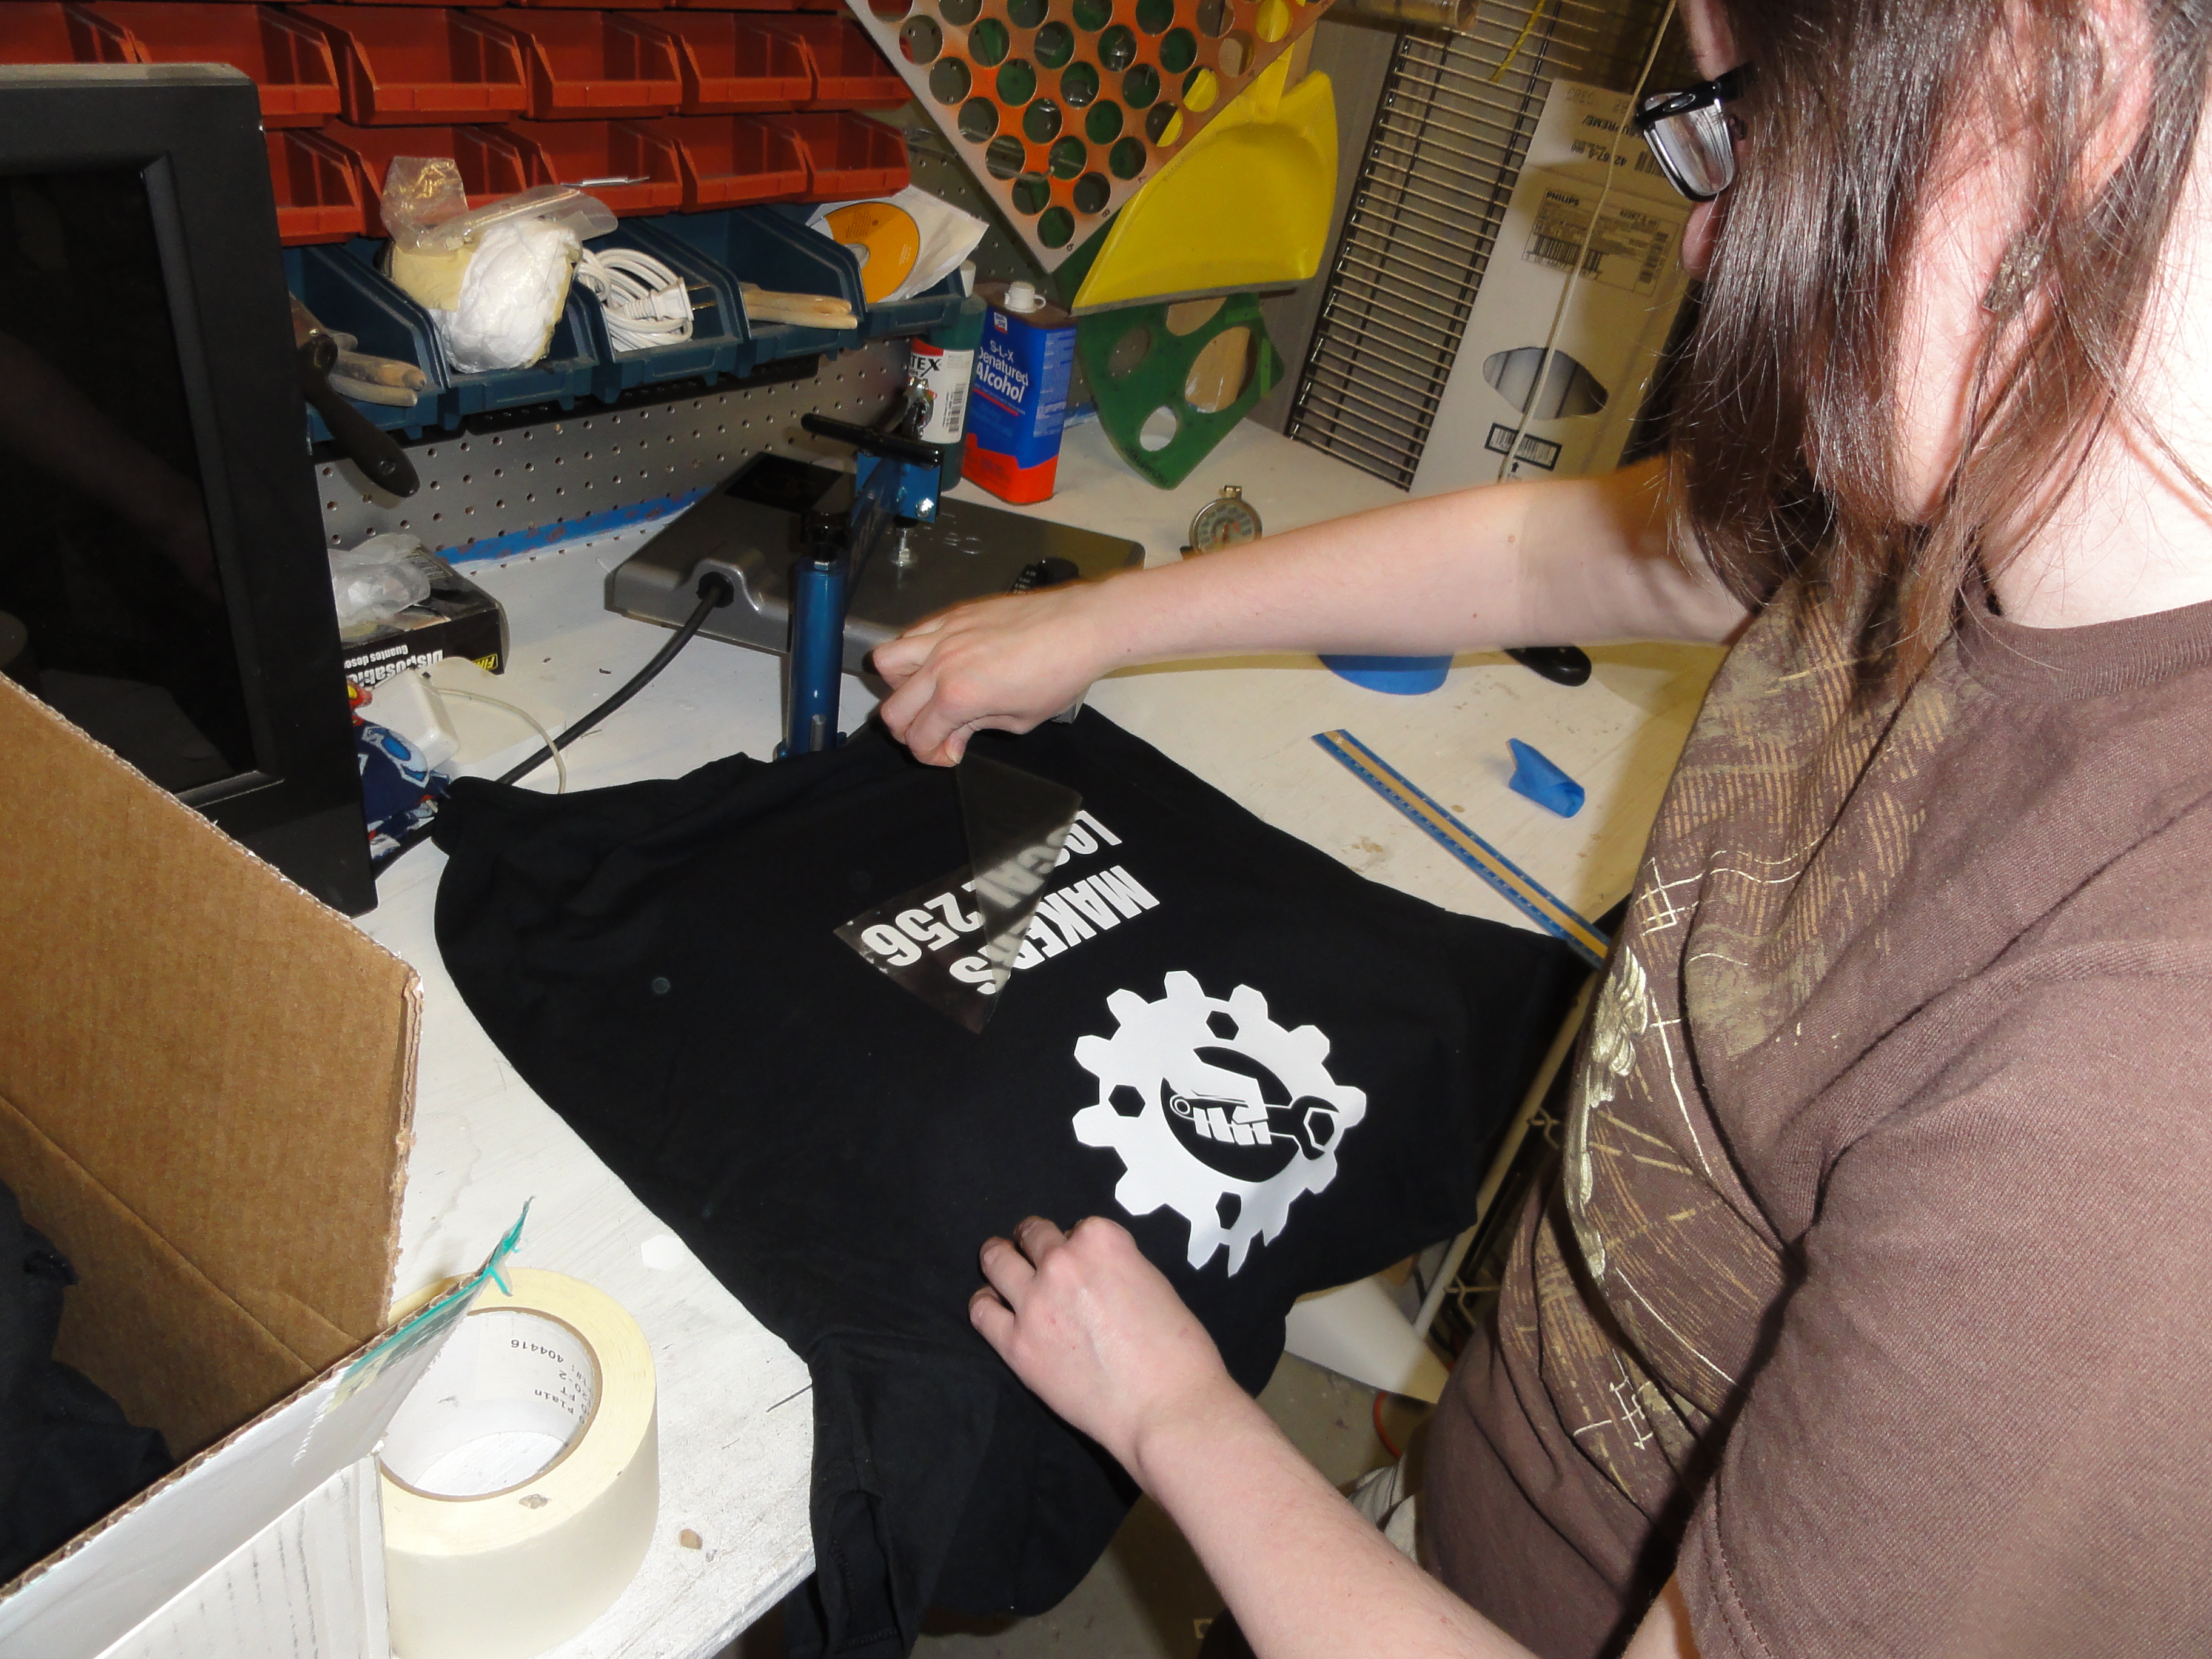
Once it’s finished, peel off the backing while holding the shirt flat (if you can — this is the hardest part because of how hot the shirt and press will be).  Whether you peel it off hot or cold will vary by vinyl type, and peeling off at the wrong time could result in wrinkled vinyl or it not sticking.

This hot-peel vinyl did a fantastic job of bonding to the fabric almost seamlessly.

Finished ML256 t-shirt

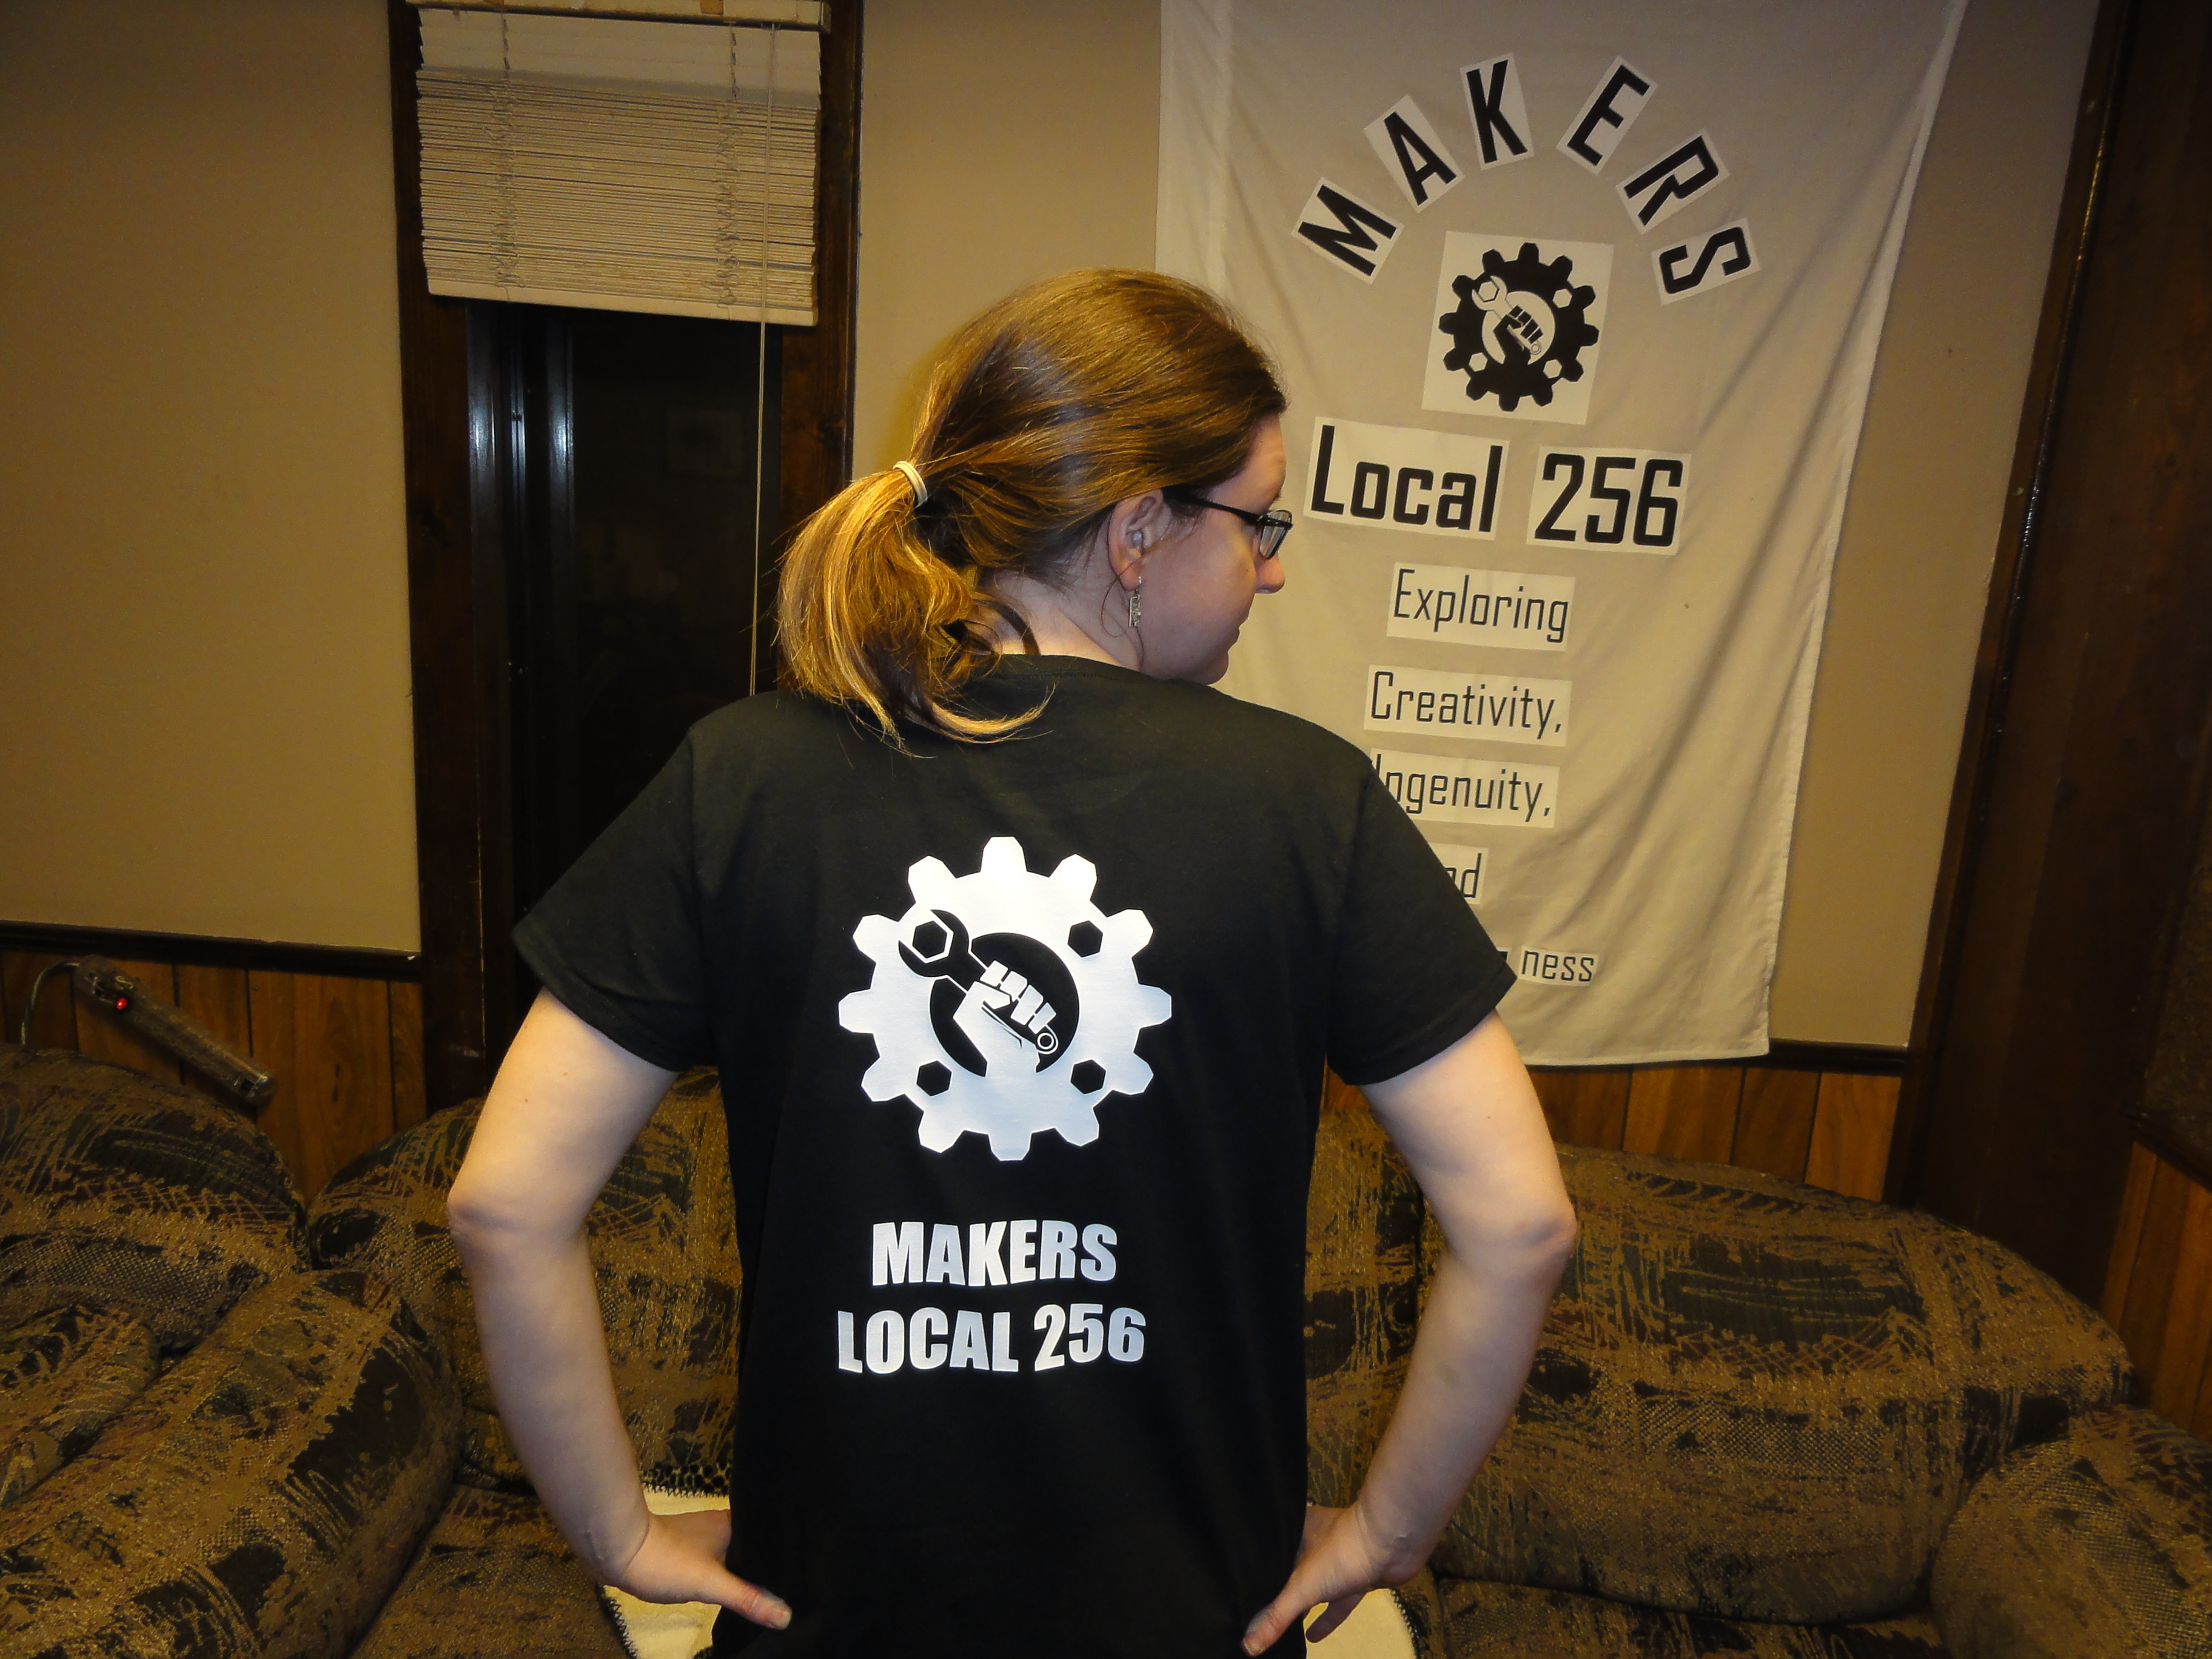
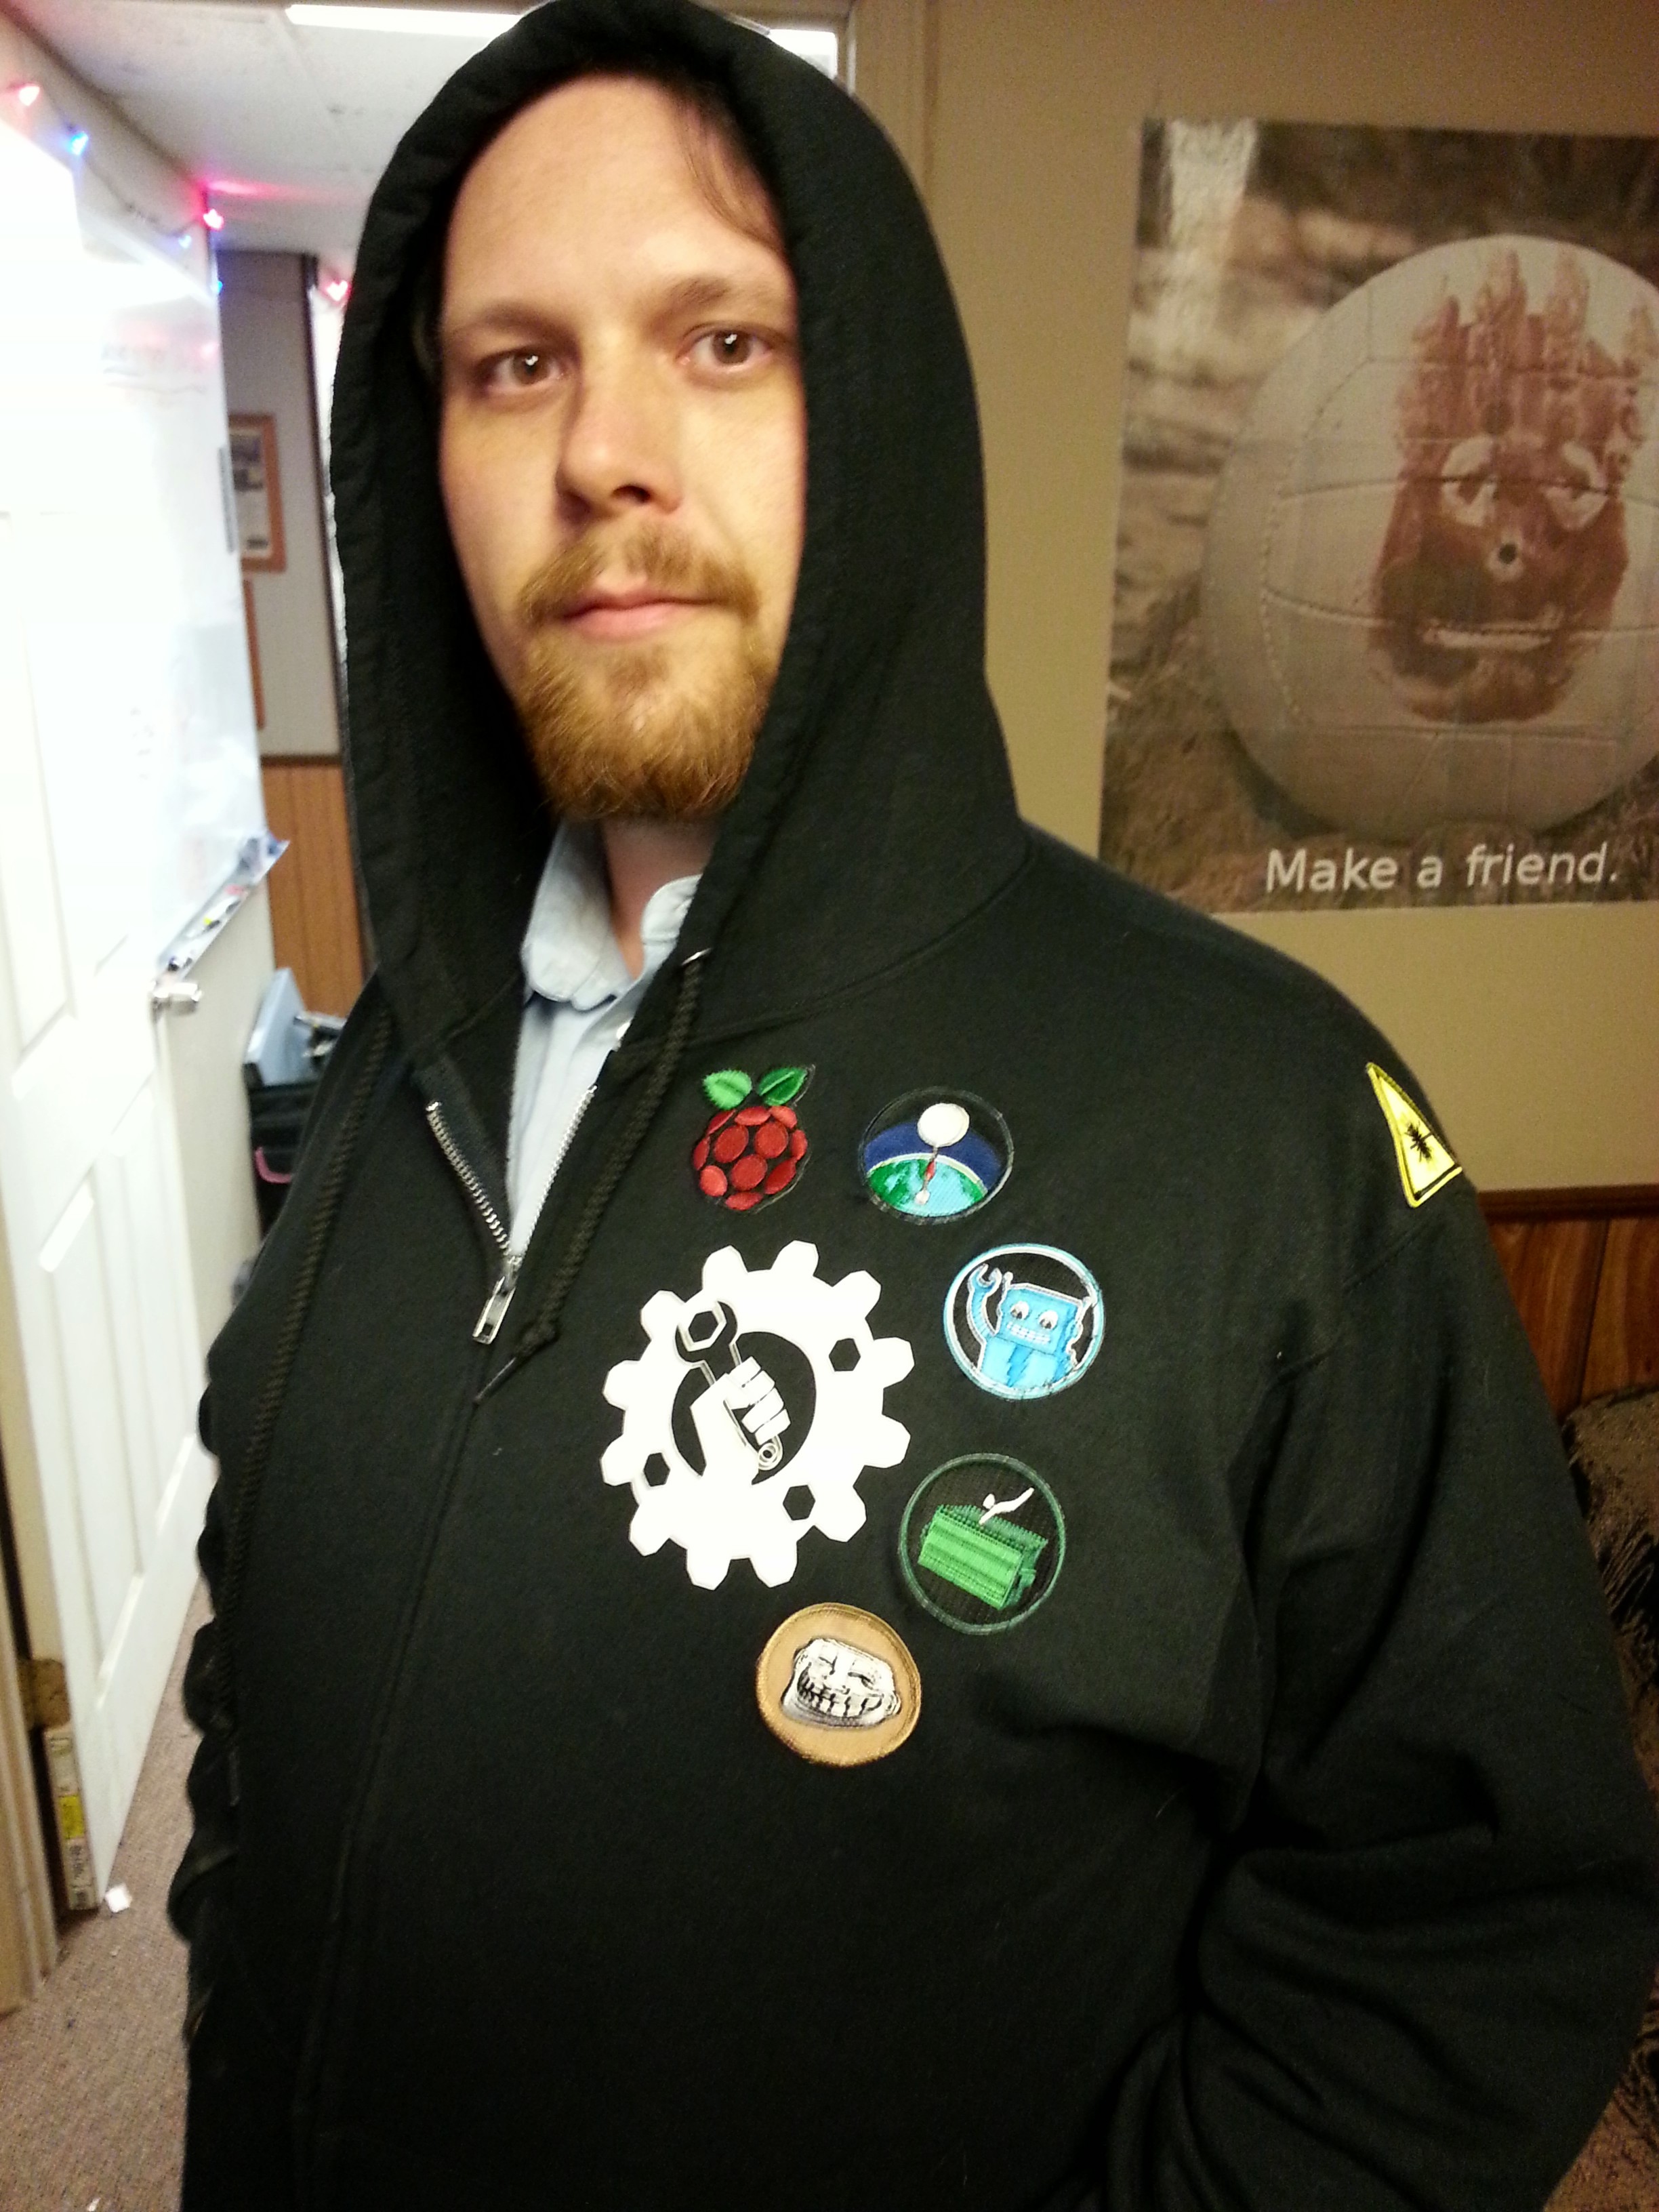
Here’s the finished product!  We only did one side this time.  If you want to add vinyl to both sides of the shirt, it’s a good idea to put down some parchment paper on the press so that the existing vinyl doesn’t try to stick to it.

Feel free to make your own shirts like this with the vinyl cutter and heat press.  The shop may also have other uses for it, such as working on PCBs.

There’s also a wiki page for the heat press.

Who wants some shop-made shirts like this at the next event?  We can make it happen now!

image

Pixel

image

Flying spaghetti monster costume

image

Remote controlled k9 from doctor who

image

Food fighters

image

Setting up for lan party

image

Jokers game (green cloth) and underwater rocket

With the shop cleaning completed, members returned to working on their projects, and starting new ones. Check out the projects below for what they’ve been up to!

Michele working on her Jokers game.
20140401_195614

Lowell cutting silver rings, and the stained wood for some sconces I’m making.

14 - 1
20140401_210009

Jeff replacing a thermostat in a Nissan Sentra.
0401141903

Kinsey screwing off. Edit: troubleshooting eclipse.
20140401_202549

Tim working on his robot.
20140401_202430

Hunter working on the clock (it’s in the window in the background of this picture).
20140401_201041

Kyle and Ryan working on their target stand.
20140401_200511

Barbara and and Lowell working on gemology.
20140401_200628

A while back, I decided I’d had enough of the 3+ USB-attached hard drives I had connected to my primary desktop at home and that it was time I consolidated my digital storage capabilities into one, easily accessible location. It was time for a dedicated network attached storage (NAS) box. Naturally, I figured I’d use mostly parts I already had available and throw one together myself. I’m pretty utilitarian, so this ended up being the epitome of “beige box”. The only things I ended up purchasing for this project are the drives, drive cage, handles, clasps, and some #6-32×3/4″ screws to hold the drive cage and power supply in place. Everything else was something I already had, a donation from someone who wasn’t using an item and never planned to, or scrap material.

Here’s a shot of the NAS as ready to be used:

NAS-closed-thumb

Here’s another shot of it opened up and ready for swapping things around:

NAS-open-thumb

As you can see above, one side of it is still completely empty. In the unused side, there is space for at least two more four-drive cages just like the one I already have installed. Filling out those two spots would give me space for 12 drives total which would require a SATA or RAID card since the board itself can only handle five internal drives.

This ended up taking far longer than it really should have and I swear I will never attempt to make 45 degree edge cuts on MDF ever again without the proper tools being setup the correct way and only when absolutely necessary.

Case Materials:

  • Scrap 1/2″ MDF
  • 4 brass door hinges
  • 10 angle brackets
  • 2 handles
  • Plenty of Titebond wood glue
  • 2 chest latches
  • 6 #6-32×3/4″ screws (drive cage/power supply)
  • 8 #8 bolts/nuts/washers (handles)
  • 16 M6 bolts/nuts/washers (hinge mounting)
  • 20 M5 bolts/nuts/washers (panel-panel attachment)
  • 12 zip ties (motherboard)

Inspired by Crashcart‘s use of Adafruit badges on the Makers Local 256 project wiki, Omegix rises to the challenge of sewing some of the Adafruit patches represented on his wiki page onto his Makers Local Hoodie.

The goal was to have the hoodie be like a boy scout’s merit sash, something wearable around the shop to proudly display hobbies, and help be a conversation starter with new members looking expand their skillsets.

Not sure if I’ve really earned a sewing patch yet, but after some lessons from Enabrintain, Gregabyte, and SqueakyKittie, I can now make the sharp thing go up and down on the electric thread contraption.  At least enough to attach a patch 🙂

For effortless attainment of a Makers Local Hoodie, you can purchase one here: http://makerslocal.spreadshirt.com/

Alternatively, Makers Local 256 will soon be getting a hot press, and you can have an opportunity to make one of your own design 🙂

20140325_213116 20140325_213130 20140325_213136