I was listening to Major Tom by Shiny Toy Guns in my car the other day. There’s a part in the song where she says,

“The count goes on

4, 3, 2, 1…”

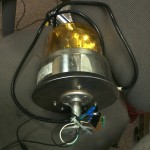
When I heard those lyrics, I thought of the rocket launch I went to on January 14, 2012. Dmitriy and John, 2 other members of ML256, launched their rocket Safety Orange twice that day. I thought that it would be really cool to sync up the rocket taking off and the “4, 3, 2, 1” part of the song.

So I started playing around with some video editing software. After a few minutes of editing the video that was taken from that day, I realized that the video editor I had wasn’t going to work for this project. So I talked to crashcartpro and he suggested I use OpenShot.

And away I went with the video editing. With help from crashcartpro, ratmandu, ramgraden, and korc I had a 2 minute and 24 second video in 2 days.

The rocket launch happens about 53 seconds in and at about 1:50 is where the rocket can be seen again deploying its parachute. Make sure you watch till the end…Dmitriy does a happy dance!

I used Inkscape for the intro and credits clips. And of course, OpenShot for the video editing. The song in the background is, you guessed it, Major Tom by Shiny Toy Guns.

Here is a link to the video.

Here is some more info about Safety Orange.

I’m really excited to do some more video editing in the very near future! Let me know what you think of this video!

-Kix

I decided to make a flag for the shop.

I started with 2 yards of a 100% cotton piece of fabric. I sewed the sides of the fabric to the size I wanted the flag to be. I also included a part on the left side of the flag for a pole.

I purchased “Jolee’s Easy Image” iron-on transfer sheets.

Iron-On Transfer Sheets

I printed my design on the transfer sheets. I then laid the transfer sheets out on the fabric and figured out how I wanted the words positioned. Once I had the final layout, I began ironing the words on.

Here is a picture of the flag hanging up at the shop:

Hanging up at the shop

I really enjoyed making this flag. Let me know what you think, unless it’s about the hyphen!

Box of dead hard drives

Tonight during our open house we decided to do a Valentine’s Day themed project.  One of our members, John Kelly (CandleKnight), brought a box of dead hard drives, non-working PC power supplies and a table full of tools.  He showed a few of us and a non-member visitor how to make a flower from the parts found inside these things most everyone has in their homes.

Since John was taking the time to show us how to make the flowers and we had to share some of the tools it took us right around an hour and a half to make one.  Some of us even took a little extra time to bend the stem into something resembling leaves.  Let us know in the comments what you think!

Inside a hard drive
Inside a power supply
Parts and pieces ready
Complete flower with a leaf

Click here for more photos:

https://plus.google.com/photos/116575142518321294189/albums/5709233976085581745?authkey=CNbC1-H_2dvyKw


The two Matts mounting the wigwag lightThe two Matts installed the Wigwag alert light on top of our member storage shelves tonight.  Now when users need our attention in the IRC channel not only do we get the robotic British lady’s voice over the intercom to tell us, we now have a bright, spinning light to grab our attention as well.

Go here to see even more pictures and a video of it in action!

https://plus.google.com/photos/116575142518321294189/albums/5705228437791855137


We soldered a Teensy 2.0 to a 240V relay then attached a wig wag light to the relay in order to create a nice and noticeable way to alert anyone at the shop for various reasons.  One plan is to eventually hook this to our doorbell whenever we get one of those installed for visitors so we know to open the door for them.  Right now you have to knock really loud and hope someone is in the office to let you in.

The interface is very simple.  Hook a USB cable to the Teensy and any computer.  Then connect through the USB serially and just send it a “1” to turn the light on.  Send it a “0” to turn it off.  It couldn’t be simpler!  Here’s the arduino sketch code we used to make it work:

/* USB Relay

 This is for a teensy connected to a relay on PIN 1.
 Send it a "1" to turn it on (HIGH)
 Send it a "0" to turn it off (LOW)

*/

int pinNum = 1;
int input = -1;

void setup()
{
    Serial.begin(9600); // USB is always 12 Mbit/sec
    pinMode(pinNum, OUTPUT);
    digitalWrite(pinNum, LOW);
}

void loop()
{
    if(Serial.available())
    {
        input = Serial.read();
        if(input == 1 || input == '1')
        {
            digitalWrite(pinNum, HIGH);
        }
        else if(input == 0 || input == '0')
        {
            digitalWrite(pinNum, LOW);
        }
    }
}

Here’s a link to more pictures with more detail:

http://plus.google.com/photos/116575142518321294189/albums/5705228437791855137