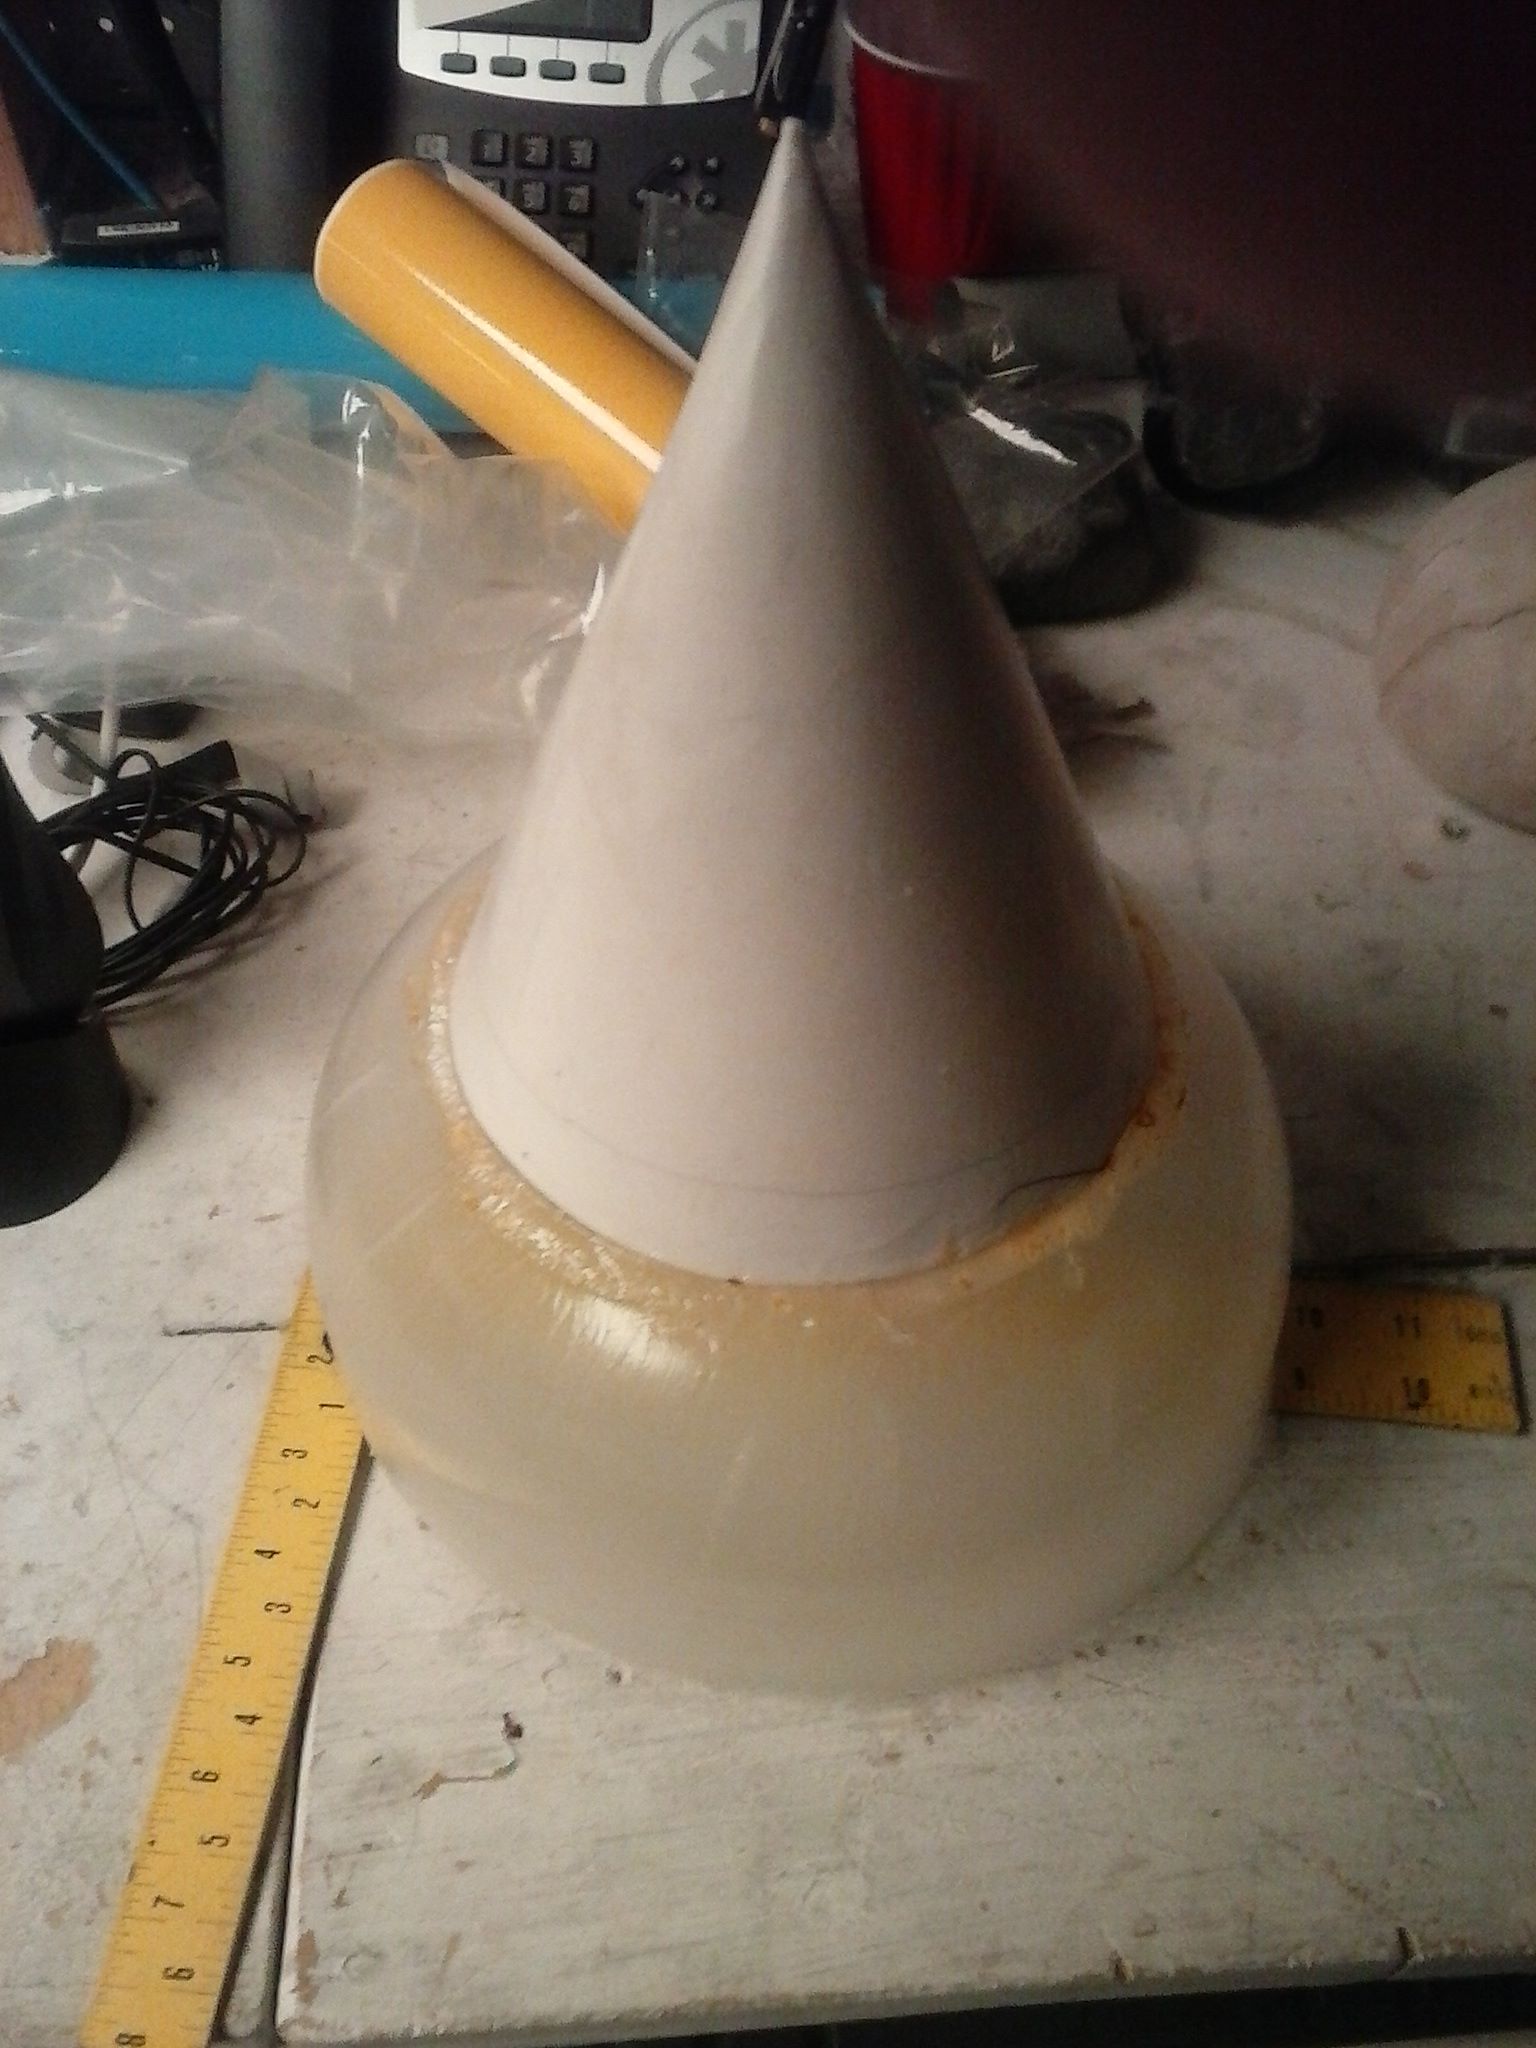
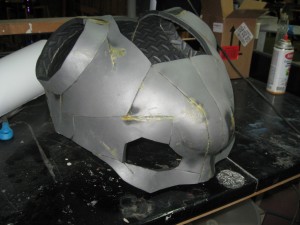
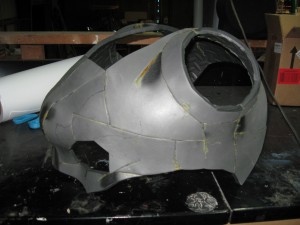
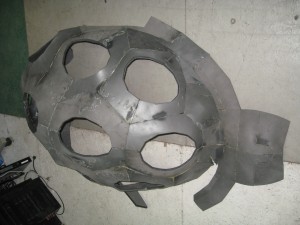
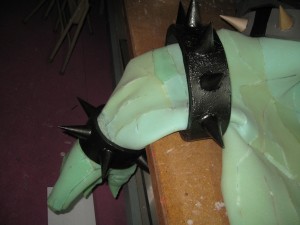
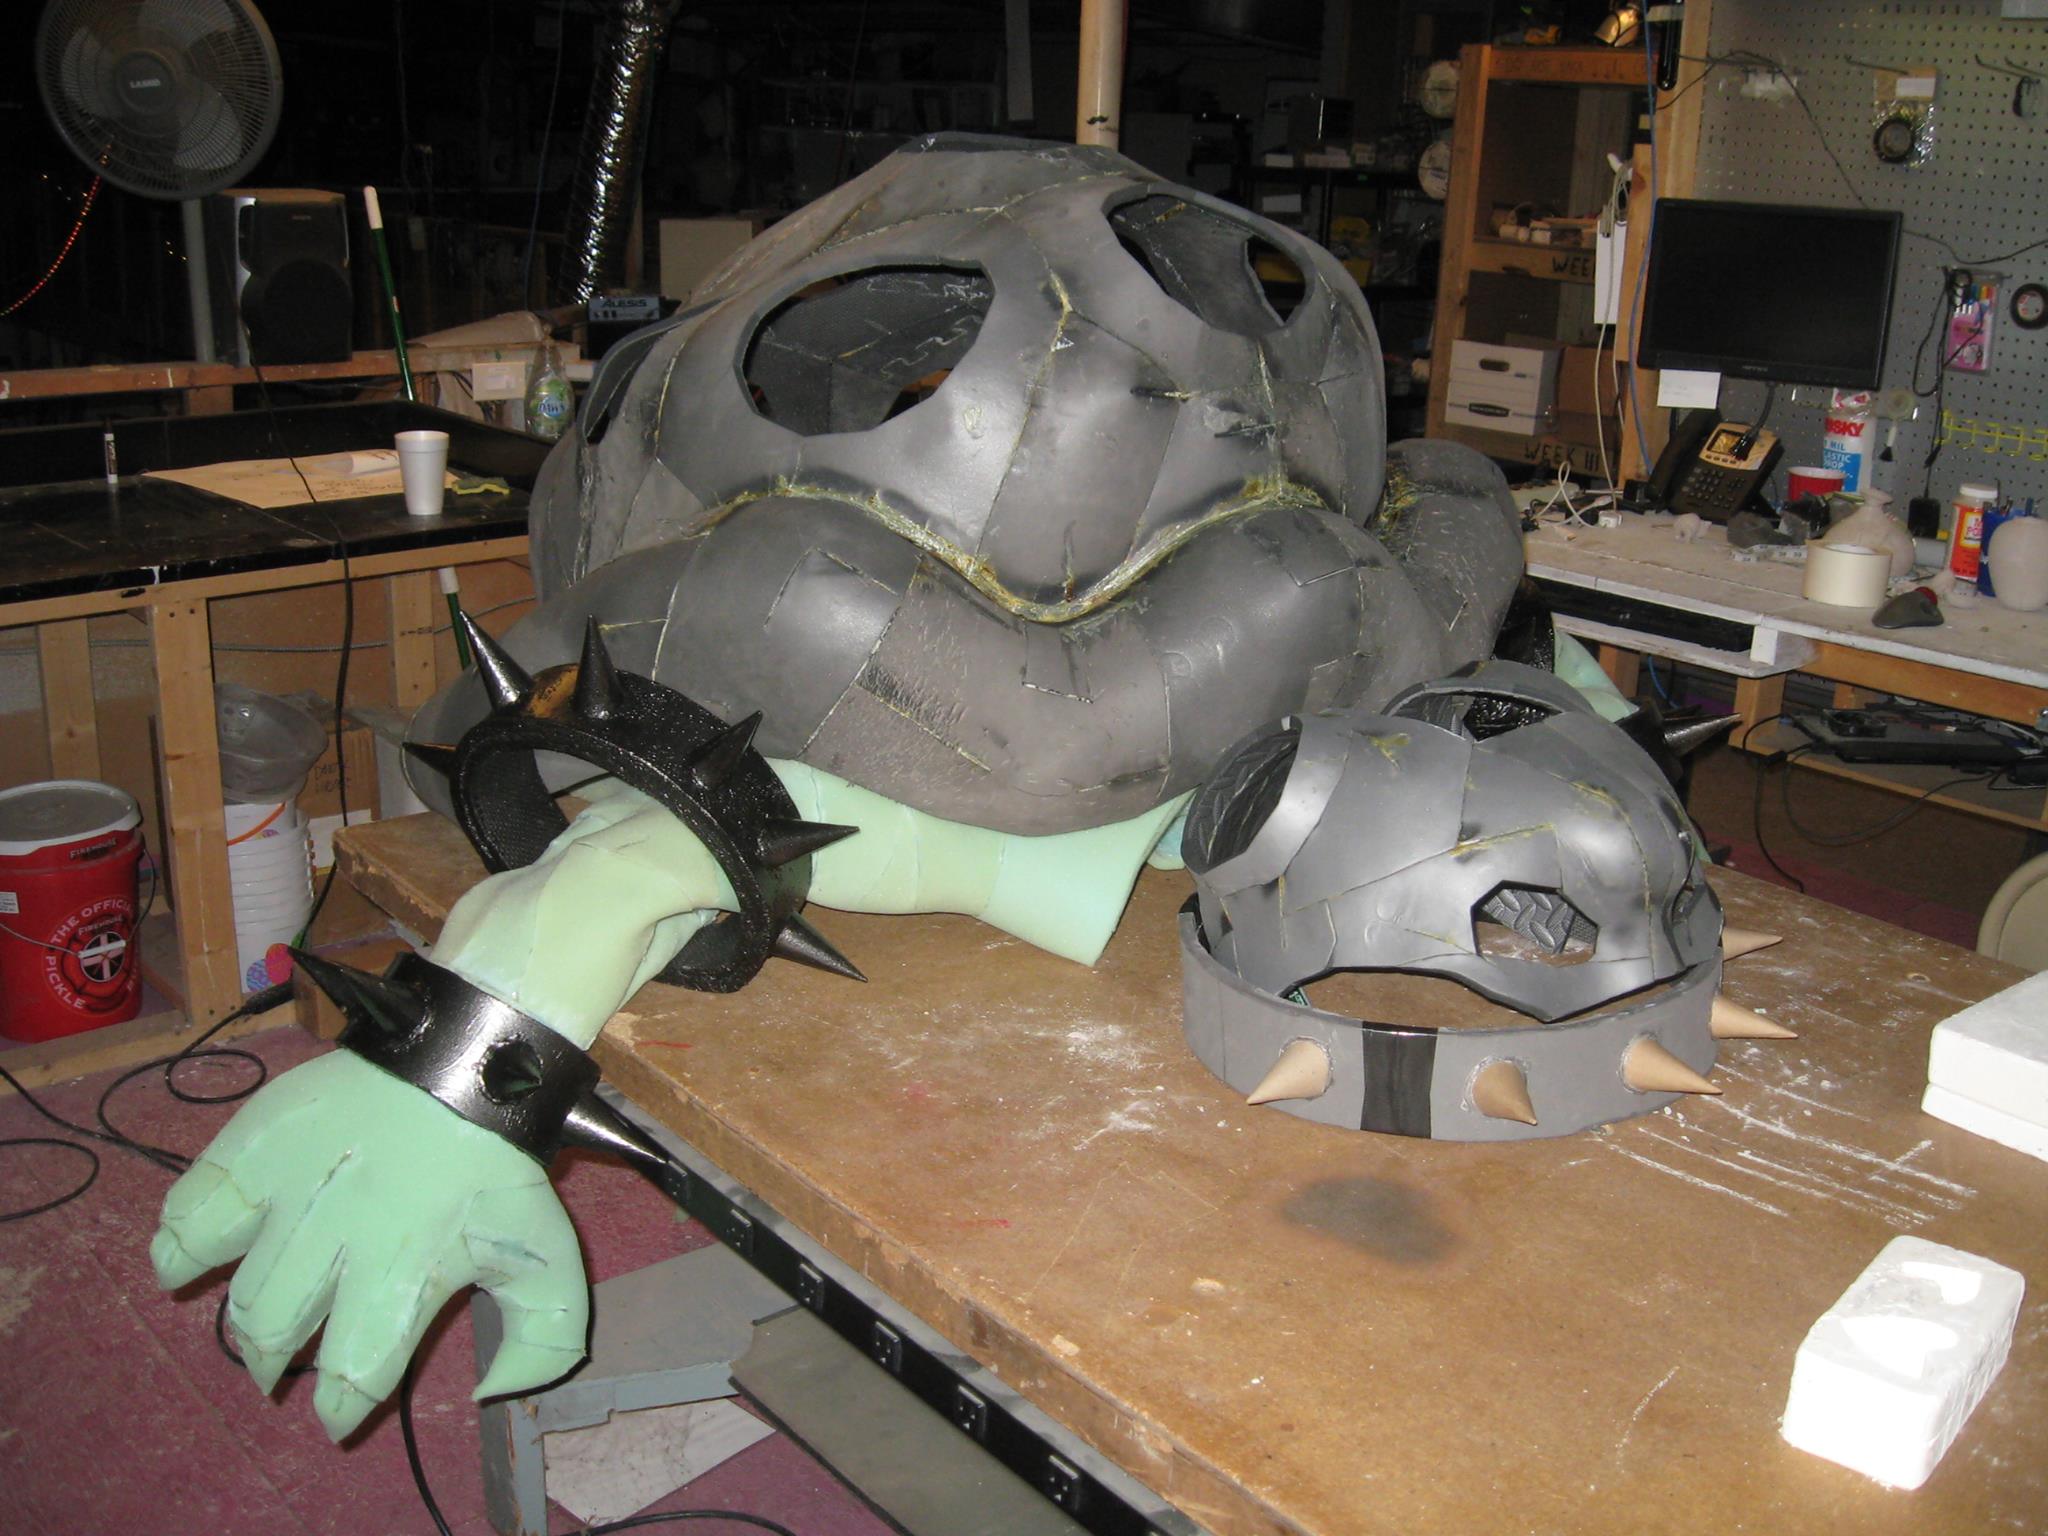
Just a quick update on new stuff.  Juggling projects as always, and progress posts on those are pending, but I figured I’d post another one of my personal pet project which is slow-going.  I have not been keeping tabs on the amount of hours invested into this, but it’s going smooth so far, even with the recent lack of laser-cutter.  I can simply print the pepakura files, trace them onto foam like in the past, and this time, use a bandsaw to cut, rather than a hot knife.  Anyway, on to photos.

The "rim" of the giant shell helps the whole thing keep its' shape, and will soon have a thin, curved pvc pipe frame inside, to attach it to the ALICE backpack frame.
The “rim” of the giant shell helps the whole thing keep its’ shape, and will soon have a thin, curved pvc pipe frame inside, to attach it to the ALICE backpack frame.
Rear view of the shell. The exterior will be covered in spray adhesive, then fiberglass mat, then a few coats of resin, sanded and carved, to simulate the carapace of an ancient, battle-hardened tyrant.
This here is the result of real teamwork. I was walking upstairs and spied a bowl on the shelf. It fit the openings in the giant shell almost perfectly, and had the proper shape for the base of any of Bowser's massive shell-spikes. Affix a posterboard cone, ModPodge it, and soon to be assisted in silicone moulding and casting this ten times by Mr. Daniel Valdez.
This here is the result of real teamwork. I was walking upstairs and spied a bowl on the shelf. It belonged to Phil, and he okayed it for use.  It fit the openings in the giant shell almost perfectly, and had the proper shape for the base of any of Bowser’s massive shell-spikes. I fashioned and affixed a posterboard cone, ModPodged it, and am soon to be assisted in silicone moulding and casting this ten times over, by Mr. Daniel Valdez.
With assistance from Dominic holding the shell, I test-fitted the body, still with incomplete tail and legs/feet. Since this is constructed using the 3d model directly from the WiiU video games, this is looking VERY on-model, and I'm very pleased.
With assistance from Dominic holding the shell, I test-fitted the body, still with incomplete tail and legs/feet. Since this is constructed using the 3d model directly from the WiiU video games, this is looking VERY on-model, and I’m very pleased.

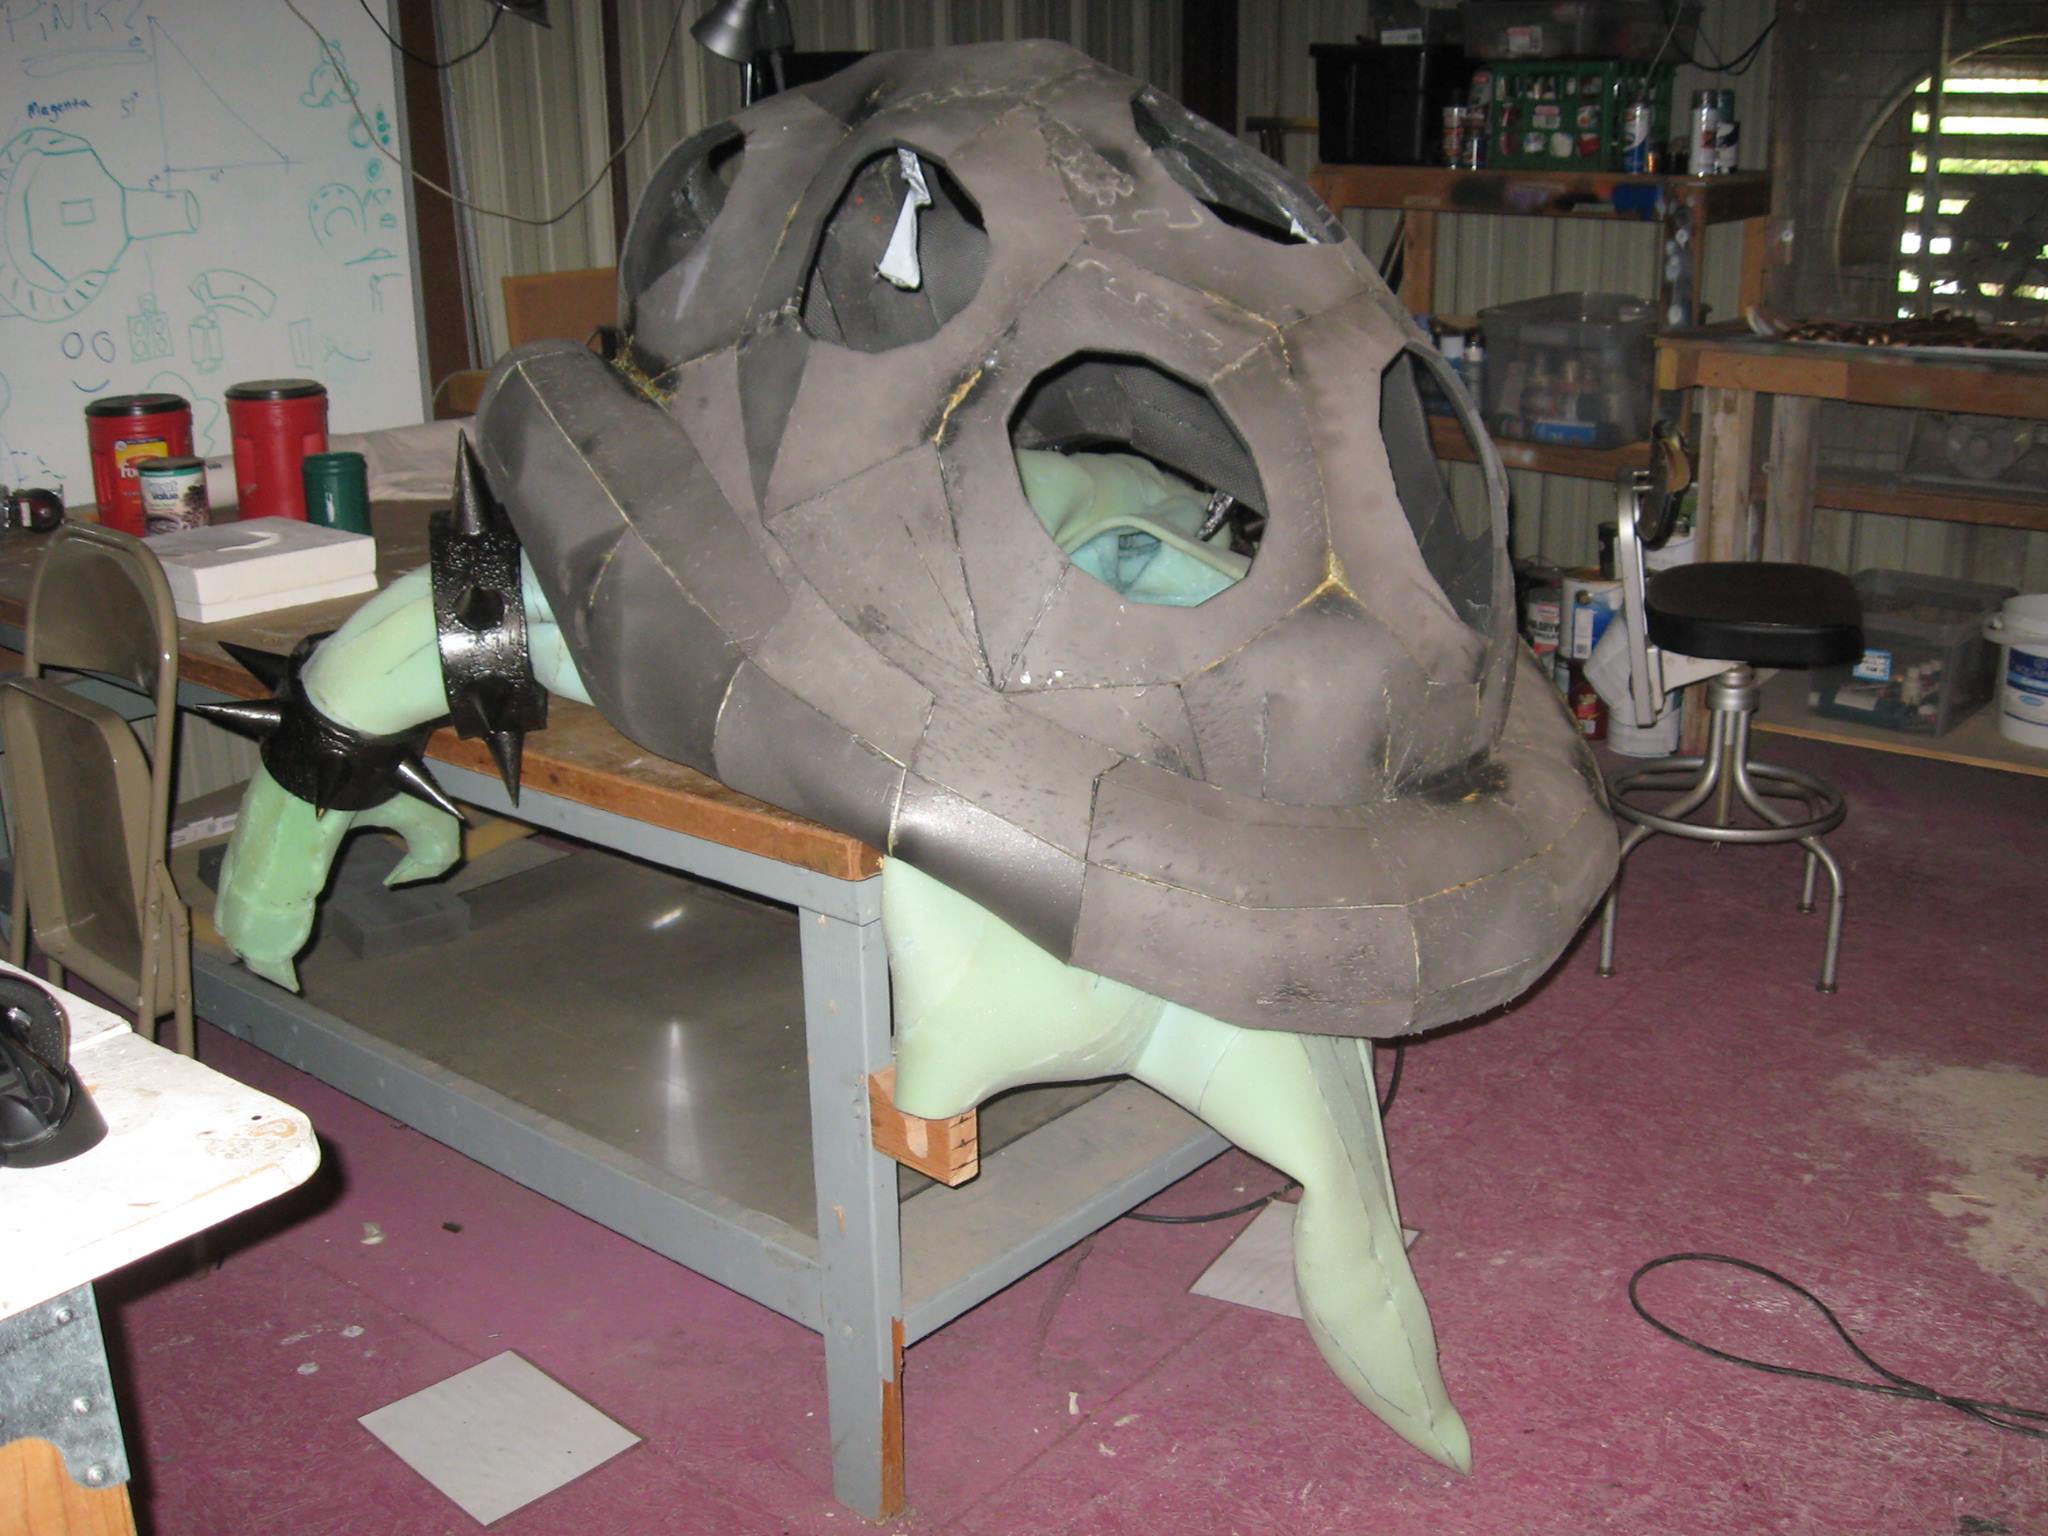
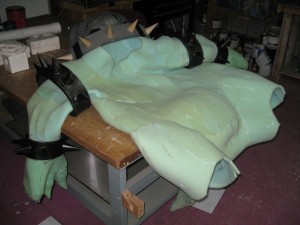
Internal structure for the body will be needed, to keep the shape.  I’d initially thought foam pillars, but plastic “ribs” would be better, in the torso, arms and leg area.  I’ll be talking with CJ about 1-foot-tall stilt platforms soon.  More to come, thanks for reading!

Is this thing on?  Oh, good, at last!

For my first post, I’ll just share a little bit about all the stuff I’ve been working on, 90% of which is for costume commissioners.  A few weeks ago, I finished up a pair of Megaman boots, made from EVA Foam, and these will be getting shipped out soon.  Currently in the works are two more Ghostbusters Proton Packs (the 2009 Video Game variety, with all the enormous physical add-ons), which puts me at 10 pack builds under my belt.  Then an “Extreme” proton pack from the “Extreme Ghostbusters” cartoon, and a GB2 Slime Blower.  There is a full Batman Arkham Origins suit (sans cowl) underway as well.  Next up is a wearable EVA foam Edward Elric arm from the Japanese animated “Full Metal Alchemist” franchise, and a Fallout 4 Pipboy.

On the side of all this, for myself, as some of you may have seen, I’ve been working on what will hopefully be my first fully-enclosed suit cosplay, Bowser.

Bowser's head in progress
Bowser’s head in progress
Bowser's head in progress
Bowser’s head in progress

The head’s gonna have animatronic eyes with cameras in each sphere, connected to two small screens fitted inside a Google Cardboard headset, for stereoscopic vision.  There’ll also be some combination of e-cig vape mechanism and fog machine for smoke breath.  Feel free to ask questions if you’ve got ’em.  Much more to come!

EVA Foam Bowser Shell.
Bowser suit in progress.
EVA Foam cuffs with paper mache spikes from eBay, coated in plastidip.

Member Michele Cotten has put over 70 hours into her latest costume.

This her her own personal design, and is her take on Batman’s Poison Ivy character done in the Japanese Lolita fashion style.

The work for this was done upstairs in Makers Local 256′ sewing area.

ivy1 ivy2

Between rigging up a small LED matrix to my member storage and returning my 3D printer + webcam to the shop, the idea of measuring ambient light has come up several times. Finding a photoresistor to do this turned out to be beyond simple: a member gave me one to use. But once the thought had crossed my mind, I wanted to follow through with this LED sensor thing and see if it’s really up to snuff.

First, gotta find out how it all works. Easy: another shop member wrote a library for it. And the library references an Arduino page which describes the operation: Light Emitting Diodes are typically wired to produce light. But, if you attempt to apply reversed voltage, then the LED will reject current (it is a diode after all) and will do something I find pretty cool: it acts as a tiny capacitor. And even cooler: the capacitor’s characteristics will change based on how much light is reaching the LED’s substrate. So this library will “charge” the LED by applying VCC->VSS backwards on the device, and then measure the length of time it takes for the capacitor to discharge (which is dependent on the ambient light). Neat!

Read More →

Way back during the summer we hanged insulation in the fab-lab, making it a more consistent temperature and opening up the way to eventually creating another properly air conditioned space at the shop. Once finished, there was still a pretty large amount of insulation strip left over; it was subsequently buried under a table upstairs.

This past weekend it snowed in Alabama, and I more or less intentionally got snowed in at the shop. During the resulting impromptu movie night, I had a chance to discuss just how damn cold it was with other shop members. We eventually landed on a concern that the shop water heater was left running in near-outdoor temperatures 24/7. Recalling the leftover insulation, we shuffled out of the warm office and began wrapping the magic hot water provider in fiberglass insulation.

First up was to apply a few feet of regular pipe insulation to the copper piping. This is mostly a for-the-hell-of-it measure, since we can’t insulate the hot water pipe already installed in the walls.

Installing pipe insulation on the water heater.

Next we cut squares from the insulation and placed them around the heater core. The system is located poorly in a too-small alcove, so insulation only fit around four of the six sides of the heater.

Ta-Da!
Ta-Da!

Ideally we’d want to create a large blanket around the heater and secure it with twine, but this will hopefully provide us with somewhat better temperature retention anyway.

Next up on the list is installing an electronic timer so that the heater doesn’t spend half of the week creating hot water that no one is around to use.