Firstly, I’d like to take this opportunity to thank everyone at Makers Local 256 for their assistance and support throughout making this. I could not have accomplished this project without all of the wonderful people I met in HSV. As someone from out of town and only in HSV for the summer, I felt incredibly welcomed by everyone at the shop.

Secondly, a huge amount of appreciation is in order to Reddit’s /u/fetchbeer! He built the original version of this cube and was kind enough to post the plans to make it as well, which I used extensively in making my own slightly-modified version. His original post is available here.

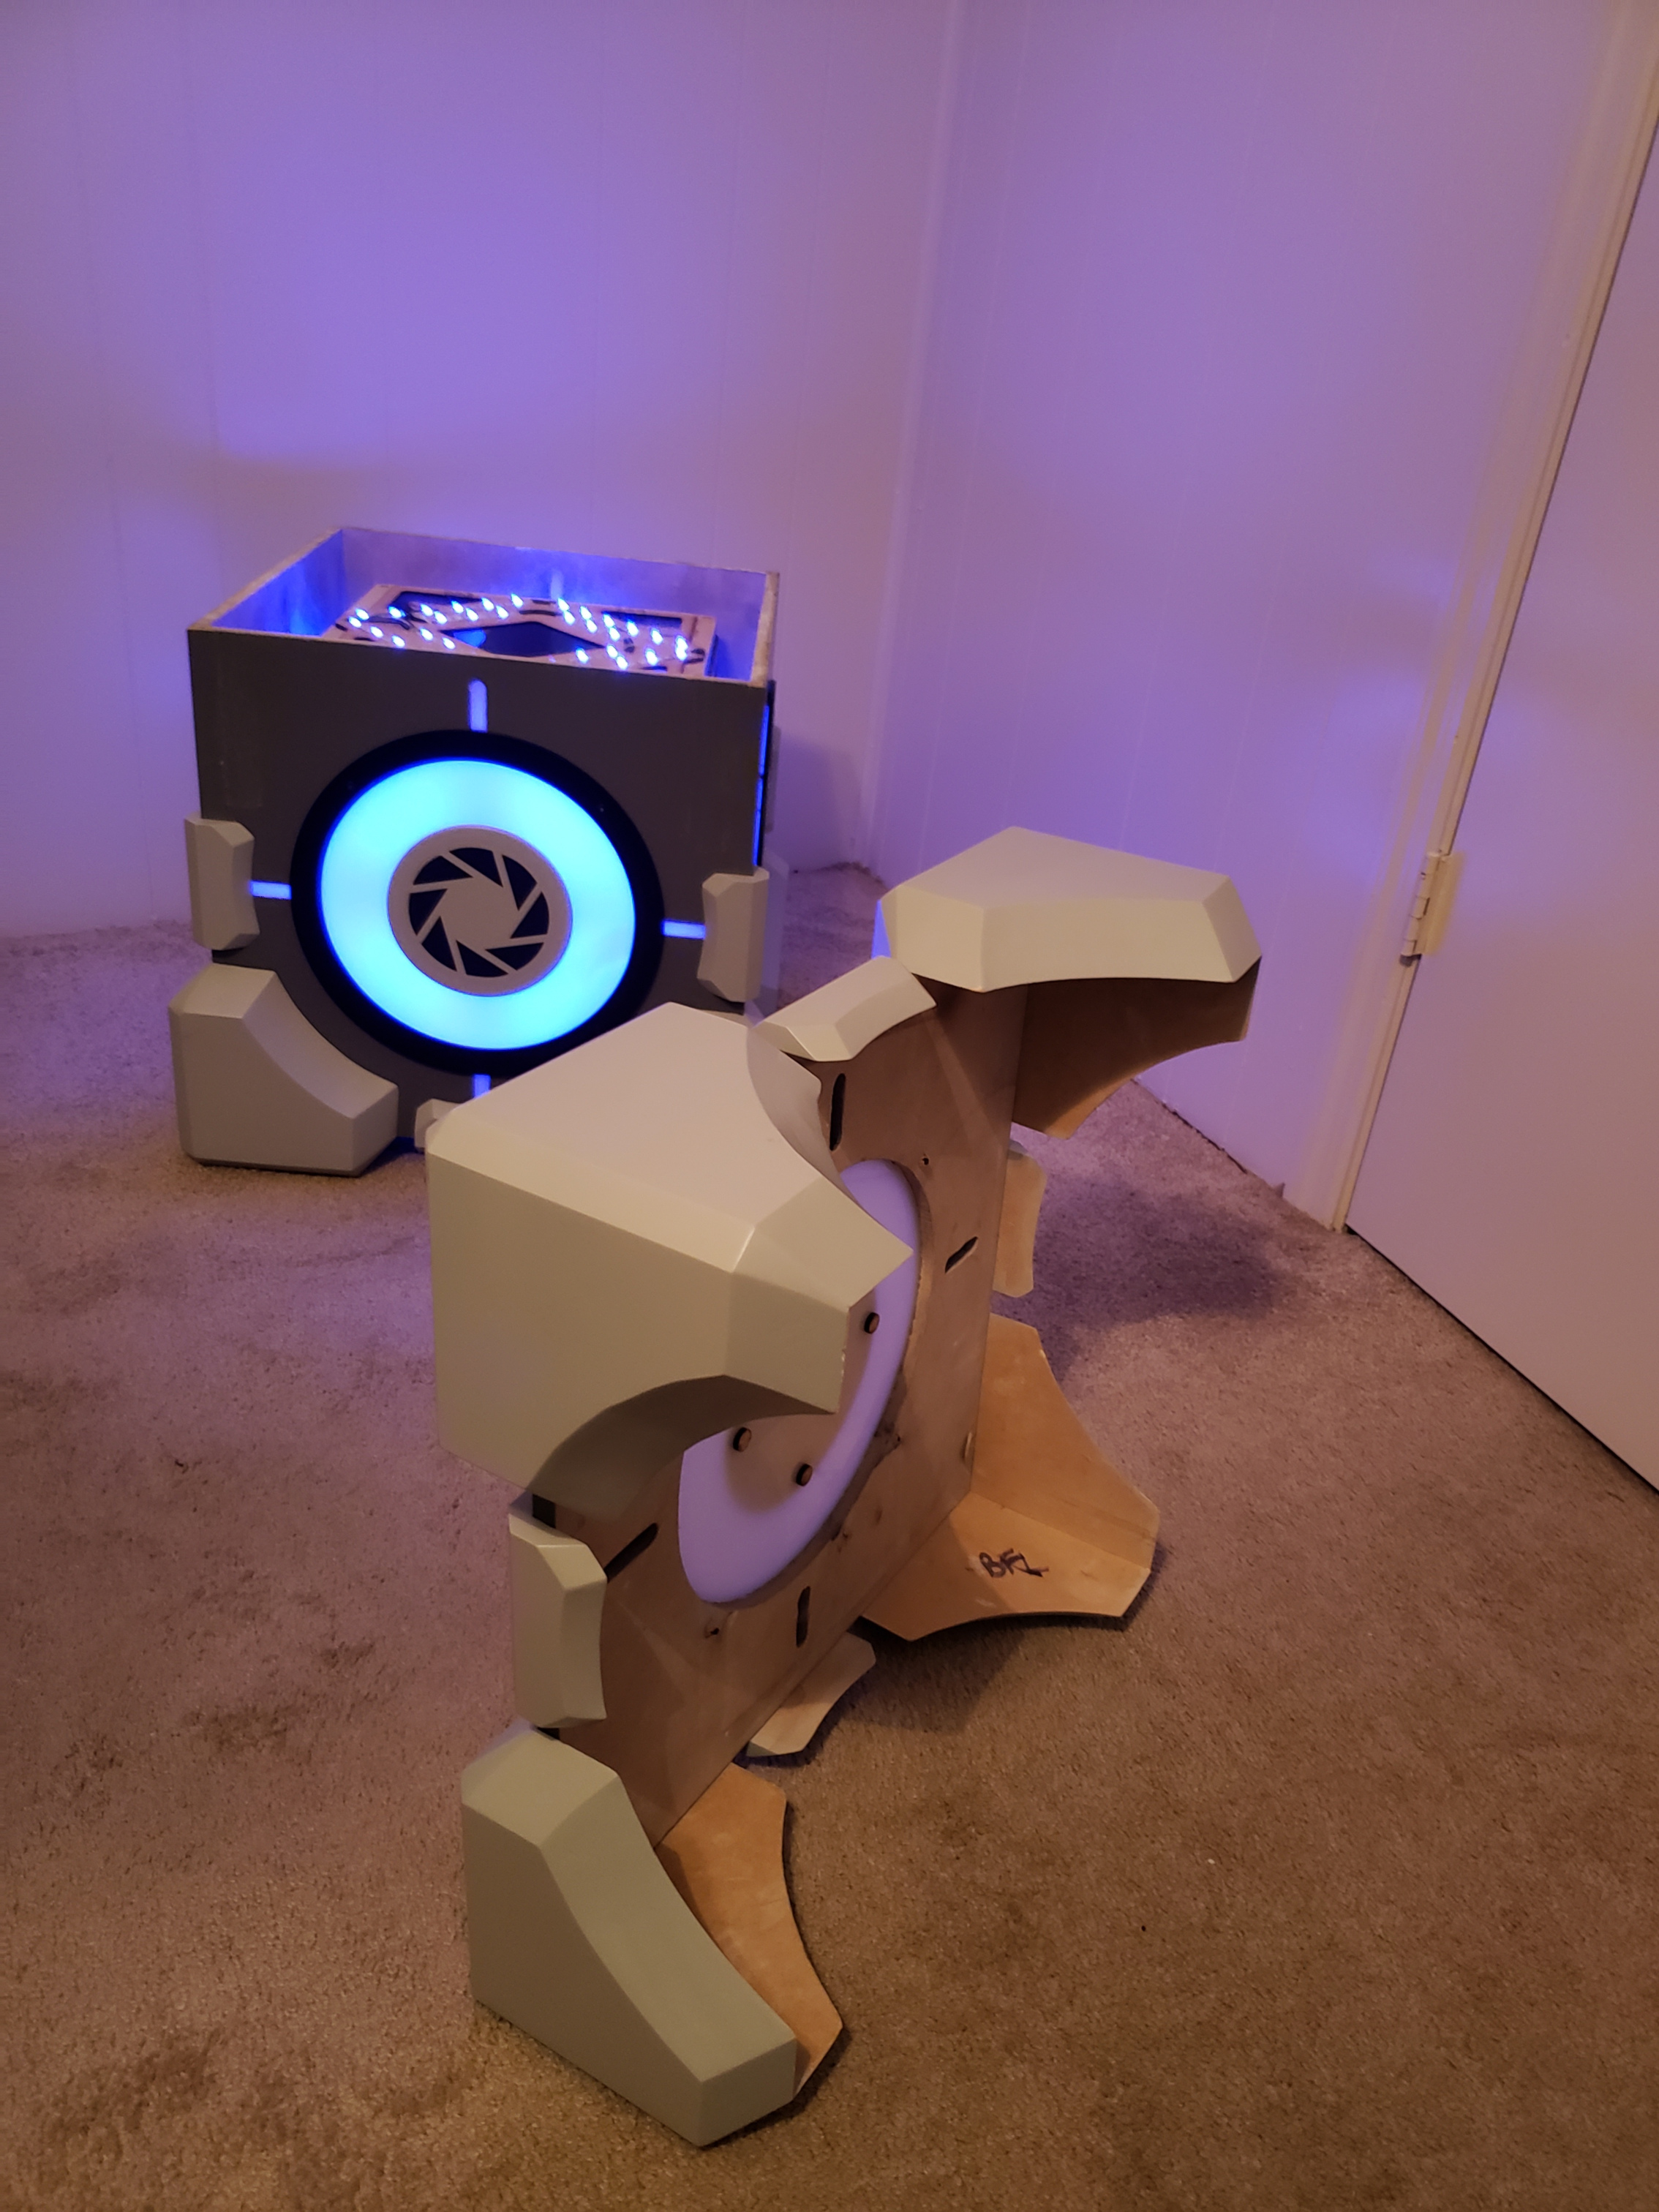
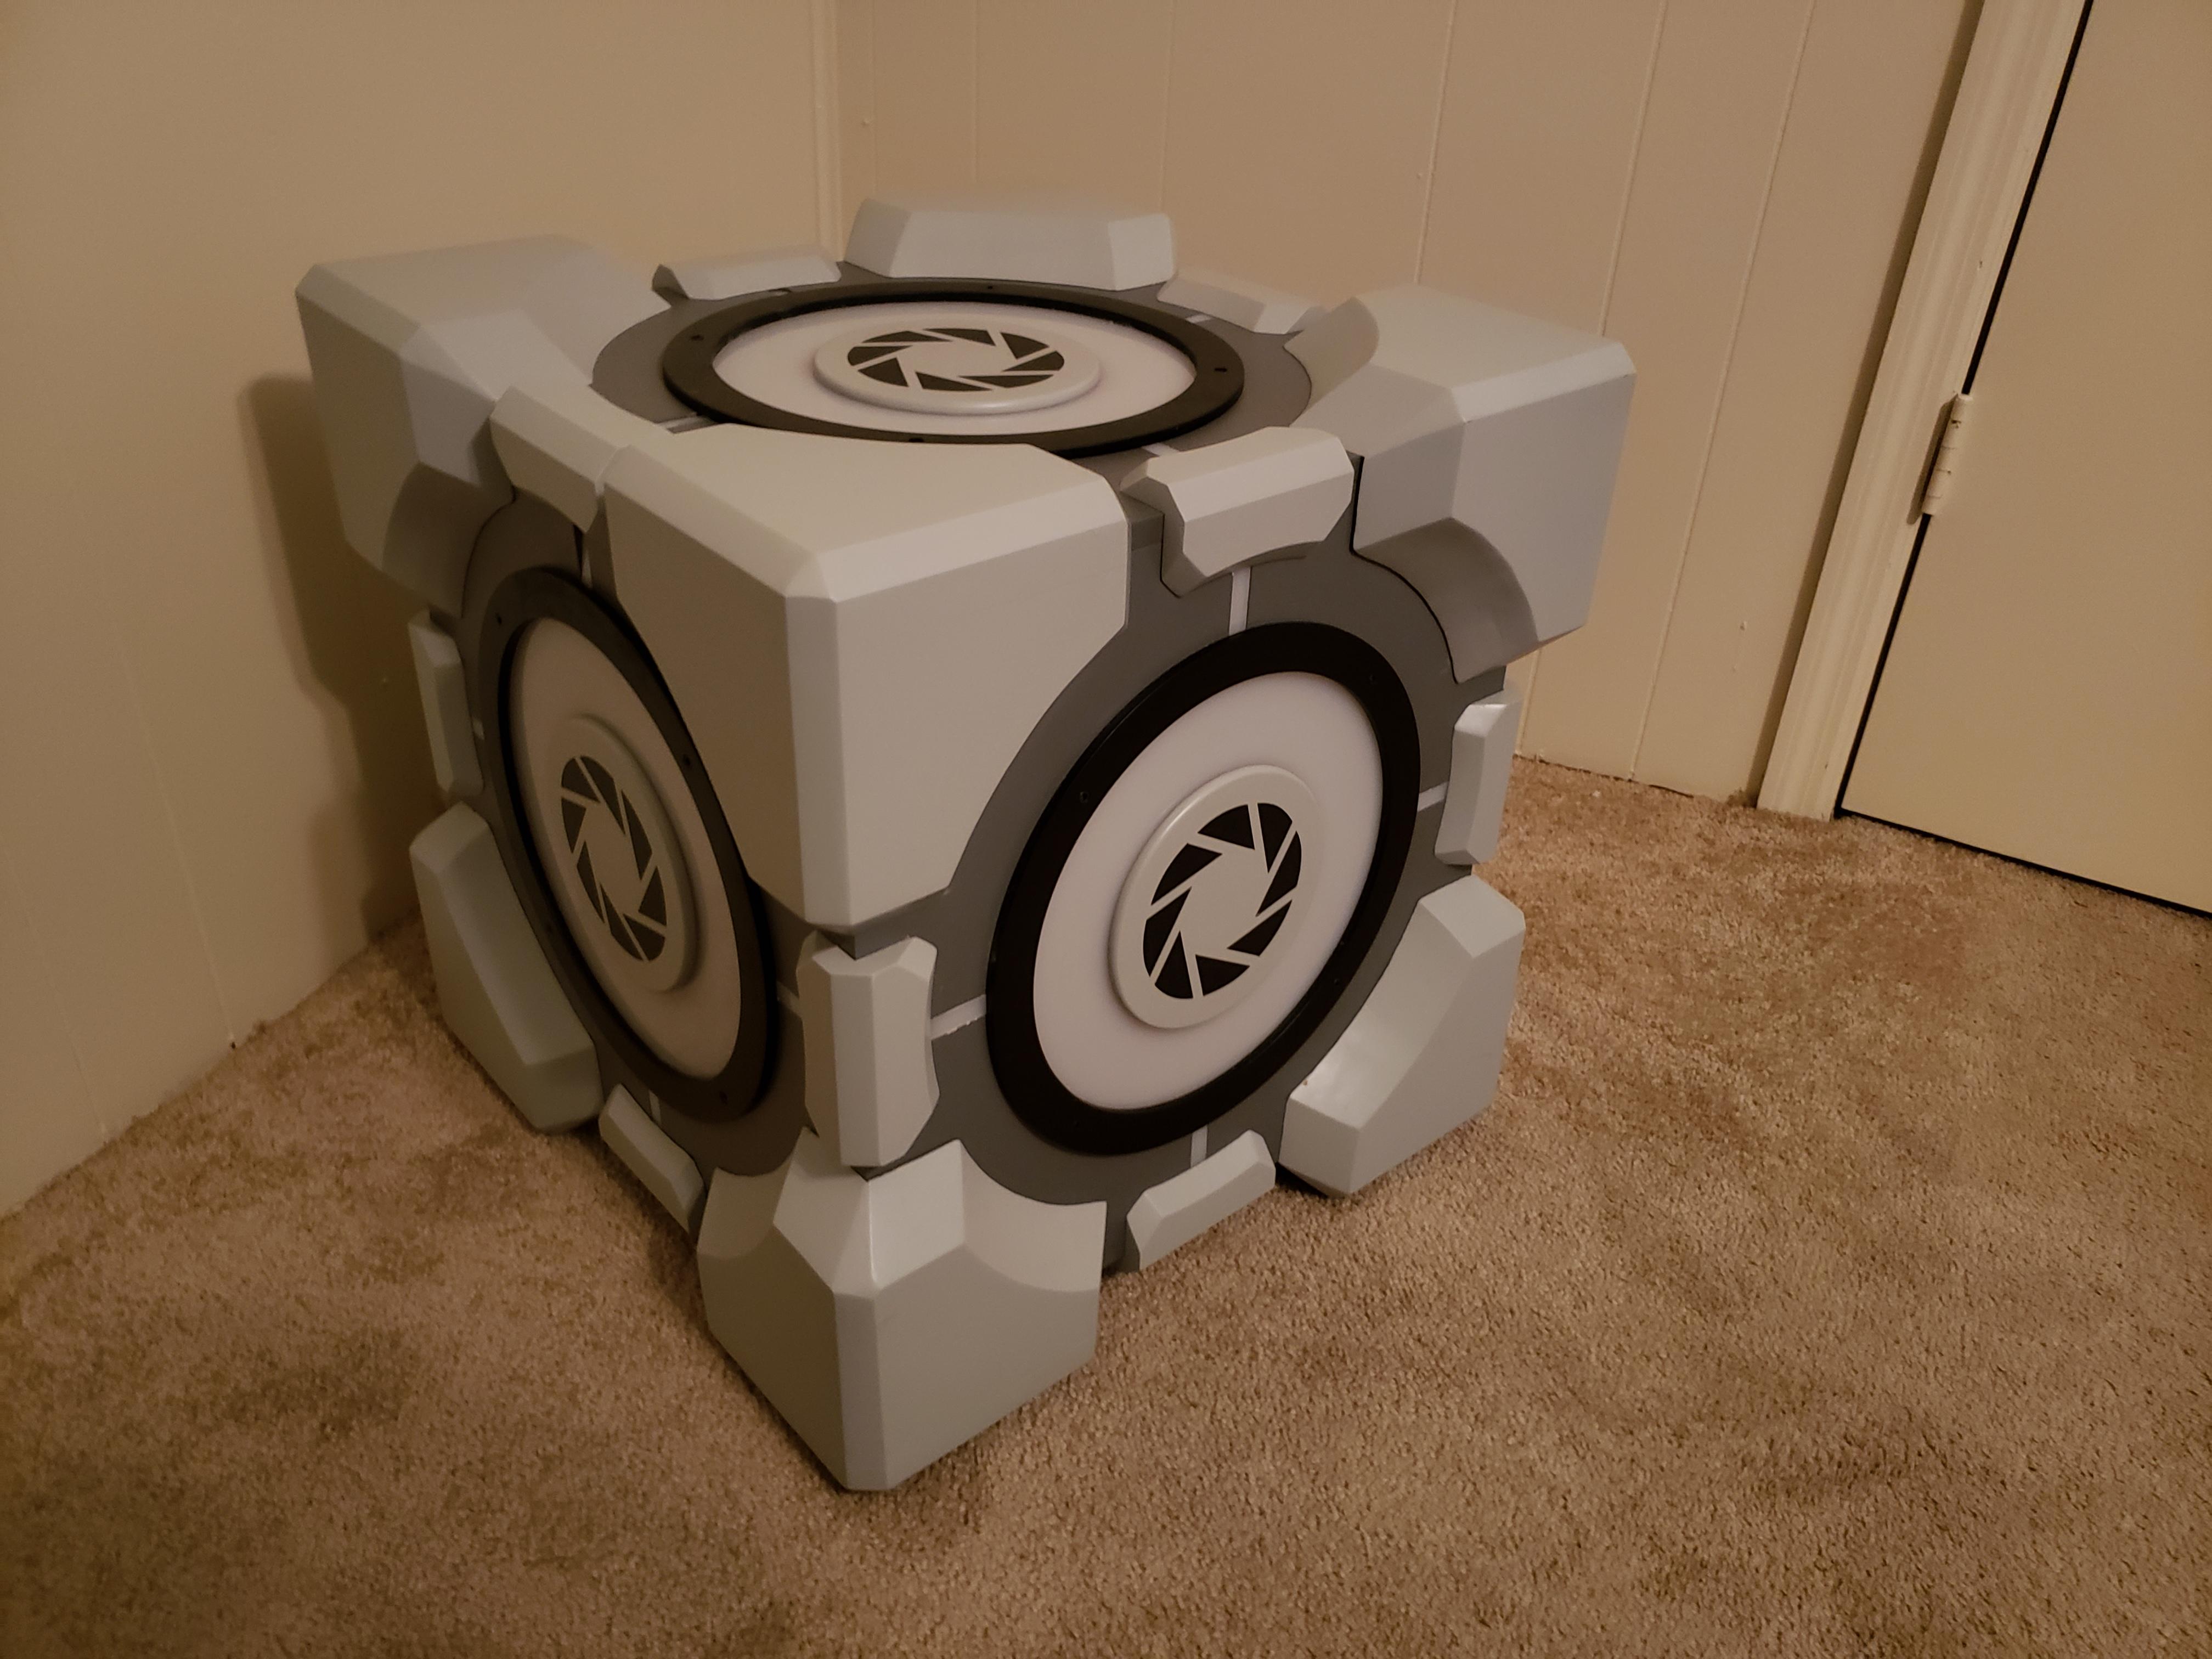
Without further ado, here’s some photos of the completed project! The Weighted Storage Cube is 20″ wide and tall, and approximately 2/3 the scale of what is displayed in Portal. My particular cube weighs about 60lbs with all the computer hardware mounted inside – my biggest modification over fetchbeer’s design was the addition of an internal cube which contains all of my home-networking equipment and a few hard drives I set up as a Plex media server. I plan on doing a complete write-up of my build process which will happen in stages. Unfortunately, I’m still taking classes as I finish up my degree so they might be spread apart over several weeks.

Weighted Storage Cube Front 2

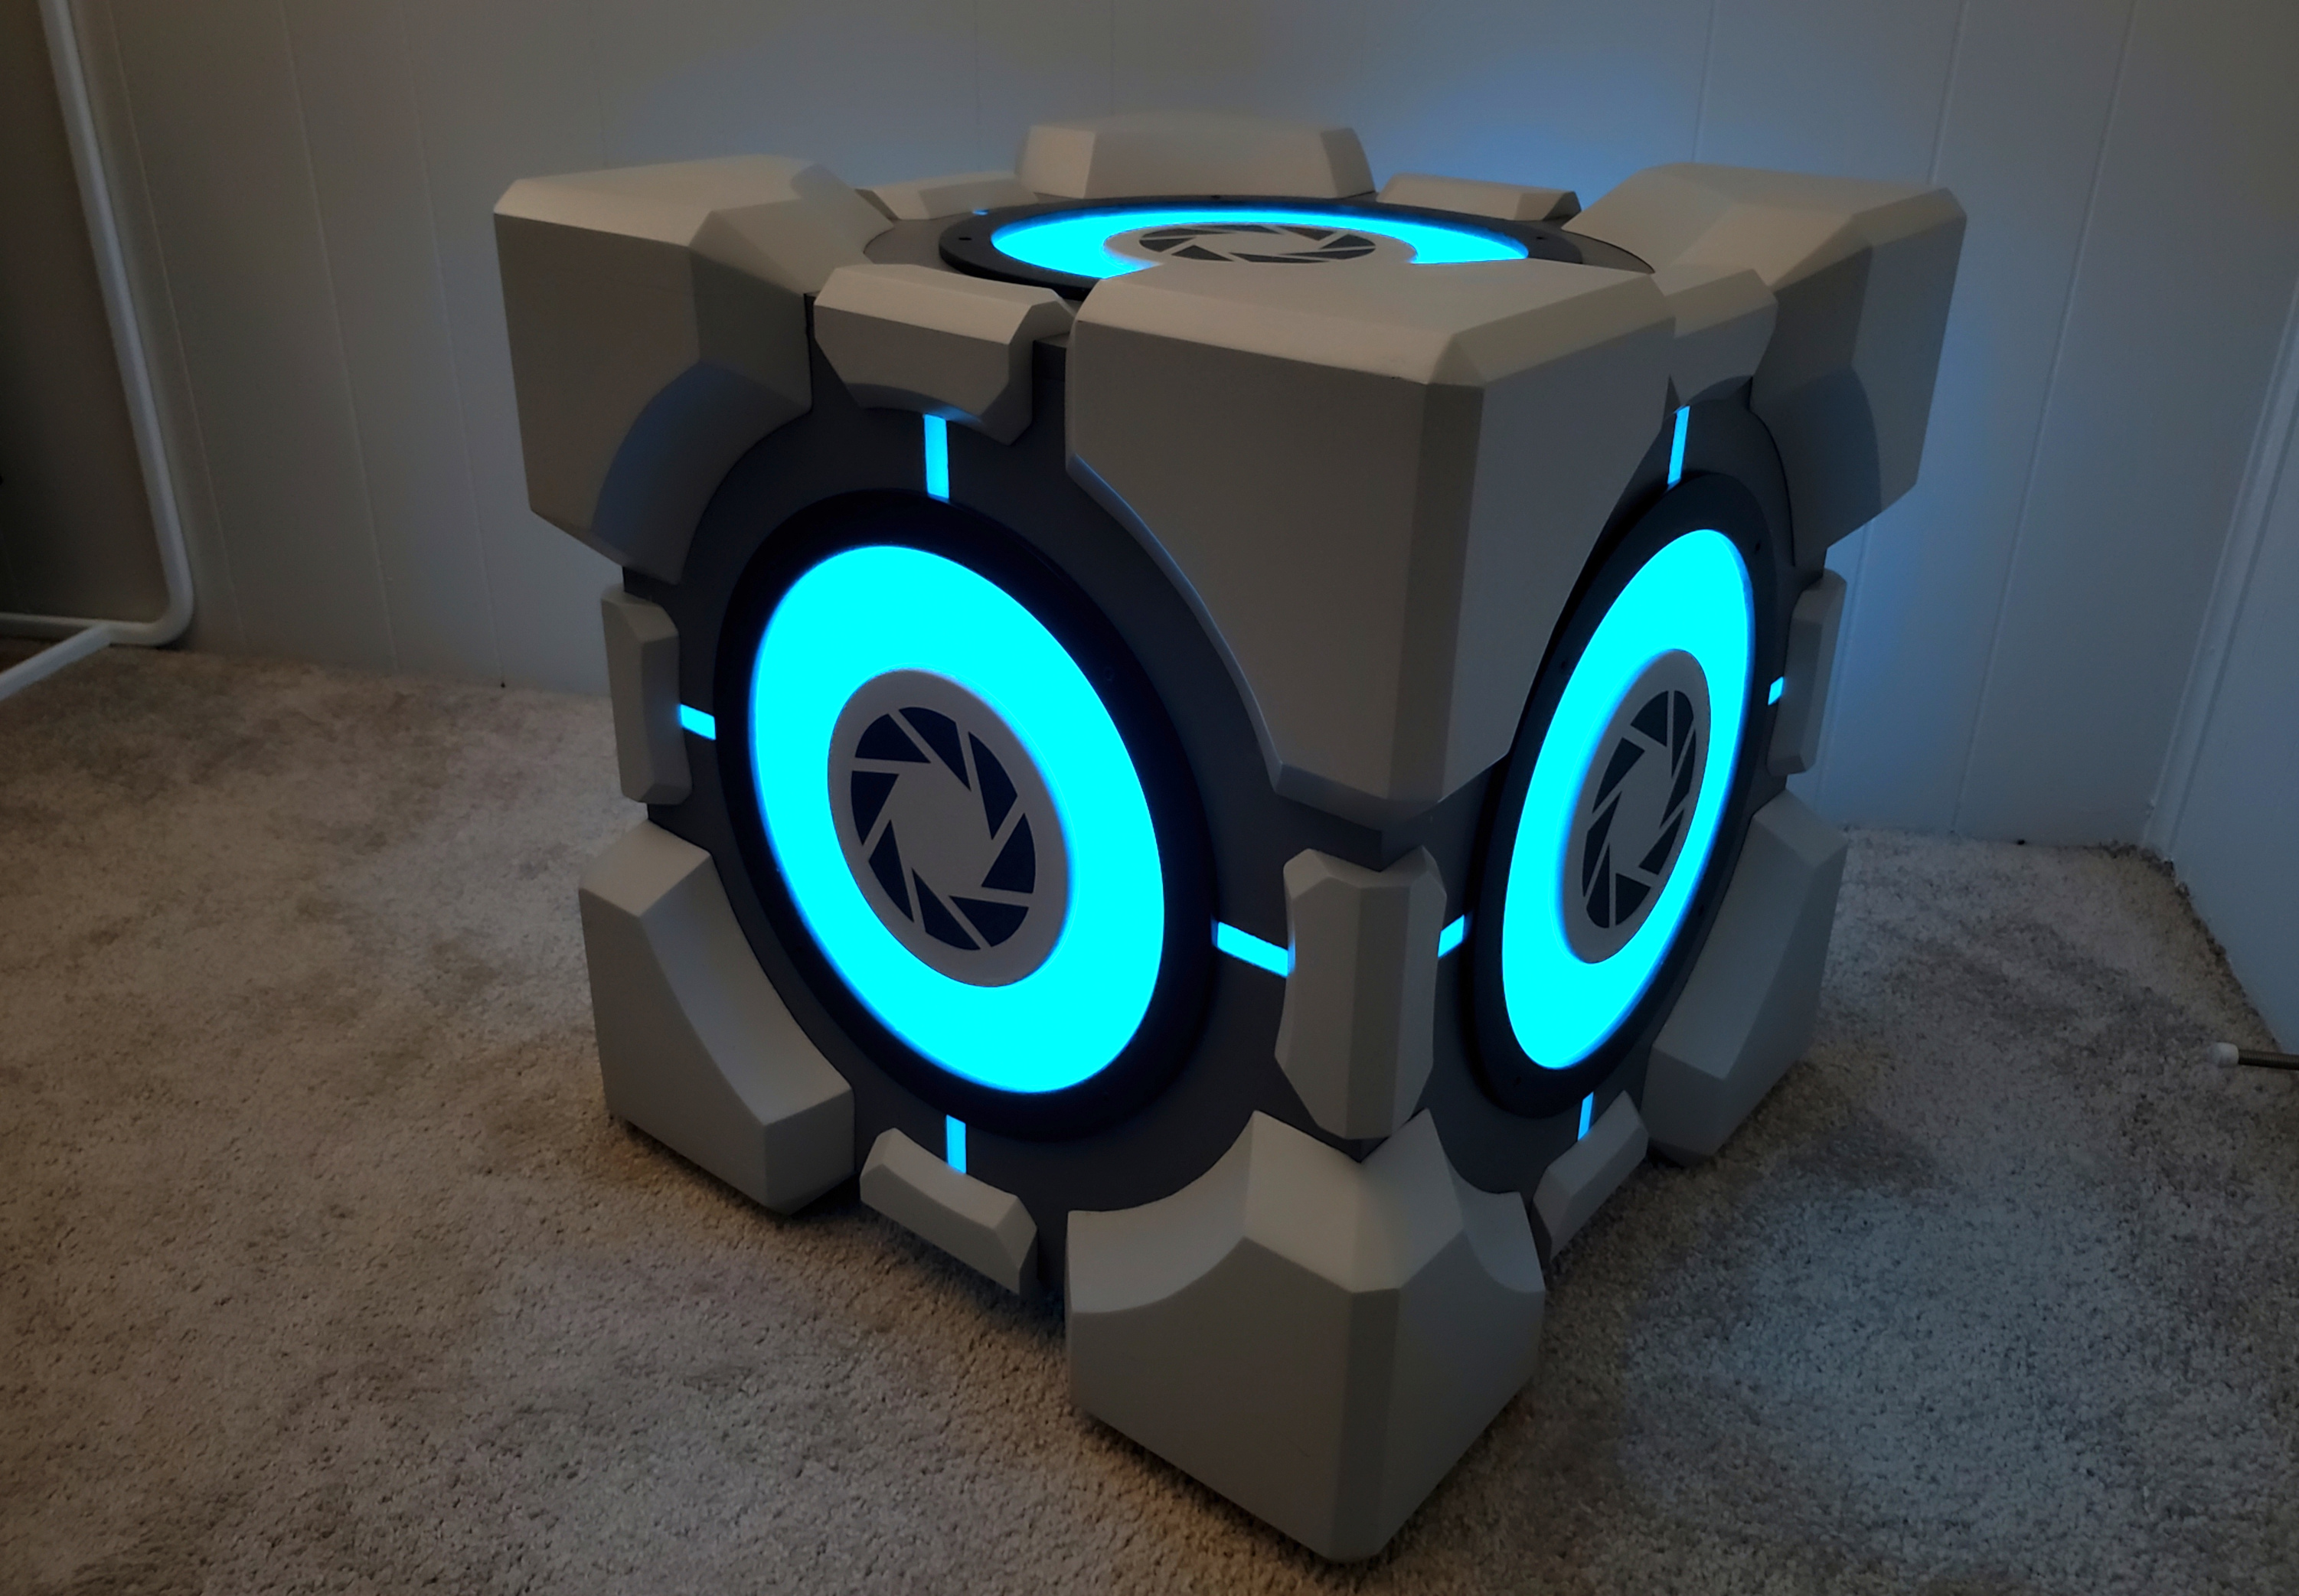
The entire cube took me about 5 months to complete, working a few nights a week and weekends during an internship I had. It’s made up mostly of 1/2″ MDF and 3/4″ board, primed, painted, and protective-enameled for the occasional bump or scratch. My eventual goal is to put a piece of glass on top with an etched Aperture logo, but my first attempt failed miserably, so I’m trying to source a second piece of glass.

Weighted Storage Cube Front

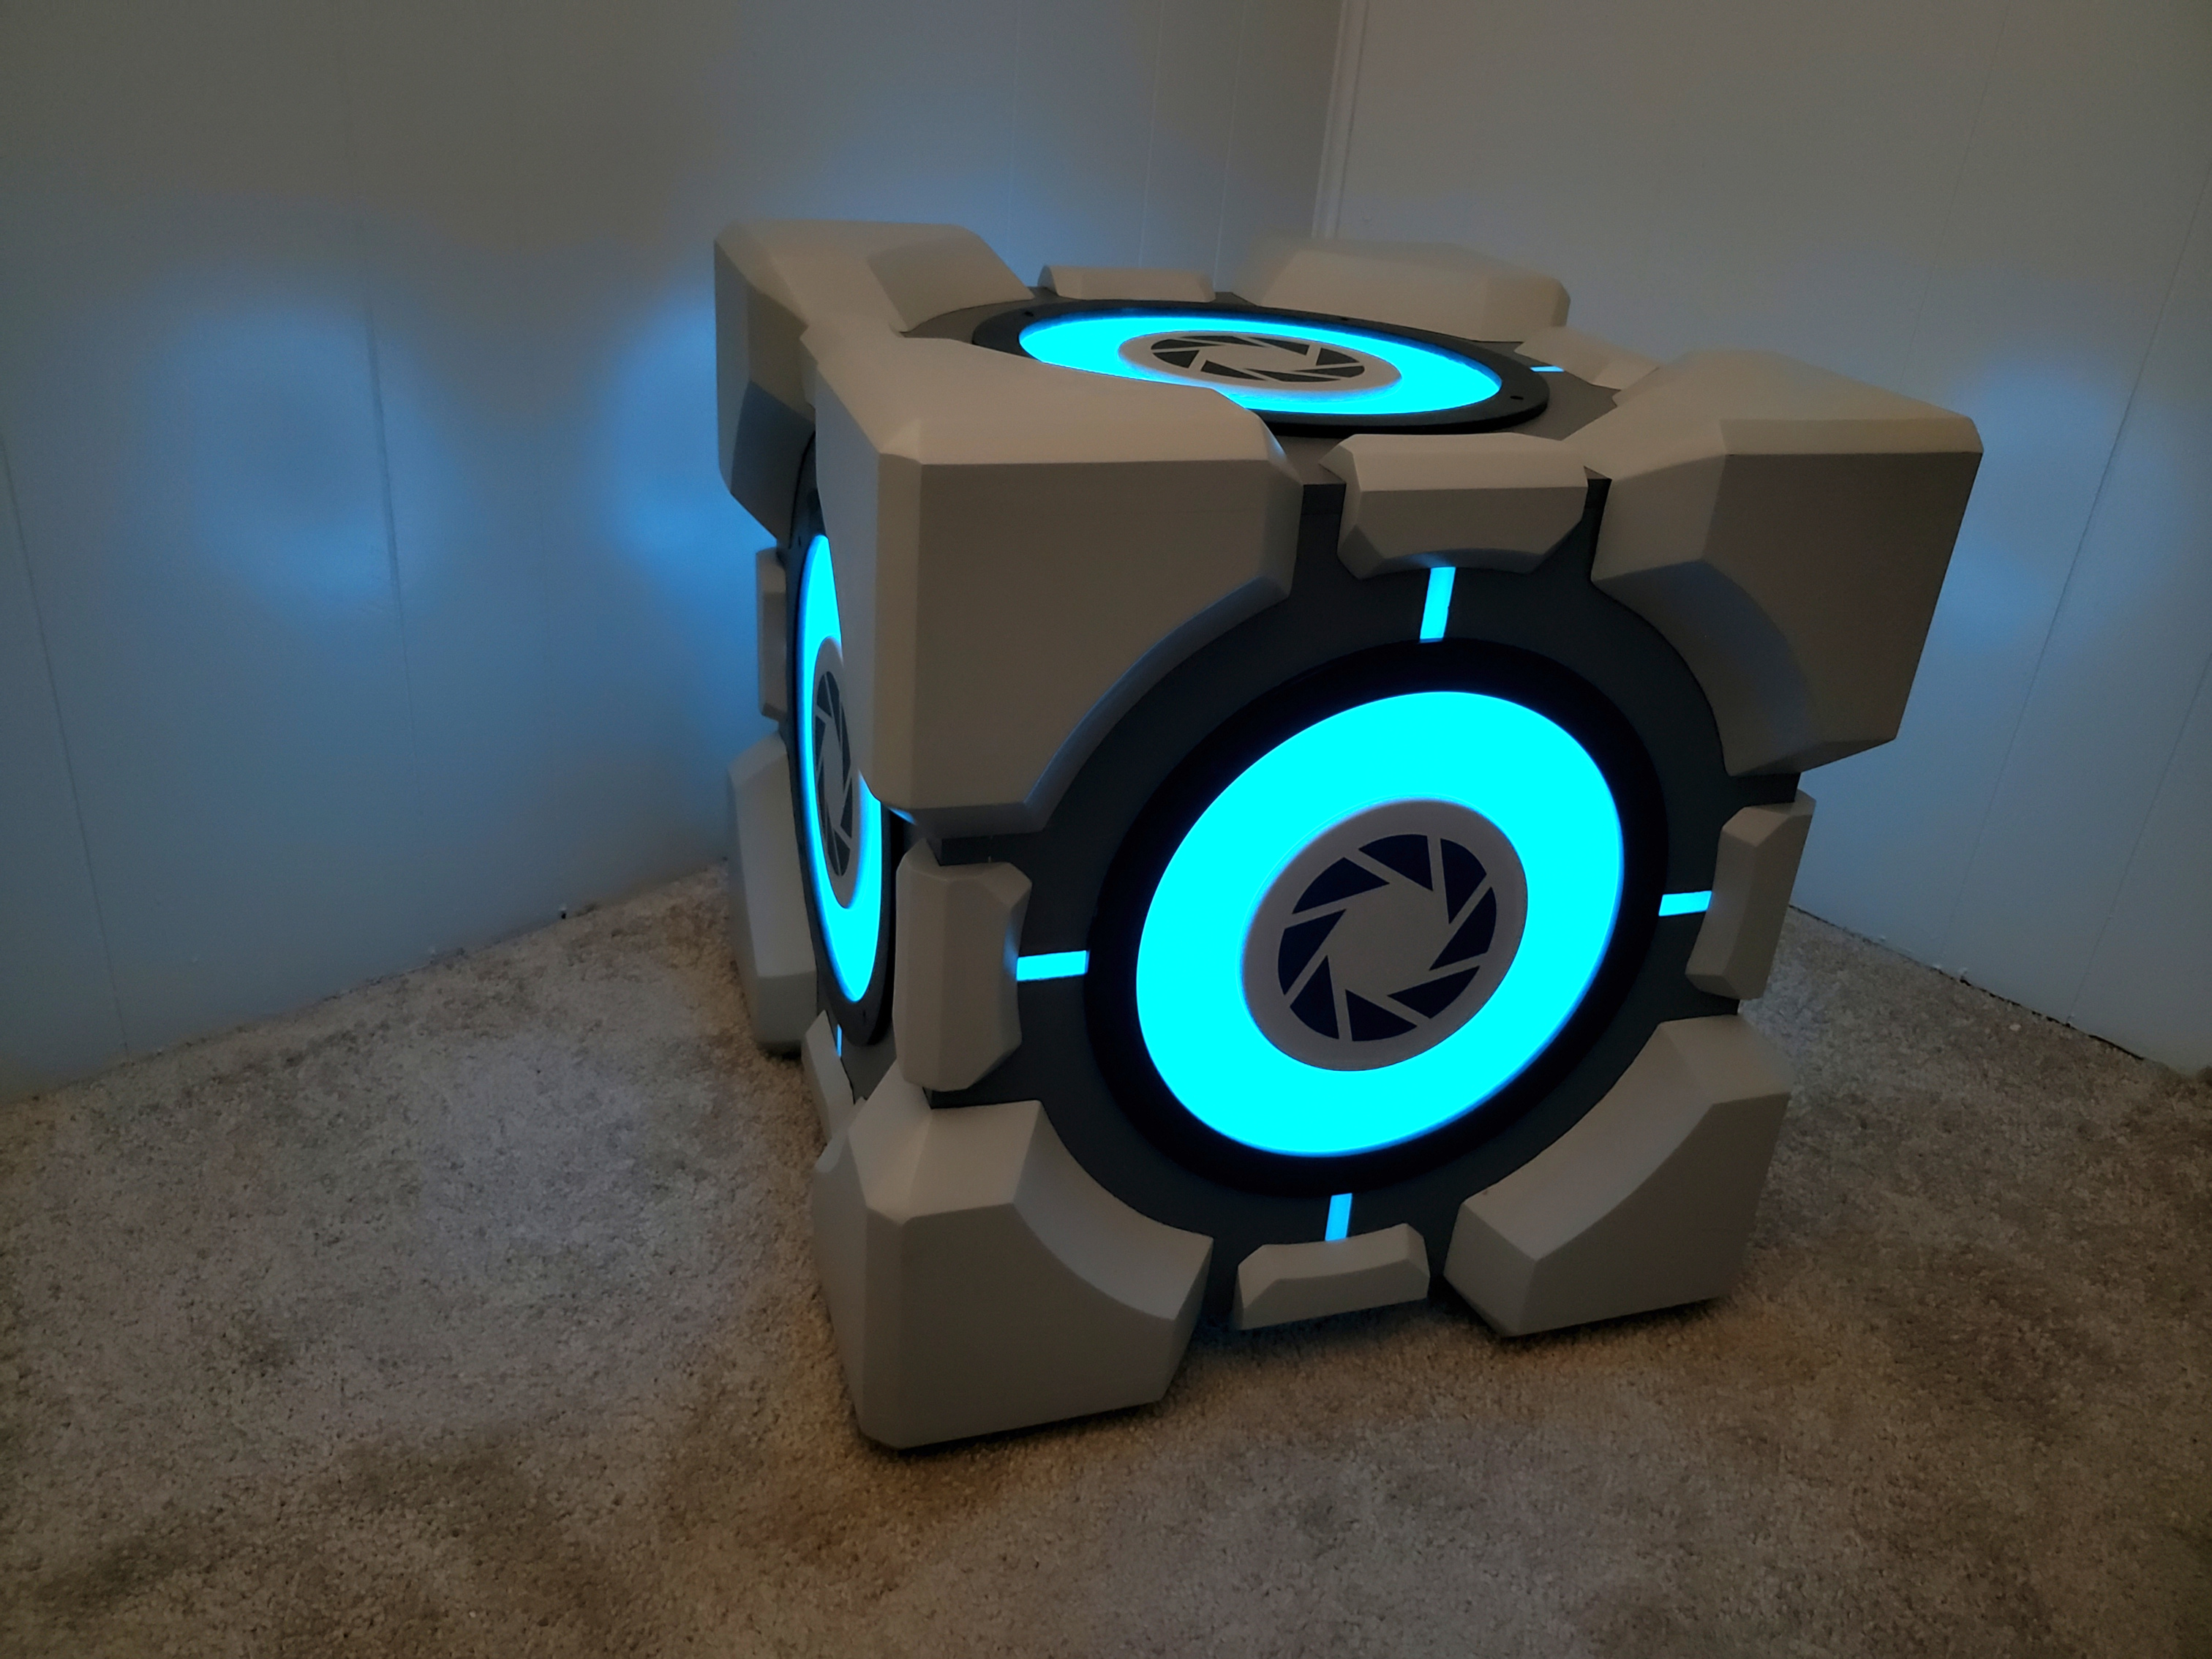
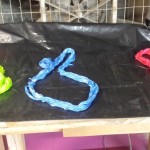
The Aperture logo decals are mounted on 1/4″ MDF with a 1/8″ rounded edge which was easily accomplished with a router. The logos themselves were cut on a vinyl cutter and transferred to the 6″ round mounts, which have a set of four magnets inset on the backs. This means the mounts are removable – I plan on making a set with pink vinyl hearts, so it can double as a Companion Cube.

Weighted Storage Cube Front Lower

Weighted Storage Cube pink

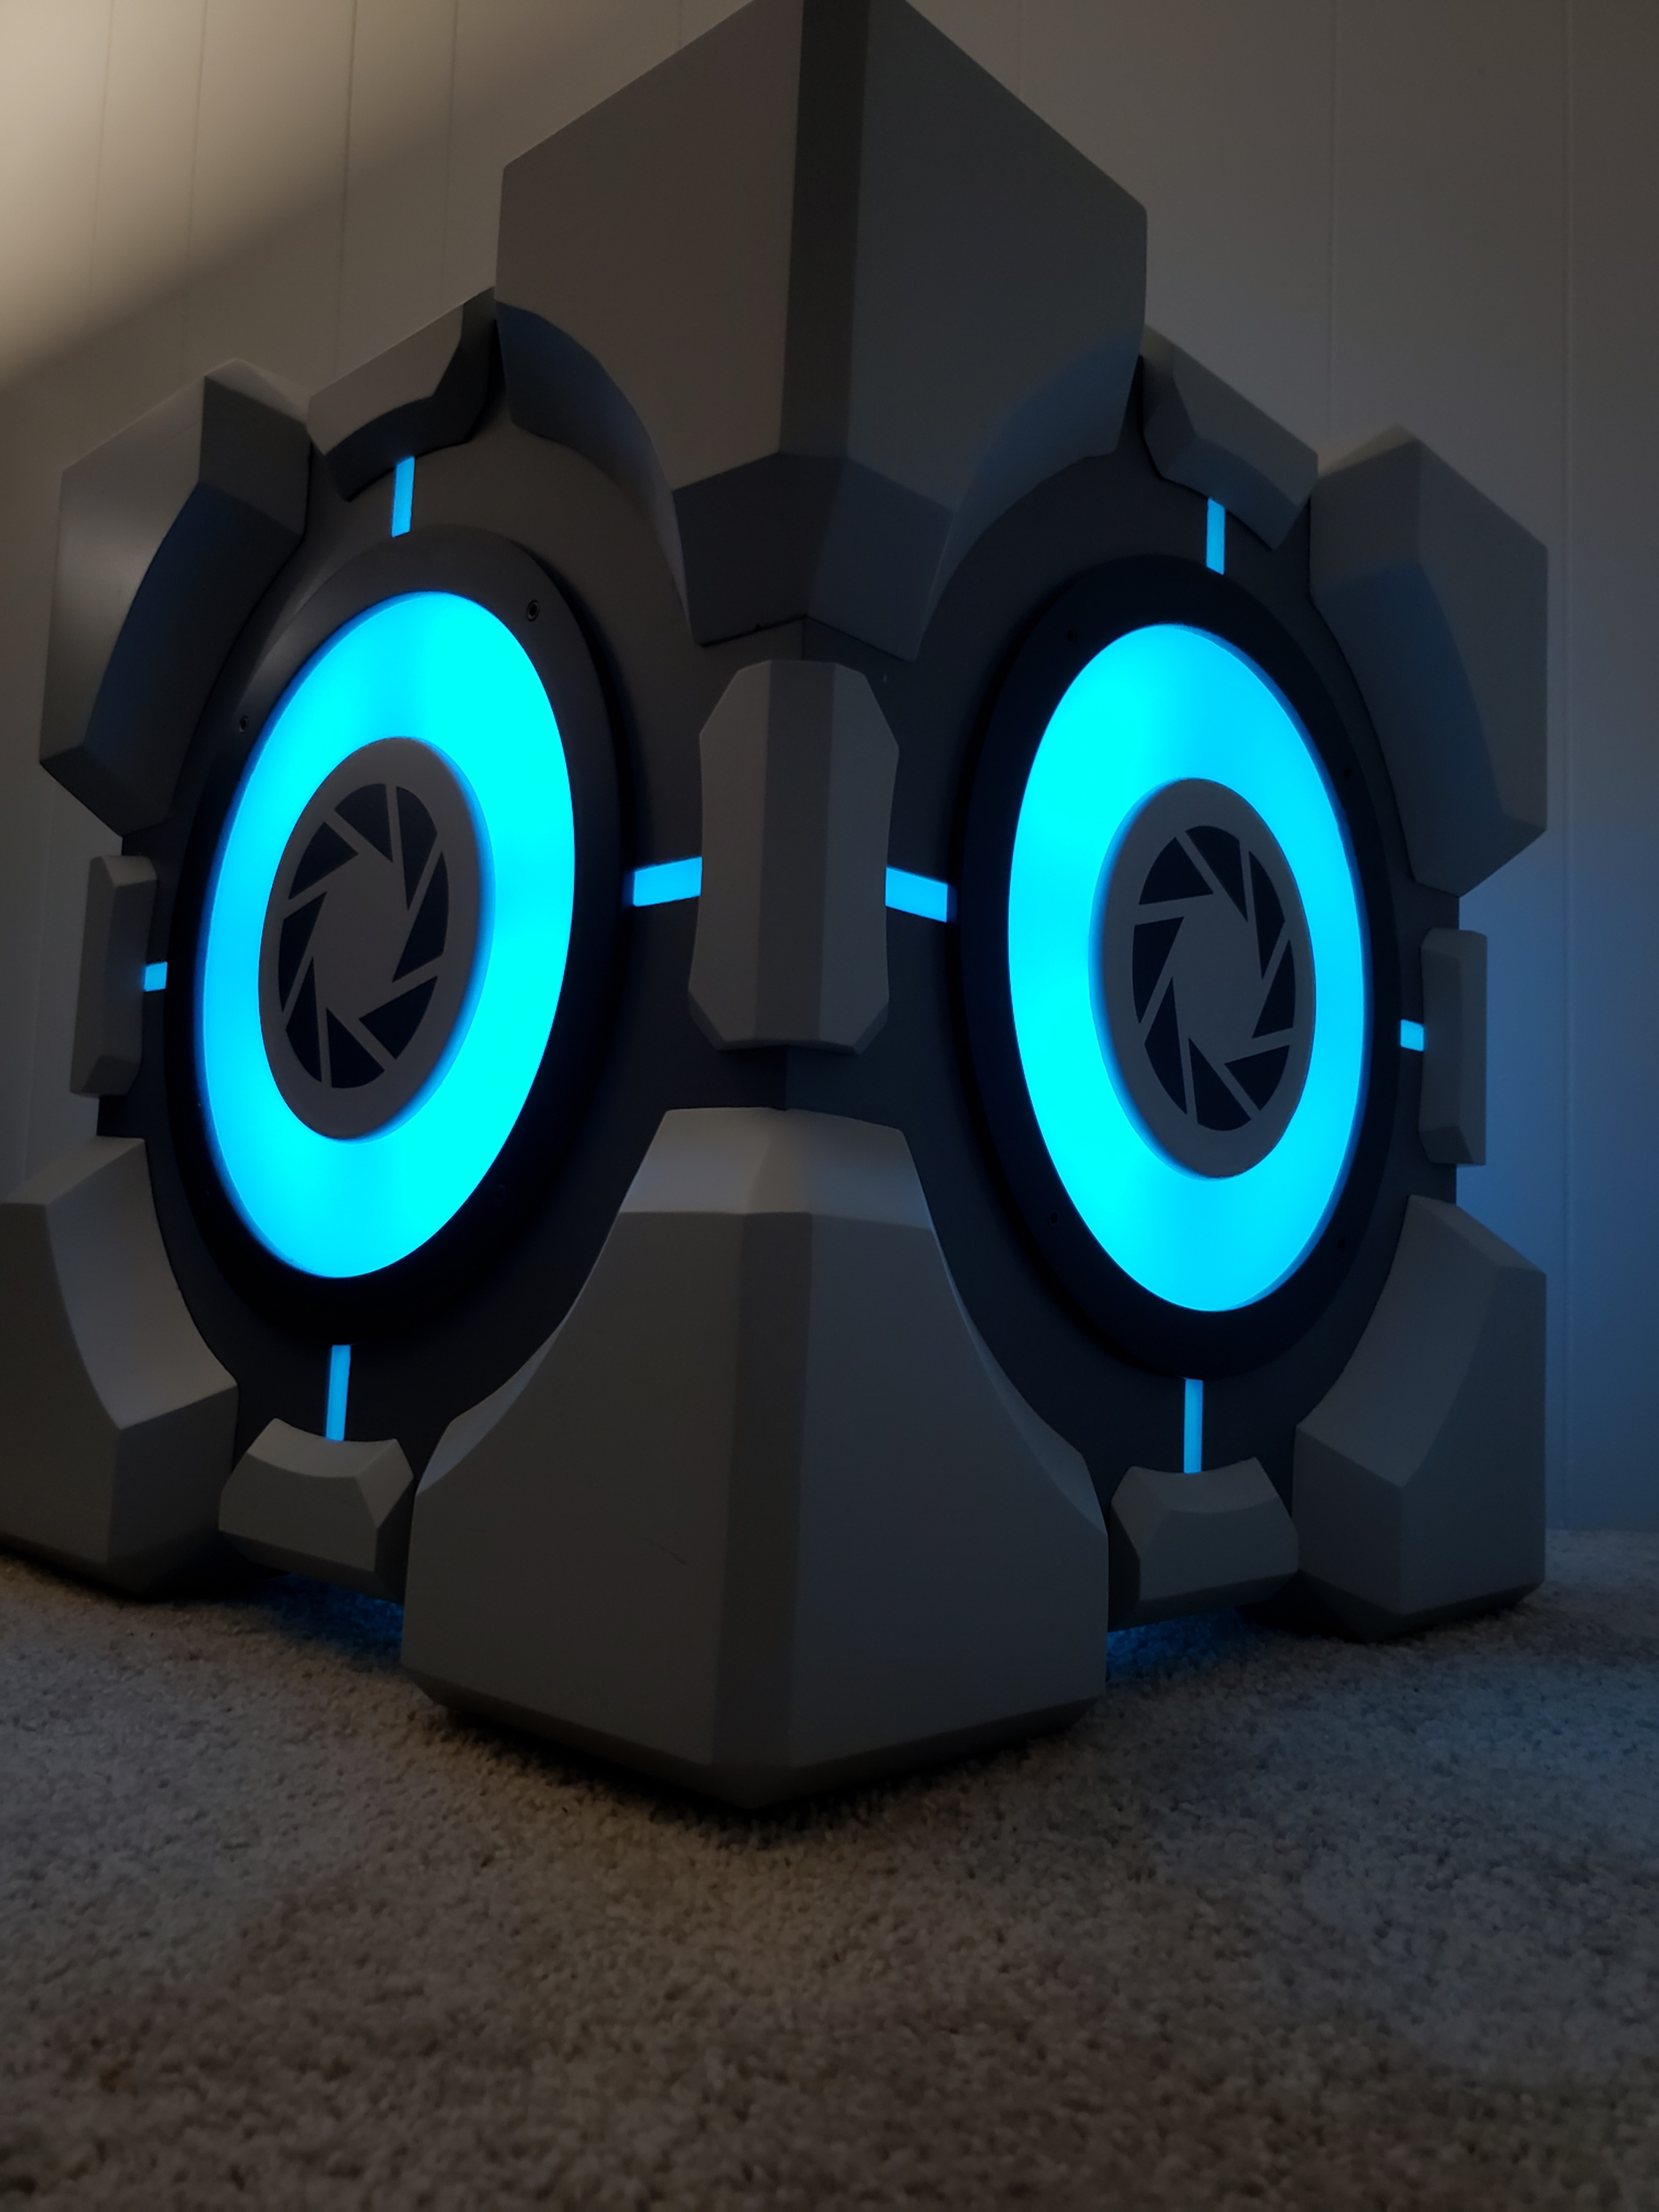
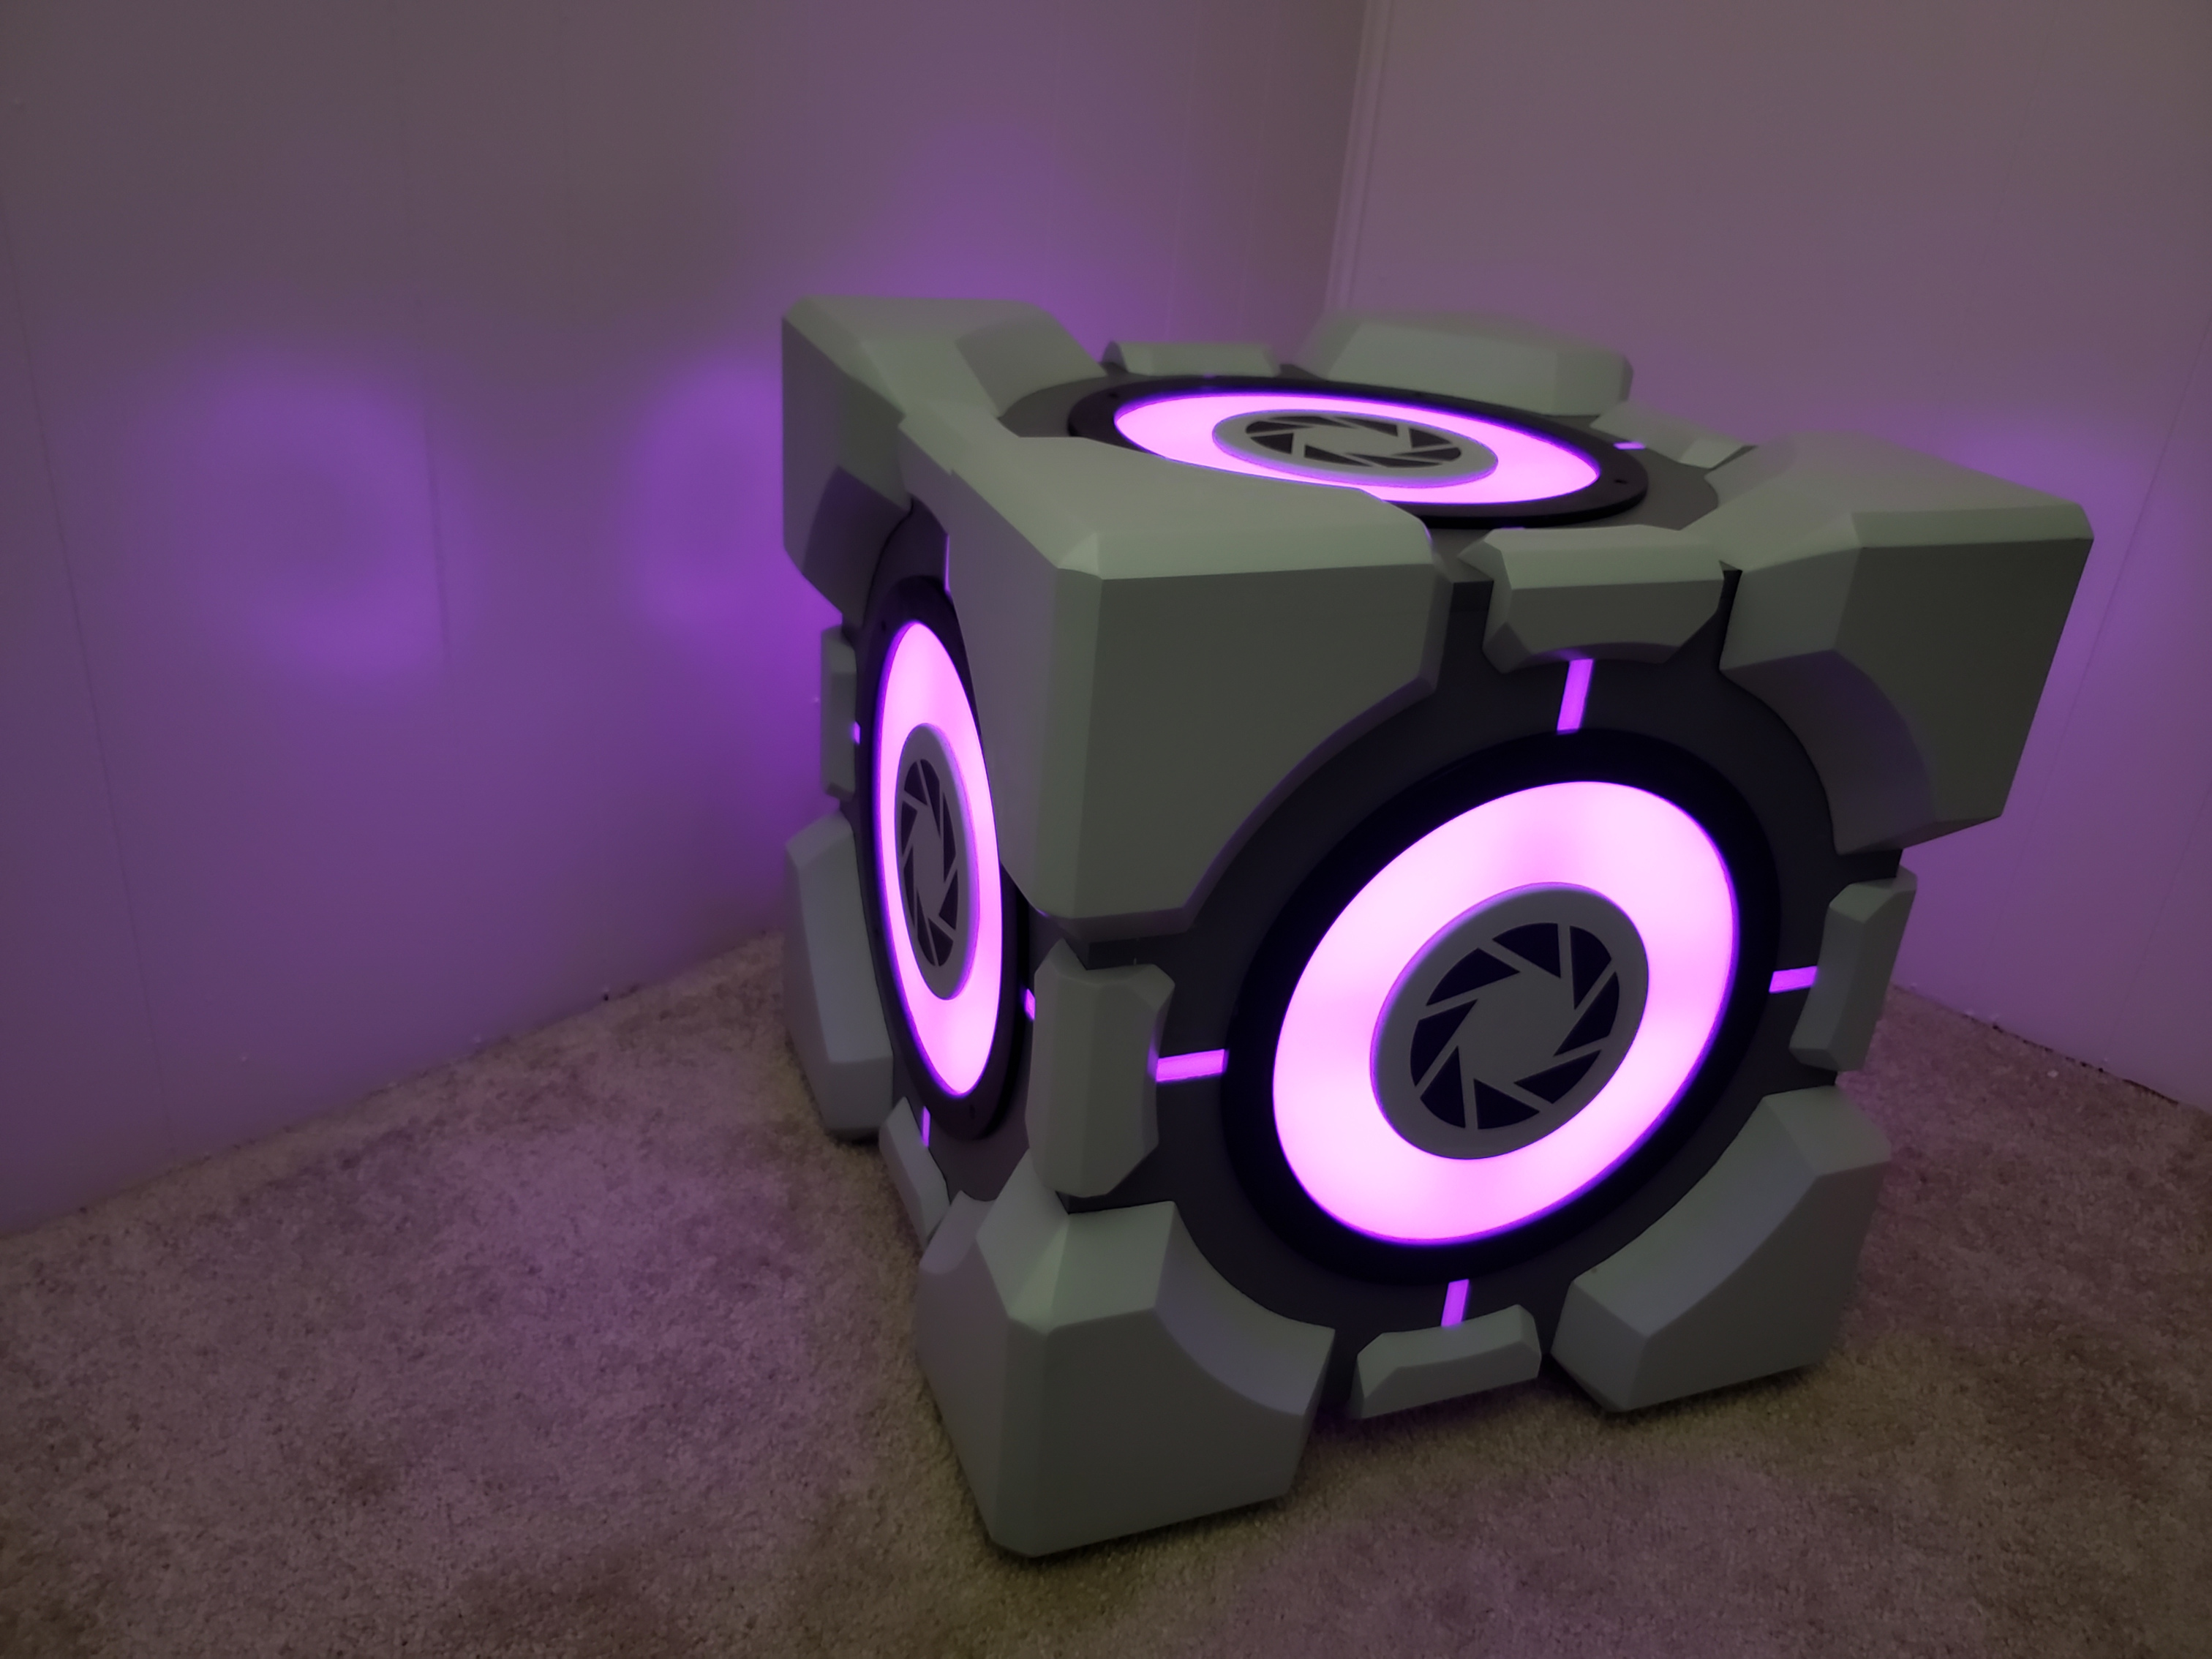
The lights mounted inside are remote-controlled RGB LED strips, so lots of different colors can be chosen!

Weighted Storage Cube top off

Unlike /u/fetchbeer‘s cube which had a large bottom hole to mount the lights, mine doubles as a media server so I wanted to use the bottom hole to mount a PC fan. This means the top of the cube had to be removable to mount anything on the interior.

Weighted Storage Cube Interior

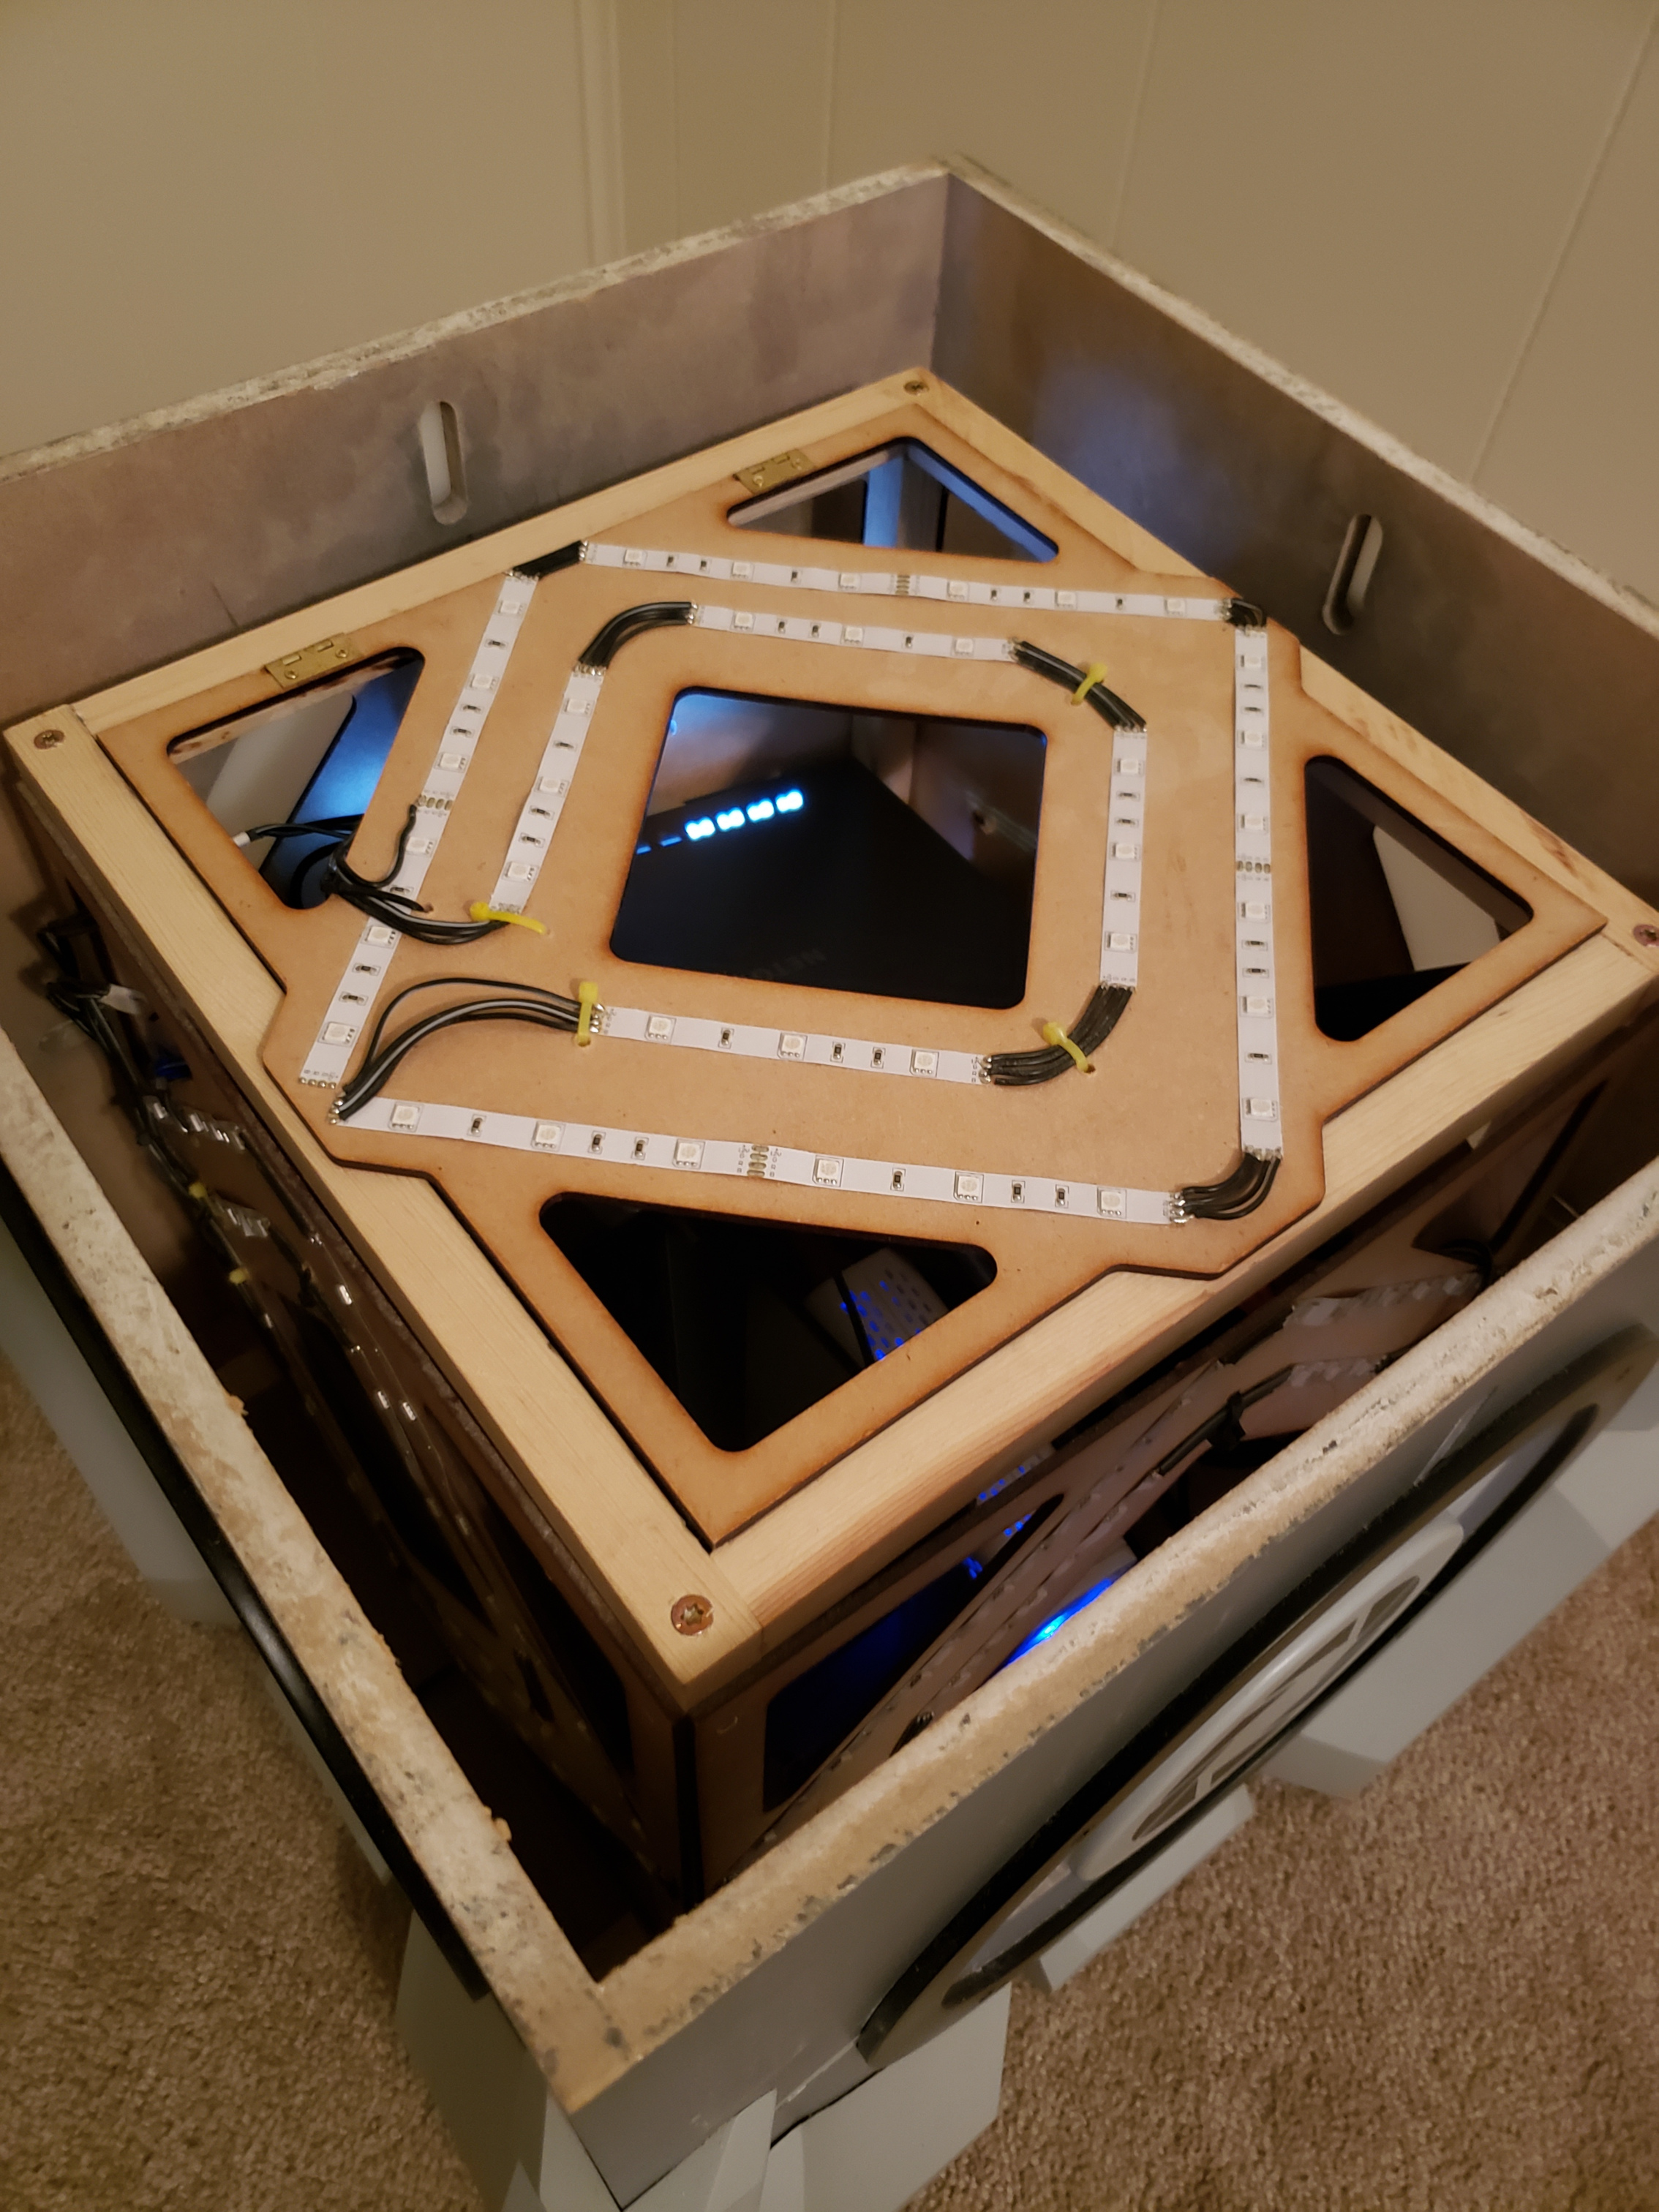
What makes my design different from fetchbeer’s is also the inclusion of an interior sub-box to contain various computer hardware. The original design had the LED strips mounted on a small cube on the interior, leaving no space for equipment. I mounted my LED strips on laser-cut panels approximately 1.75″ inches away from the plexiglass used in the cube “windows”.Weighted Storage Cube networking

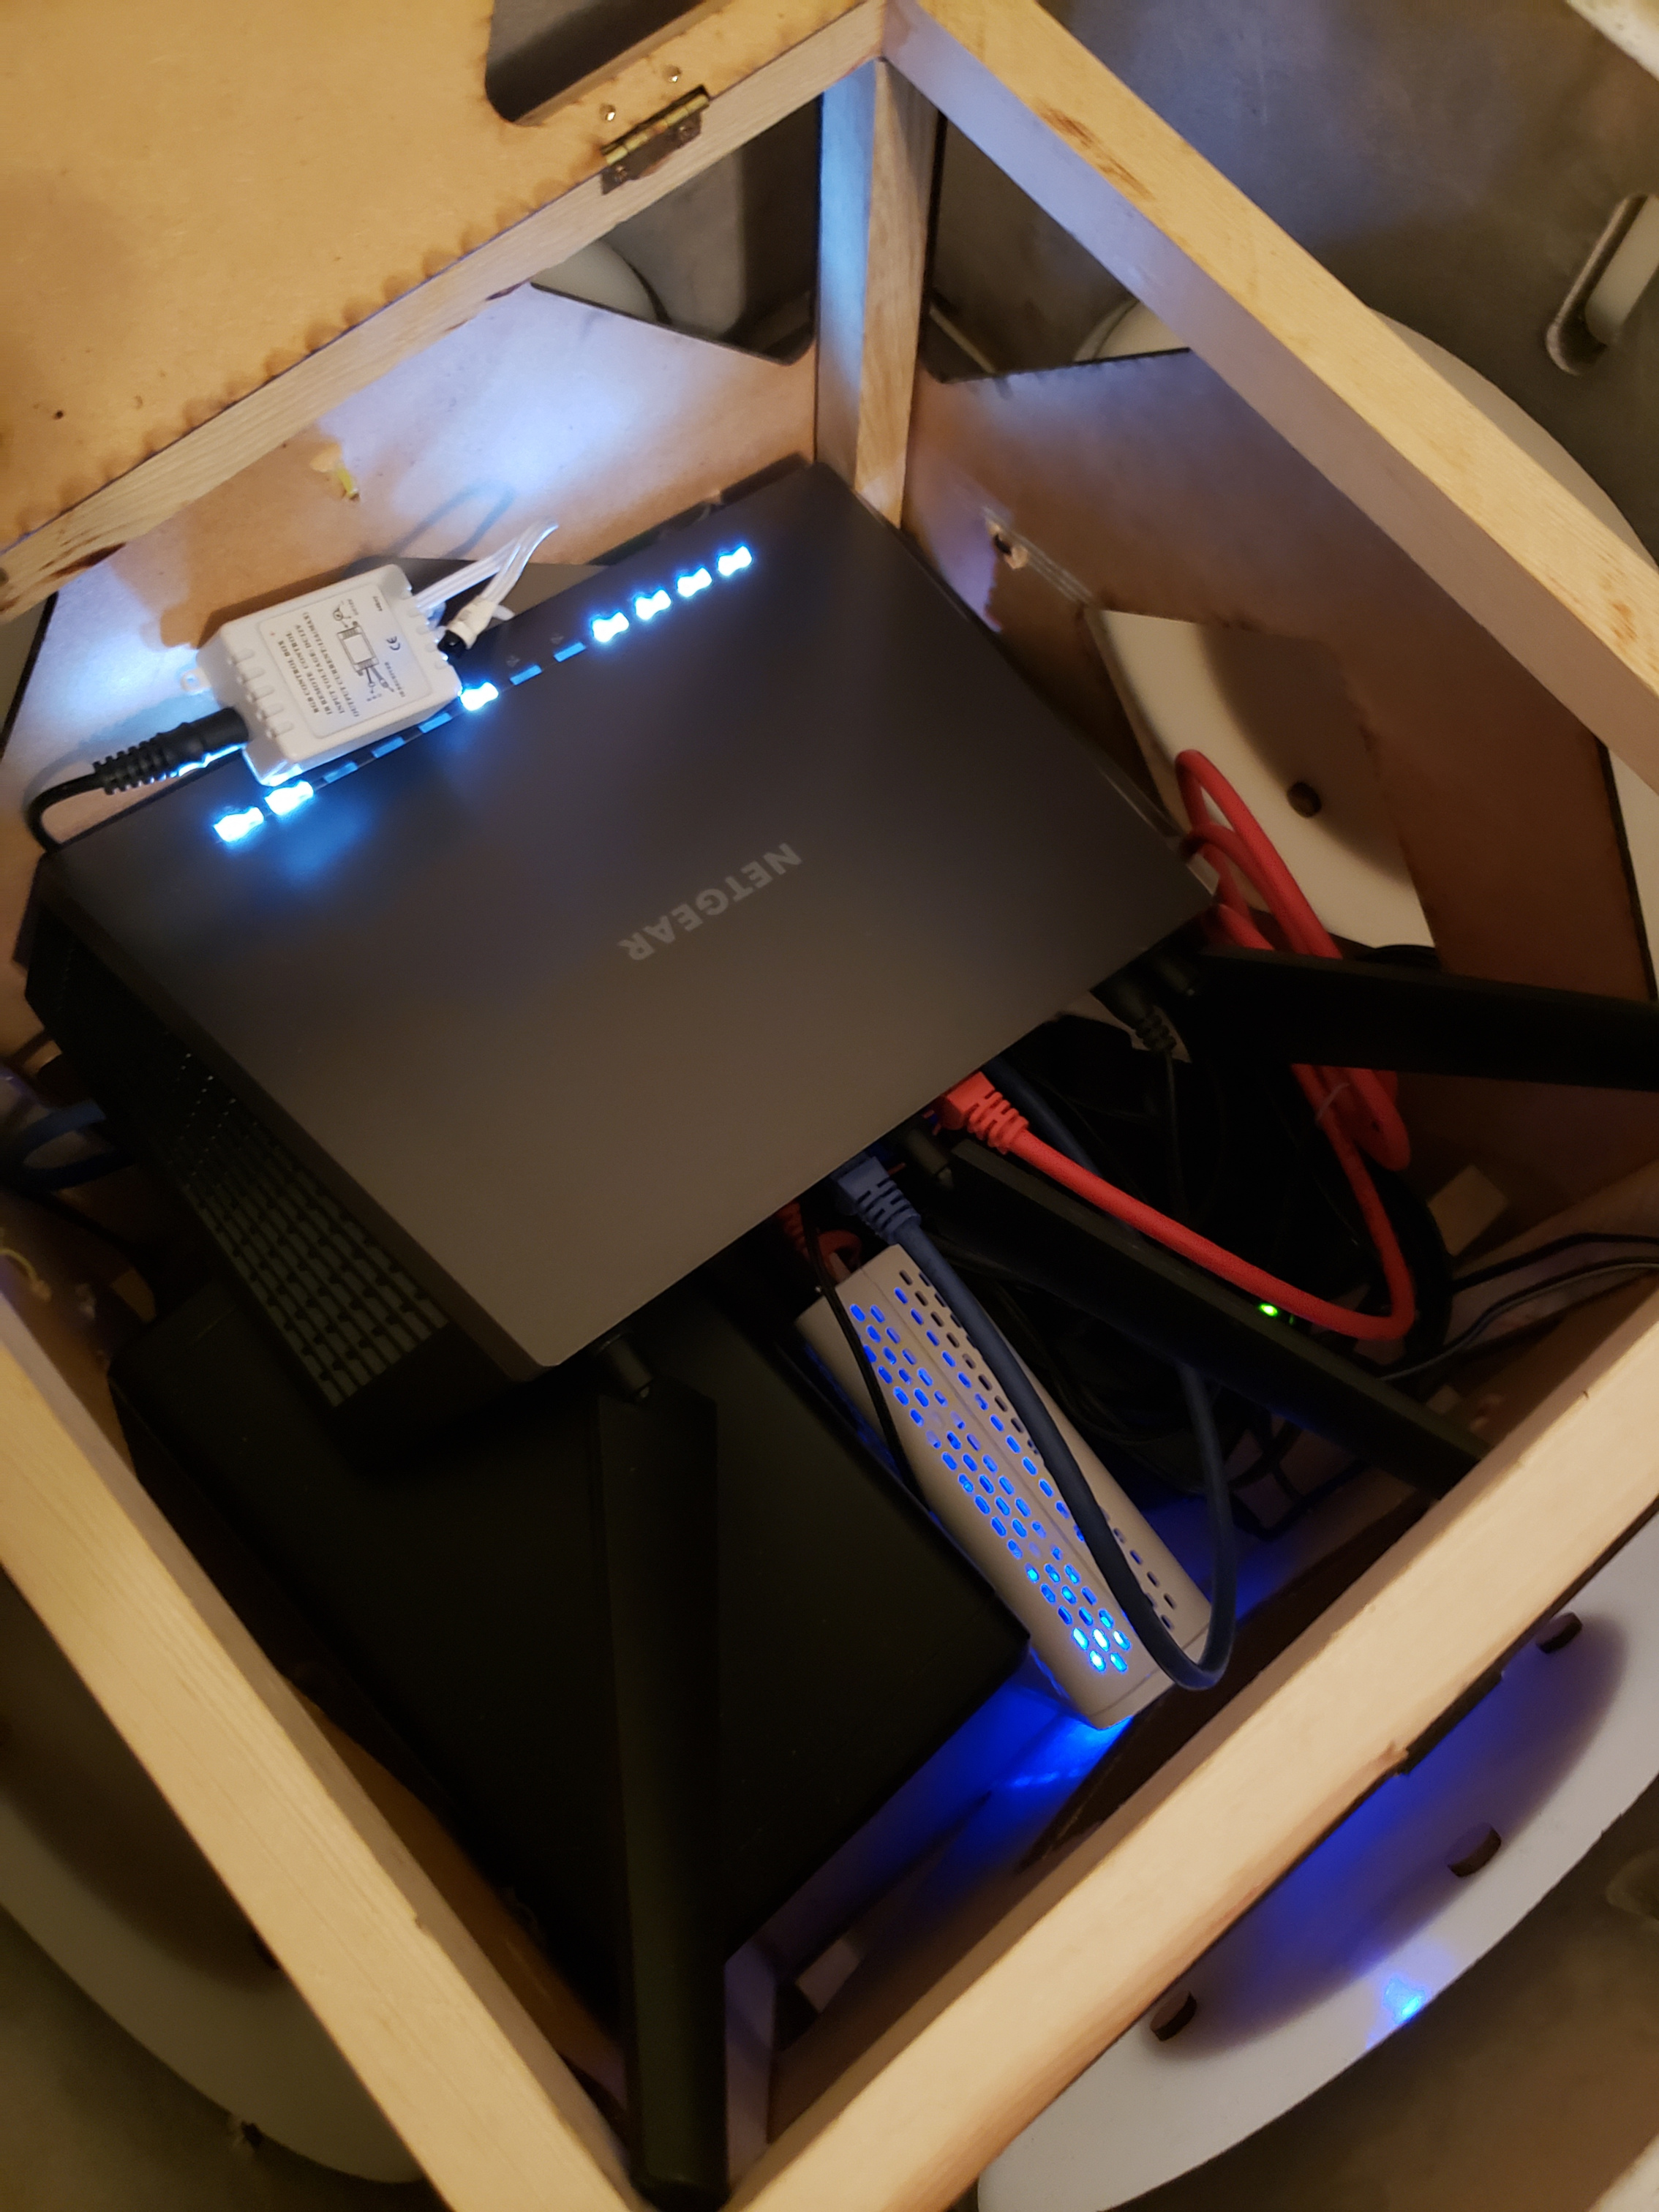
The interior of the box is a bit of a mess, but it contains a power strip, my Netgear router, a modem, a Rock64 single-board computer (a bit beefier than a Raspberry Pi) acting as a share point/Plex server, and 8TB of HDDs mounted in a RAID array. A 120mm PC fan is mounted to a special holder at the bottom and is controlled by the Rock64 to dump waste heat from when the HDDs are spun up or LEDs are on high.

Weighted Storage Cube (lights off)

That’s all for now – I’ll begin writing up the whole build process at a later date, but feel free to forward me any questions you may want answered now and I’ll do my best to answer!

steamboxflyer


Facebook Event:  https://www.facebook.com/events/437126759827103/

All Box materials are to be provided.

Class Cost: $50
For those of you with a Rocket Republic Coupon: -$5 off!

We would ask that if you plan to attend the class, please sqarecash a $10 deposit with your name/Steampunk Box Class, using cashtag $MakersLocal. If you do not have the Squarecash app, you may download it on your phone or from https://cash.me/.

We want to customize this experience for those who will attend. I have set up a survey for colors of felt and paint to have on hand for those that will take the class. Please follow the link below:

http://surveynuts.com/surveys/take?id=56493&c=688084757HJVJ

Note: Default colors will be red for the felt and front inset, then copper for the gears, feet, and front face as shown in the photo.


Fall Wreath

As some of you may have noticed, there is a giant new laser cutter at the shop! Since my interests are less acrylic and wood and more fabric and yarn, I decided to ask Tyler to laser cut some leaves out of felt for use in a fun fall wreath.  Here is how I did it:

Read More →

You can check out videos of the yarn dying process here.

Credits: Jonica had the original idea, Kirstin pushed the organization, Shae was entertaining, and Jennifer documented the whole thing.

Kirstin, Shae, and Jonica excited to do some yarn dying
Jonica, Shae, and Kirstin excited to do some yarn dying

During the week after our original idea to dye yarn, Shae purchased Jacquard acid dyes and undyed yarn. Kirstin purchased a stainless steel pot for dyeing along with white vinegar and filter masks. Kirstin did all of the research on required ingredients listed above, and what types of dyes should be used on a type of fiber. We decided to use acid dyes on protein based fibers, since that meant we could work with our most familiar and accessible material, animal fiber yarn. Acid dyes can be damaging when inhaled or absorbed through the mucus membranes; fortunately, Kirstin is also a lab tech in her day job, her expertise kept us safe during the process.

We assembled Saturday March 28th with the expectation that we would make mistakes and learn. After we carefully applied our safety equipment…

…Kirstin started with red dye and a small skein of alpaca yarn. We dumped the yarn into the pot, heated the water to a simmer, turned off the heat, and applied dye. We waited 30 minutes for the dye to set, and the resulting red yarn was beautiful!

Next, Shae chose blue, Jonica mixed yellow and green, and then we mixed all four colors into a large skein.

The small skeins were dry a few hours later, but the large skein took most of the weekend to dry.

We made the expected mistakes, and learned much.

1. Get all the yarn into the water with the dye.
2. Make sure the yarn is not tightly clumped together so all the yarn is exposed to the dye. We learned this requires cutting the ties that keep the skein from tangling.
3. An addendum to the second point is, use smaller lengths of yarn.

For our next session we’re hoping to re-dye the big chunk of yarn that didn’t get fully colored, and separate
the other large skeins of yarn into smaller skeins for more experiments.

Thank you to everyone who came out and made flowers with us on February 7th. We were able to make a lot of flowers for the Wedding Week event. We had fabric, tissue paper, origami, and felt flowers. Check out the pictures below!

Kirstin, Jennifer, and Heather making flowers
John, Heather, and Phil making flowers
Kirstin and Dickie making flowers
ALL THE FLOWERS!
ALL THE FLOWERS!
Fabric Flowers
Fabric Flowers
Origami Kusudama Flowers
Calla Lilies
Calla Lilies
Anemones Flowers
Anemones Flowers
Tissue Paper Flowers
Origami Iris Flowers