Difference between revisions of "Clay Pugmill"
Enabrintain (Talk | contribs) (→Parts: added more pics) |
Enabrintain (Talk | contribs) (→Next Steps: updated) |
||
| Line 44: | Line 44: | ||
== Next Steps == | == Next Steps == | ||
| − | + | The next step will involve cutting lots of circles in the /18" plate. I need to make a jig for the plasma cutter. | |
| − | + | ||
| − | + | ||
| − | + | ||
| − | The next step will involve cutting | + | |
After that, more steps will follow and be dutifully recorded here. | After that, more steps will follow and be dutifully recorded here. | ||
Latest revision as of 15:49, 24 September 2017
|
Creator: |
Contents
[hide]Overview
A Clay Pugmill is a tool for mixing and processing clay. Potters use them to recycle waste clay back into clay ready for throwing. I am building one from scratch based on a book I found that has plans for making one. The book is called The Potter's Alternative, and was published in 1989.
Parts
The first part of the process is to acquire an amount of 11GA mild steel plate (1/8" thick).
Next cut out the parts. (I used an Angle Grinder with a mess of cutoff wheels) These were a series of rectangles that ranged from 11" to 26" tall.

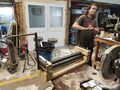
The third part was rolling some of the plates into cylinders. For this part, a plate roller was required. The shop didn't have such a thing, but directions for building one that is human powered can be found in the back of The Potter's Alternative! This was built for around $141 in Sch.80 Pipe from Speedy Metals plus some wood found in the scrap bin in the shop, and some angle iron and square tubing, also out of the scrap pile. The remainder of parts (threaded rod and bolts and sheathing) were bought at Home Depot for $34. I also made heavy use of White Lithium grease to ease the turning of the rollers in their wooden 'bearings'.

The plate roller
A helper!


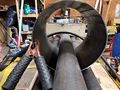
It is important to pre-bend the ends of the plate, because the roller can only bend the part of the plate that is between all the rollers. I used another piece of pipe, a hammer, and a complete disregard for noise pollution to introduce this bend in the plates that I was turning into cylinders. The Roller takes two strong people to use, each turning a crank in the reverse direction of the other. Tightening the bolts causes the top roller to bend the plate, while cranking it propagates the bend into a curl. Vise Grips are used to align the two ends of the plate for welding.
The fourth part of the process will be to roll two "U" shaped pieces, one with mounting holes pre-drilled for the vacuum baffle plate.
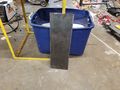
This was a 24" long, 8" wide plate
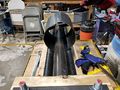
Previous plate that was rolled and waiting welding
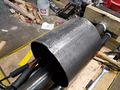
Cylinder after it had been joined
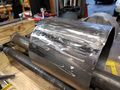
Cylinder after it had been joined
Inside of cylinder after it had been joined
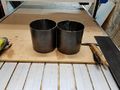
Two cylinders!
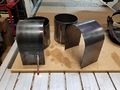
Two U-shaped parts
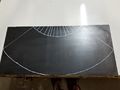
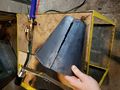
Nose cone
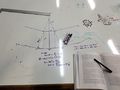
Nose cone math (thanks trig!)
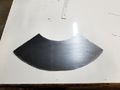
Nose cone cut!
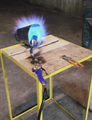
After rolling in the roller, some hammering was needed
After rolling in the roller, some hammering was needed
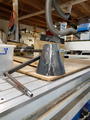
Nosecone!


Next Steps
The next step will involve cutting lots of circles in the /18" plate. I need to make a jig for the plasma cutter.
After that, more steps will follow and be dutifully recorded here.
Expenses
| Count | Item | Cost |
|---|---|---|
| 1 | 4' x 8' 11 GA (1/8") Mild Steel Plate | $100 |
| 2 | 1.9" OD Sch.80 Steel Pipe | |
| 1 | 2.37" OD Sch. 80 Steel Pipe | $141 |
| - | Misc Vitamins for roller (Home Depot) | $34 |
| Total (not counting hours and bandaids) | $275 |