Difference between revisions of "Cerealbot"
m (→GCode: updated gcodes) |
m (→Project Cost Breakdown: updated project costs) |
||
| Line 432: | Line 432: | ||
** [https://smile.amazon.com/gp/product/B00A6SOGC4/ref=od_aui_detailpages00?ie=UTF8&psc=1 Wire for breadboards] - $4.33 | ** [https://smile.amazon.com/gp/product/B00A6SOGC4/ref=od_aui_detailpages00?ie=UTF8&psc=1 Wire for breadboards] - $4.33 | ||
| − | Project Cost: $ | + | * 30-4-2015 |
| + | ** [https://smile.amazon.com/gp/product/B007Y7F8OA/ref=oh_aui_detailpage_o04_s00?ie=UTF8&psc=1 Copper tape for hotbed testing] - $15.96 | ||
| + | ** [https://smile.amazon.com/gp/product/B0013HKZTA/ref=oh_aui_detailpage_o05_s00?ie=UTF8&psc=1 PEI sheet for alternate hotbed surface] - $17.24 | ||
| + | ** [https://smile.amazon.com/gp/product/B007F7S4P4/ref=oh_aui_detailpage_o05_s01?ie=UTF8&psc=1 24V PSU for hotbed] - $24.99 | ||
| + | ** [https://smile.amazon.com/gp/product/B0000510ZO/ref=oh_aui_detailpage_o05_s01?ie=UTF8&psc=1 2x NEMA cables for the PSUs] - $9.90 | ||
| + | ** [https://smile.amazon.com/gp/product/B007Y7CZDM/ref=oh_aui_detailpage_o05_s02?ie=UTF8&psc=1 Tape for PEI] - $4.88 | ||
| + | |||
| + | * 7-5-2015 | ||
| + | ** [https://smile.amazon.com/gp/product/B000FPX4G2/ref=oh_aui_detailpage_o01_s00?ie=UTF8&psc=1 Silicon mat for hotbed] - $8.08 | ||
| + | |||
| + | * 21-5-2015 | ||
| + | ** [https://smile.amazon.com/gp/product/B0053WRPMG/ref=oh_aui_detailpage_o00_s00?ie=UTF8&psc=1 8mm inductive sensor, poor quality] - $6.09 | ||
| + | ** [https://smile.amazon.com/gp/product/B007Q8137I/ref=oh_aui_detailpage_o00_s01?ie=UTF8&psc=1 8mm inductive sensor, better quality] - $6.86 | ||
| + | |||
| + | Project Cost: $961.06 | ||
== External Resources == | == External Resources == | ||
Revision as of 17:20, 23 May 2015
|
Creator: |
Contents
[hide]Overview
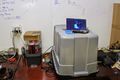
Unmodified Printer

Unmodified Printer
Concept Design
Prototype Frame
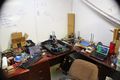
Workspace
Climate Container


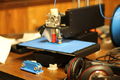
I am retrofitting a Printrbot Simple Metal 3D printer with tools to allow for serialized printing. Then I hope to release the use of it to schools. For Free.
Cereally 3D Printer Extension
3D printers are nice, but I feel the consumer grade ones are seriously lacking in simple engineering processes that provide a more encapsulated solution. For instance: my printer can not print without me present. Sure, I can start a print and then drive home knowing that for several hours the printer will be occupied without me, but two days later when I next revisist the printer it will have been idle for over 30 hours. I find this unacceptable. Working from a basis of "a good print" where nothing goes wrong, the printer really only requires human intervention to remove the previous part that is firmly stuck to the aluminum plate it was printed on, then it can reset and begin printing again all from software.
The Cereally 3D extension is a project of mine to make the best remote-controlled 3d printer for minimal cost. The keystone for the project is an idea I call the pop-bar, which is an attempt to break finished parts free from the build platform with as little force or complexity possible. I will also investigate other low-cost automation solutions for non-optimal prints, listed below under "Types of Failures".
It is my hope that this project will bring about an affordable printer that can be placed in a school and maintained in a low-overhead, ad-hoc manner. The serialization will also allow for maximal student use from each printer, meaning that more investigative minds have access to this technology.
Progress Log
- 27-1-2015
- Serious consideration needs to be taken for moving forward. I now know that this procedure works; the prototype works admirably given how it was constructed. The system needs a redesign, and I want to make sure I select the correct path going forward. Currently, the pop-bar lays in a channel milled into the bed, this is a holdover from when I imagined this procedure against the default printrbot build plate. The channel warps the build plate, so this design must go. I now think that the build plate could be constructed from three discrete parts, with the pop-bar laying between two separate plates of alum. There may also still be a better way to detach parts from the build plate, I'm not sure.
- 25-1-2015
- After several prints with the printrbot outside of its enclosure, it is apparent that some climate control is needed. Each print has warped and curled fairly heavily. A custom box must be constructed, or a large cardboard box must be found.
- The pop bar has worked well for the past dozen or so prints and failed prints. Collection of ways to remotely screw up the printer and then recover is growing quickly.
- I learned to NOT try melting plastic off of the print nozzle, because then the plastic inside will char and clog everything. Will test whether a lower temperature is appropriate.
- The print bed is warped, contributing to the jammed nozzle. I cannot determine if this happened while milling, or due to torque from mounting it on the printer. I rigged up a vice and flexed the plate back to near-level, but it appears to be bending again once remounted. Future print beds must be designed to minimize this.
- 22-1-2015
- The second pop-bar, which I am considering a true prototype, has been created and linked to an active servo.
- Undated, X-1-2015
- The testbed for train_rec was a success. Rather than use the length of the pop-bar as a lever to pry the piece off of the bed, I think its better to twist the bar along the length to push the 3d printed part up.
- Undated, X-12-2014
- Milling the "production/testing" bed is next on the list.
Types of Failures
Clogged Print Nozzle
Symptom:
The printer gradually or suddenly ceases to extrude filament, although the extruder stepper motor appears to be working and the filament is now pinched.
Abatement:
Manual Maintenance. I will try cleaning my print head with a 0.4mm drill bit and report my findings.
- 25-1-2015
- Possibly a welding torch cleaning wire can unclog the nozzle. Will test soon.
- Welding torch wire did NOT work. I ended up forcing plastic through the nozzle to dislodge the obstruction. A special cleaning kit has been ordered for testing.
- Possibly a welding torch cleaning wire can unclog the nozzle. Will test soon.
- 31-1-2015
- The nozzle cleaning kit from Amazon worked well. I mounted the bit in a drill press, and gently bored out of the damaged print nozzle. Extruded filament is now 0.6mm in diameter, which means I must update all gcode to continue printing.
Loss of filament
Symptom:
The printer continues printing even after the filament is either used, or accidentally breaks due to stress.
Abatement Procedure:
Prints cannot be saved from this error, but I believe a small analog sensor with wires on the extruder GT2 gear and ball bearing roller can detect the contact between the two items that results from a lack of filament, thus the printer can be autonomously stopped and self-report the situation.
Part traveling
Symptom:
Sometimes a part will break free from the print bed before it is supposed to, and will drag under the extruder.
Abatement Procedure:
Possibly a switch attached to a servo with a long wire on it can be swung into contact with the first few layers of a print, and if it detects the print move the job can be stopped and amended remotely?
Warping
A subset of Part Travelling in which the part continues to be printed, but is deformed.
Symptom:
The edges of a part curl up.
Abatement:
This is usually caused by cold air getting to the part too quickly. Placing a container around the printer which keeps the air static should limit part warping.
Plastic Adhering to Extruder Nozzle
Symptom:
The plastic is either pushed up by the plate, or wraps up on its own and become stuck on the print head. Generally this requires manual intervention to chip off the plastic.
Abatement Procedure:
I believe that large amounts of plastic may be slowly melted off of the print head, and that the remaining plastic which may interfere with a print can be cleaned by a small field of silicon walls, which can be tested but cutting up a kitchen mitt.
- 22-1-2015
- I will attempt to remove cooled plastic from the print head by turning on the extruder fan, and then heating the extruder to 180C. I hope and anticipate that the plastic will slough off and cool on the print bed, where it can be removed remotely.
- visual contact with the underside of the print head is lost, I will have to go on-location to check the progress of this test.
- 90 minutes of heat appears to have dislodges most of the plastic. The extruder is now cooling down and I will inspect it in person later tonight.
- Alright! Most of the plastic sloughed off very cleanly from the extruder, so much so that i left it as-is and started printing again. I'm putting a note here: great success!
This system may be augment-able with a custom g-code file which first performs the above to get most of the plastic off, and then has the print head mix up a small sphere of plastic on the print bed, which it then melts and very slowly rises out of to get remaining spots of plastic which may interfere with printing. More testing is required.
Software / Connection Issues
Symptoms:
It stops printing.
Misc:
The connection could accidentally be reset by my improperly wired killswitch, I shall need to go back and calculate the appropriate resistor values for the NPN transistor I'm using.
OR
The connection could accidentally be reset by a loose USB cable which drops the serial port momentarily as the printer shakes while running.
Needs further investigation.
Misalignment
Symptom:
The z-axis can become misaligned which may result in damage to the printer.
Belt slippage
Symptom:
The x and y axis belts may slip during fast travel on a print, this results in the part printing with slosh or cliffs in either direction.
Contributors
People who have helped make this happen:
Phillip Showers
Tyler Crumpton
Hunter Fuller
Thanks!
Software Configuration
BYOBU
Protips:
- F1 allows you to set "log into byobu" to save some time while logging in.
- 'C-a a' will send C-a to screen, so that you can use screen within byobu to debug the printer's serial connection.
Webcam
Webcamera Information
To list available formats:
v4l2-ctl --list-formats
or
v4l2-ctl -d /dev/video0 --list-formats-ext
With Octoprint
To use an http stream with octoprint, the URL has to be formatted correctly.
At first glance, I tried: cerealbox.256.makerslocal.org:8081, which didn't work.
Turns out Octoprint blindly appends a GET variable to the URL, which turns the above into: cerealbox.256.makerslocal.org:8081?2354jk345 which isn't a valid URL anymore.
So, you have to set up the webcam URL like: http://cerealbox.256.makerslocal.org:8081/
Here the trailing slash lands the GET variable. It took Hunter Fuller to figure all that out.
mjpg-streamer
mjpg-streamer is by far the best solution for webcam streaming from the RPi. A recent update brought immense relief for CPU overhead.
Base command to run:
mjpg_streamer -b -i "./input_uvc.so -d /dev/video0 -n -f 5 -r 1280x720" -o "./output_http.so -p 8080 -w ./www"
Previously I've used the -y flag for compatibility, which totally crushed the little CPU, but the most recent build of mjpg-streamer appears to work quite well with my Logitech webcam with the default MJPG codec.
ffmpeg + ffserver
I also tried ffmpeg+ffserver. Didn't go over well, I'm not patient enough to learn how to set it up correctly.
motion
Octoprint Config
Haproxy setup:
https://github.com/foosel/OctoPrint/wiki/Reverse-proxy-configuration-examples
https://gist.github.com/christiannelson/3900758
RedQueen256 Integration
Slic3r Config
Archlinux
To run octoprint from port 80 as user 'octoprint', I adjusted the systemd unit file to launch with authbind.
[Unit]
Description=Octoprint 3d Printing Web Server
After=network.target

[Service]
User=octoprint
Group=octoprint
Type=simple
ExecStart=/usr/bin/authbind --deep /usr/bin/octoprint --port 80
Restart=on-failure

[Install]
WantedBy=multi-user.target
Right now I'm streaming the webcam from v4l-mjpg-streamer, total pain, will look for something better.
GCode
Endstop Sensors - M119
M119 will print z-sensor state to the terminal.
PID Tuning - M303
After modifying the printbed and hotend, neither held temperature well and would jitter around the mark, to help with this I'm going to try the firmware-side PID tuning.
Hotend: M303 C12 S215
Homing - G28
Do not run G28. It will try to home in the center of the glass plate.
Instead, run G28 X/Y/Z to home one axis at a time.
Z-Level - G29
G29 will test the z-axis on three points of the build plate, unfortunately it uses an undesirable point where the tape is peeled up by printing.
G30 is being investigated as an alternative to G29. G30 homes the z-axis at the print head's current location. If this method also generates the z-plane to print on, then it may usurp G29.
Hotbed: M303 E-1 C12 S60
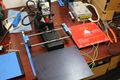
Hardware Configuration
Modified HBP
Heated Build Platform:
Wire sockets 2-3: 5.6 Ohm
Wire sockets 1-2 & 1-3: 2.8 Ohm
1-2 and 1-3 are in parallel, so their equivalent resistance is actually 1.4 Ohm.
V=IR -> I=V/R
24V @ 2.8 Ohm: I=8.6A, P=206W
24V @ 5.6 Ohm: I=4.3A, P=103W
24V @ 1.4 Ohm: I=17A, P=408W
12V @ 2.8 Ohm: I=4.3A, P=51W
12V @ 5.6 Ohm: I=2.2A, P=26W
12V @ 1.4 Ohm: I=8.6A, P=103W
My 24V PSU is rated to 14A. The 12V PSU is rated to 30A. I'm currently using the 408W connection, and haven't blown up the PSU... yet.
Dimensions:
PCB: 1.65mm by 200x200mm
Glass: 3.2mm by 200x200mm
Aluminum: 3.5mm by ~230x~165mm
Part Detachment
Pop-Bar

The pop-bar is a system which minimizes effort to ensure release of a part from the print bed. Currently in use.
Pivot-Plate

The pivot-plate is a simplified design compared to the pop-bar, but raises some difficult design and construction questions.
The system works on a very basic principle: flexing the build plate will detach a part. Since the build plate is aluminum and not feasible to flex, the plate will be divided in two and hinged, so that it will pivot to force the part off. I hope to design such that a standard servo can be used, otherwise a worm drive and stepper motor system will be investigated.
The design also needs to consider the heating plate mounted below, which means that the heater needs to be modified or the bed can only lift upwards.
Current
- Killswitch, both remote and local
Planned
Immediate:
- Detect use of emg stop button in arduino
- Pop-bar and channel
- servo structure
- Removal arm. Can also double as print surface cleaner?
- New GT2 belt mount for print bed
Later:
- Just melt failed prints from the printhead? Then clean with silicon sponge?
- Use accelerometer to detect grinding gears/belts?
- larger print surface to maximize hotplate use
- Longer steel rods
- more GT2 belt
- Print a GT2 belt clip? Zipties suck
- Better webcamera setup
- different embedded computer?
- Filament absence sensor
- Just look for the circuit completion when the extruder rollers connect?
- Birdsnest detection
- Print adhesion detection
- General failure detection
- Detect belt slipping?
- Use linear encoders? I mean, they really ought to be standard on a 3d printer.
- Heater dead-mans switch
- Ping the webpage?
- snoop on gcode over serial?
X-Y Axis Upgrade:
- The printer comes with 8mm rods for the x-y axis. 250mm and 268mm in length.
- Longer rods available on Amazon.
- Also available from CNCsuperstore
- 300mm shafts are ideal for the 12" plates available from Speedymetals.com
- Build plates for x-y upgrade:
Printed Upgrades
Images incoming.
- Extruder Fan Duct
- Filament Guard
- Filament Clips
- Spool Stand
- Filament Cleaner
Upgrades to be printed:
- Fan mounts for motors
- GT2 belt mounts for print bed?
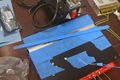
Printed Parts
Failed Prints
| Date | Failure Type | Details | Image |
|---|---|---|---|
| 21-1-2015 | Molten Plastic on Extruder | Part quickly came unadhered to print surface and began pushing plastic back up past the print nozzle. Recovering from this remotely was the first successful attempt at melting of plastic with gravity. | Example |
| 22-1-2015 | Serial Communication Error | It appears that the arduino killswitch malfunctioned and disabled the printer 2/3rds through a print. | Example |
Project Cost Breakdown
Does not include existing things that I own which have been purposed for this project.
dd-mm-yyyy
- 28-11-2014
- Printrbot Simple Metal Unassembled - $539.00
- Filament - $22.50
- 14-12-2014
- Kapton Tape - $17.99
- Extruder Fan - $6.13
- Extruder Fan 2 - $5.95
- 8 Channel Relay - $9.99
- Went missing x(
- 12V Power Supply - $22.14
- Hot Bed - $19.99
- 25-1-2015
- 12V Relays for hotbed - $13.60
- Raspberry Pi to run octoprint - $33.19
- 5V relays to upgrade killswitch - $11.99
- Kapton Tape, because its awesome - $25.95
- 0.4mm drill bits to clean clogged nozzles - $10.99
- 4x Futaba Servos to make armatures that clean the print surface - $51.52
- More x-y axis belt, because I now consider it ablative - $25.00
- Mini breadboards to wire up test circuits - $6.95
- Wire for breadboards - $4.33
- 30-4-2015
- Copper tape for hotbed testing - $15.96
- PEI sheet for alternate hotbed surface - $17.24
- 24V PSU for hotbed - $24.99
- 2x NEMA cables for the PSUs - $9.90
- Tape for PEI - $4.88
- 7-5-2015
- Silicon mat for hotbed - $8.08
- 21-5-2015
Project Cost: $961.06
External Resources
Parts
Amazon is an OK outlet for GT2 gear/belt parts for the X-Y motion
Source for 2-3mm Hex Bolts like those used in the simple metal
MISC
Printrbot initial config guide
Protoparadigm plastic I'm interested in
Quick guide on authbind, which allows octoprint to bind port 80
http://hackaday.com/2013/10/23/3d-printering-a-call-for-an-open-source-automated-build-platform/
Glass is good for easy part removal
Other serial printers
http://forums.trossenrobotics.com/showthread.php?6311-One-more-robotic-3D-printer-assembler