Cerealbot/Hardware
Contents
[hide]Spoon
Spoon is a robotic arm to support remote use of the Cerealbot.
I'm using plans from Thingiverse.
Parts
Building a HGBP
If you want to use the Cerealbot scripts to automate printing, you first have to configure your printer's hardware to match. Luckily, its both pretty cheap and pretty easy.
Materials:
Make a technology sandwich with hotbed + steel sheet + glass plate all together and mount it on your existing build platform. Then wire in the inductive sensor as your Z-limit switch to your printer and confirm that your firmware can make use of it (this can totally be the most tricky/difficult part of the entire project).
Once you've got that up and running, head over to Cerealbot/rpi and get the software set up!
HBP Design Notes
Heated Build Platform:
Wire sockets 2-3: 5.6 Ohm
Wire sockets 1-2 & 1-3: 2.8 Ohm
1-2 and 1-3 are in parallel, so their equivalent resistance is actually 1.4 Ohm.
V=IR -> I=V/R
24V @ 2.8 Ohm: I=8.6A, P=206W
24V @ 5.6 Ohm: I=4.3A, P=103W
24V @ 1.4 Ohm: I=17A, P=408W
12V @ 2.8 Ohm: I=4.3A, P=51W
12V @ 5.6 Ohm: I=2.2A, P=26W
12V @ 1.4 Ohm: I=8.6A, P=103W
My 24V PSU is rated to 14A. The 12V PSU is rated to 30A. I'm currently using the 408W connection, and haven't blown up the PSU... yet.
Dimensions:
PCB: 1.65mm by 200x200mm
Glass: 3.2mm by 200x200mm
Aluminum: 3.5mm by ~230x~165mm
Method Brainstorming
Thermal Expansion
Implemented. Currently in use.
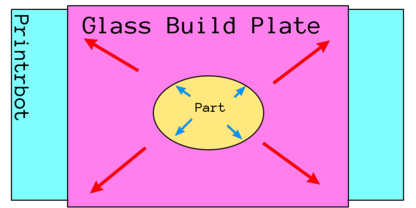
The Borosilicate glass used in the hotbed has a different thermal expansion factor than PLA. Because of this, repeated heating and cooling of the build platform will break the adhesion of the PLA to the glass plate. Then the printer's tool head can supply enough force to push the part off of the build platform.
Pop-Bar
Previously implemented. No longer in use.
The pop-bar is a system which minimizes effort to ensure release of a part from the print bed. The idea is to have something mounted on/in the build plate which would leverage the part just enough to make it fall free, then sweep it off with the print head.
I built two prototypes of this system; while they were promising, the skill required to mill the pop-bar flush with the print bed was pretty high and bugs in implementation lead to printer self-harm.
Pivot-Plate
Hypothetical.
The pivot-plate is a simplified design compared to the pop-bar, but raises some difficult design and construction questions.
The system works on a very basic principle: flexing the build plate will detach a part. Since the build plate is aluminum (for the z-sensor) and not feasible to flex, the plate will be divided in two and hinged, so that it will pivot to force the part off. I hope to design such that a standard servo can be used, otherwise a worm drive and stepper motor system will be investigated.
The design also needs to consider the heating plate mounted below, which means that the heater needs to be modified or the bed can only lift upwards.
Hardware Additions/Modifications
Arduino Pinout
- Pin
- D3 - All fans
- D6/D7 - SureElec WR/Data
- D9 - Servo
- D10-D13 - SureElec CD1-4
- A0 - Yellow, Humidity
- A1 - White, Temperature
- A2 - Water Sensor
Bucket Water Sensor
Analog value with tap water:
- Dry - 1023
- One drop of water - 493
- Damp - 700
- Submerged - 220
Current
- 24V hotbed
- arduino
- fan
- servo
Future
In rough descending order.
- Killswitch, both remote and local
- Detect use of emg stop button in arduino
- Pop-bar and channel
- servo structure
- Removal arm. Can also double as print surface cleaner?
- New GT2 belt mount for print bed
- Just melt failed prints from the printhead? Then clean with silicon sponge?
- Use accelerometer to detect grinding gears/belts?
- larger print surface to maximize hotplate use
- Longer steel rods
- more GT2 belt
- Print a GT2 belt clip? Zipties suck
- Better webcamera setup
- different embedded computer?
- Filament absence sensor
- Just look for the circuit completion when the extruder rollers connect?
- Birdsnest detection
- Print adhesion detection
- General failure detection
- Detect belt slipping?
- Use linear encoders? I mean, they really ought to be standard on a 3d printer.
- Heater dead-mans switch
- Ping the webpage?
- snoop on gcode over serial?
X-Y Axis Upgrade:
- The printer comes with 8mm rods for the x-y axis. 250mm and 268mm in length.
- Longer rods available on Amazon.
- Also available from CNCsuperstore
- 300mm shafts are ideal for the 12" plates available from Speedymetals.com
- Build plates for x-y upgrade:


