Cerealbot
|
Creator: |
Contents
[hide]Map
Overview
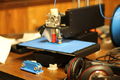
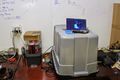
Unmodified Printer

Unmodified Printer
Concept Design
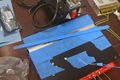
Prototype Frame
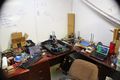
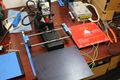
Workspace
Climate Container


I am retrofitting a Printrbot Simple Metal 3D printer with tools to allow for serialized printing. Then I hope to release the use of it to schools. For Free.
Cereally 3D Printer Extension
3D printers are nice, but I feel the consumer grade ones are seriously lacking in simple engineering processes that provide a more encapsulated solution. For instance: my printer can not print without me present. Sure, I can start a print and then drive home knowing that for several hours the printer will be occupied without me, but two days later when I next revisist the printer it will have been idle for over 30 hours. I find this unacceptable. Working from a basis of "a good print" where nothing goes wrong, the printer really only requires human intervention to remove the previous part that is firmly stuck to the aluminum plate it was printed on, then it can reset and begin printing again all from software.
The Cereally 3D extension is a project of mine to make the best remote-controlled 3d printer for minimal cost. The keystone for the project is an idea I call the pop-bar, which is an attempt to break finished parts free from the build platform with as little force or complexity possible. I will also investigate other low-cost automation solutions for non-optimal prints, listed below under "Types of Failures".
It is my hope that this project will bring about an affordable printer that can be placed in a school and maintained in a low-overhead, ad-hoc manner. The serialization will also allow for maximal student use from each printer, meaning that more investigative minds have access to this technology.
Progress Log
- 27-1-2015
- Serious consideration needs to be taken for moving forward. I now know that this procedure works; the prototype works admirably given how it was constructed. The system needs a redesign, and I want to make sure I select the correct path going forward. Currently, the pop-bar lays in a channel milled into the bed, this is a holdover from when I imagined this procedure against the default printrbot build plate. The channel warps the build plate, so this design must go. I now think that the build plate could be constructed from three discrete parts, with the pop-bar laying between two separate plates of alum. There may also still be a better way to detach parts from the build plate, I'm not sure.
- 25-1-2015
- After several prints with the printrbot outside of its enclosure, it is apparent that some climate control is needed. Each print has warped and curled fairly heavily. A custom box must be constructed, or a large cardboard box must be found.
- The pop bar has worked well for the past dozen or so prints and failed prints. Collection of ways to remotely screw up the printer and then recover is growing quickly.
- I learned to NOT try melting plastic off of the print nozzle, because then the plastic inside will char and clog everything. Will test whether a lower temperature is appropriate.
- The print bed is warped, contributing to the jammed nozzle. I cannot determine if this happened while milling, or due to torque from mounting it on the printer. I rigged up a vice and flexed the plate back to near-level, but it appears to be bending again once remounted. Future print beds must be designed to minimize this.
- 22-1-2015
- The second pop-bar, which I am considering a true prototype, has been created and linked to an active servo.
- Undated, X-1-2015
- The testbed for train_rec was a success. Rather than use the length of the pop-bar as a lever to pry the piece off of the bed, I think its better to twist the bar along the length to push the 3d printed part up.
- Undated, X-12-2014
- Milling the "production/testing" bed is next on the list.
Contributors
People who have helped make this happen:
Phillip Showers
Tyler Crumpton
Hunter Fuller
Thanks!
GCode
Endstop Sensors - M119
M119 will print z-sensor state to the terminal.
PID Tuning - M303
After modifying the printbed and hotend, neither held temperature well and would jitter around the mark, to help with this I'm going to try the firmware-side PID tuning.
Hotend: M303 C12 S215
Homing - G28
Do not run G28. It will try to home in the center of the glass plate.
Instead, run G28 X/Y/Z to home one axis at a time.
Z-Level - G29
G29 will test the z-axis on three points of the build plate, unfortunately it uses an undesirable point where the tape is peeled up by printing.
G30 is being investigated as an alternative to G29. G30 homes the z-axis at the print head's current location. If this method also generates the z-plane to print on, then it may usurp G29.
Hotbed: M303 E-1 C12 S60
Hardware Configuration
Modified HBP
Heated Build Platform:
Wire sockets 2-3: 5.6 Ohm
Wire sockets 1-2 & 1-3: 2.8 Ohm
1-2 and 1-3 are in parallel, so their equivalent resistance is actually 1.4 Ohm.
V=IR -> I=V/R
24V @ 2.8 Ohm: I=8.6A, P=206W
24V @ 5.6 Ohm: I=4.3A, P=103W
24V @ 1.4 Ohm: I=17A, P=408W
12V @ 2.8 Ohm: I=4.3A, P=51W
12V @ 5.6 Ohm: I=2.2A, P=26W
12V @ 1.4 Ohm: I=8.6A, P=103W
My 24V PSU is rated to 14A. The 12V PSU is rated to 30A. I'm currently using the 408W connection, and haven't blown up the PSU... yet.
Dimensions:
PCB: 1.65mm by 200x200mm
Glass: 3.2mm by 200x200mm
Aluminum: 3.5mm by ~230x~165mm
Part Detachment
Pop-Bar

The pop-bar is a system which minimizes effort to ensure release of a part from the print bed. Currently in use.
Pivot-Plate

The pivot-plate is a simplified design compared to the pop-bar, but raises some difficult design and construction questions.
The system works on a very basic principle: flexing the build plate will detach a part. Since the build plate is aluminum and not feasible to flex, the plate will be divided in two and hinged, so that it will pivot to force the part off. I hope to design such that a standard servo can be used, otherwise a worm drive and stepper motor system will be investigated.
The design also needs to consider the heating plate mounted below, which means that the heater needs to be modified or the bed can only lift upwards.
Current
- Killswitch, both remote and local
Planned
Immediate:
- Detect use of emg stop button in arduino
- Pop-bar and channel
- servo structure
- Removal arm. Can also double as print surface cleaner?
- New GT2 belt mount for print bed
Later:
- Just melt failed prints from the printhead? Then clean with silicon sponge?
- Use accelerometer to detect grinding gears/belts?
- larger print surface to maximize hotplate use
- Longer steel rods
- more GT2 belt
- Print a GT2 belt clip? Zipties suck
- Better webcamera setup
- different embedded computer?
- Filament absence sensor
- Just look for the circuit completion when the extruder rollers connect?
- Birdsnest detection
- Print adhesion detection
- General failure detection
- Detect belt slipping?
- Use linear encoders? I mean, they really ought to be standard on a 3d printer.
- Heater dead-mans switch
- Ping the webpage?
- snoop on gcode over serial?
X-Y Axis Upgrade:
- The printer comes with 8mm rods for the x-y axis. 250mm and 268mm in length.
- Longer rods available on Amazon.
- Also available from CNCsuperstore
- 300mm shafts are ideal for the 12" plates available from Speedymetals.com
- Build plates for x-y upgrade:
Printed Upgrades
Images incoming.
- Extruder Fan Duct
- Filament Guard
- Filament Clips
- Spool Stand
- Filament Cleaner
Upgrades to be printed:
- Fan mounts for motors
- GT2 belt mounts for print bed?
Printed Parts
Failed Prints
| Date | Failure Type | Details | Image |
|---|---|---|---|
| 21-1-2015 | Molten Plastic on Extruder | Part quickly came unadhered to print surface and began pushing plastic back up past the print nozzle. Recovering from this remotely was the first successful attempt at melting of plastic with gravity. | Example |
| 22-1-2015 | Serial Communication Error | It appears that the arduino killswitch malfunctioned and disabled the printer 2/3rds through a print. | Example |
External Resources
Parts
Amazon is an OK outlet for GT2 gear/belt parts for the X-Y motion
Source for 2-3mm Hex Bolts like those used in the simple metal
MISC
Printrbot initial config guide
Protoparadigm plastic I'm interested in
Quick guide on authbind, which allows octoprint to bind port 80
http://hackaday.com/2013/10/23/3d-printering-a-call-for-an-open-source-automated-build-platform/
Glass is good for easy part removal
Other serial printers
http://forums.trossenrobotics.com/showthread.php?6311-One-more-robotic-3D-printer-assembler